Serving Southern Arizona Since 2003
Call (520) 406-5900

Author: aabrite

Remediating Stucco: What Does It Mean & When Do You Need It

Remediating Stucco: What Does It Mean & When Do You Need It

When it comes to stucco, a lot of homeowners choose this type of siding to give their exterior a different look and keep moisture, fire, and other perils out of the way. However, stucco is not invincible. 

Moisture, the pesky household problem, can pose a threat to stucco. If not noticed on time, it—or any other water damage from the plumbing—can find its way to the stucco and ruin it.

In a scenario where your stucco is damaged, did you know that you have two options to choose from? You can either repair or remediate the stucco. The difference between stucco remediation and stucco repair is significant. 

Unlike stucco repair, remediation asks for more work. Keep reading below to see what stucco remediation is and when you need it.

What Is Stucco Remediation?

Wondering what is stucco remediation?

Stucco remediation is a complex and effective way to mend the entirety of the walls. If you’re thinking stucco remediation sounds pretty much like stucco repair, you’d be wrong. Complete stucco remediation goes beyond stucco repair since it deals with stripping the stucco off the walls, repairing damages, and then applying it anew.

Remediating stucco revolves around completely replastering every exterior wall to tend to the issues causing the damage in the first place. The main underlying issue of stucco damage that requires remediation includes moisture that’s gotten between the framework of the walls on the inside and the stucco layer on the outside of the walls.

Stucco Remediation Process

In a nutshell, a stucco remediation process looks something like this:

  • Removing stucco: All of the wall sidings are removed, together with any wires and nails. The walls are then cleaned and prepped for further work.
  • Removing unusable plywood sheathing: Damaged insulation and sheathing are removed entirely.
  • Removing mold and performing structural repairs: This step is reserved for removing mold and other structural damage caused by moisture.
  • Removing doors and windows: This step of the process deals with the removal of every window and door in the walls. The window/door areas are where you can find the most obvious signs of water damage. Once the flashing is redone, the windows and doors go back in.
  • Installing house wrap: House wrapping is a process involving the insulation of windows, doors, pipes, and steps using flashing tape.
  • Adding home cladding: Stucco remediation contractors will proceed with installing new siding on your home.
  • Finishing up: The team you choose to remediate your stucco should take the time to clean up the surrounding area of any debris created during the process.

Remediation vs. Repair: What’s The Difference

As we mentioned, stucco remediation services and stucco repair are not the same. Stucco remediation is a wholesome process that tends to the walls of the home as a whole, whereas stucco repair only deals with a portion of an area that’s suffered damage. In other words, repair is superficial, remediation is thorough.

The reason why homeowners need remediation is because of deeper damage caused by water damage. By doing remediation, you are practically tending to the underlying problems of stucco damage and delivering a permanent remedy.

Remediation is the process you turn to when you want the issue resolved and future damages prevented.

Stucco Repair, On the Other Hand…

Stucco repair is used only when the damages to the stucco are superficial. For instance, if there are cracks but no mold or moisture damage is visible, it’s best to repair the stucco than remediate it. 

Repairing stucco is a partial fix that only addresses visible damages in particular areas. By repairing stucco, you are basically tending to the problem and not its cause, which is why stucco repair is much faster and more straightforward than remediation.

In essence, a stucco repair involves the following steps:

  • Cutting and removing the stucco only in the affected area;
  • Removing and replacing damaged wood behind the stucco;
  • Applying a new coat of stucco.

As you can tell, the stucco repair process is much less intricate than the remediation process, which is why it’s also more affordable than stucco remediation. In all fairness, with major stucco issues, the stucco remediation cost should be the last thing on your mind.

Sometimes, repairing your stucco isn’t going to fix the problem altogether. Serious damage to stucco can only be amended by remediation; if you fail to do so and opt for stucco repair, you’re risking the damage to deepen the problem and, ultimately, lead to more expenses down the road. 

When Should You Remediate the Stucco?

Even though homeowners might have a difficult time deciding which approach to choose, there are some tell-tale signs your stucco will benefit more from remediation than from repair. We mentioned cracks as obvious signs of stucco damage; these cracks can be small or large, in either case, something isn’t right with the stucco.

Some situations that call for stucco remediation include the following:

  • Bubbling alongside the siding, close to the bottom;
  • Dark blotches that have been there even after nice weather;
  • Chipping or cracking in the stucco siding;
  • The drywall on the interior walls is soft to the touch;
  • There’s a musty smell coming from the exterior or interior walls.

If you notice any of these signs, know that your stucco is suffering substantial damage that won’t be fixed by anything other than remediation. 

Advantages of Prompt Stucco Remediation

As you might know by now, immediate stucco remediation can save you a lot of trouble and money. Here are some advantages that this process holds:

  • It’s a permanent fix;
  • It means less stucco maintenance in the years to come;
  • It saves money on frequent repairs;
  • Gives you peace of mind knowing the problem is nipped in the bud.

Where to Look for Stucco Damage

If you’re wondering where you should look first for any potential stucco damage, these are the most common places:

  • Around the chimney;
  • On the patio or the deck;
  • Around the doors, doorsteps, windows, and window sills;
  • On the masonry;
  • Other penetrations into the home.

All in all, when it comes to stucco failures and remediation, know that this particular method is the only remedy that will save the stucco and the rest of your home’s structure from suffering even more damage in the future. 

Stucco Remediation Cost

When it comes to the cost of stucco remediation, know that early detection will reduce the overall costs—the more you wait to remediate the stucco, the greater the costs will be. The moment you notice mold, pools of moisture, or dark spots on your stucco, don’t think twice about calling a professional to resolve the issue

For example, you can go online and search for “stucco remediation near me” and see what pops up. Also, you can ask around your friends and neighbors for referrals.

On average, buying 80 pounds bag of stucco material will cost around $9. With this amount of material, you can cover up to 25 square feet. However, if you need a finishing coat of stucco, you can expect to pay more (anywhere from $17 to $22 a bag). 

In general, you can expect to pay anywhere from $6,000–$9,000, considering the $6–$9 per square feet ratio. 

Stucco & the Remediation Process: Final Words

Stucco is a very durable finish material with a typical life span of 50–80 years or more.

It is not only one of the most durable surfaces available, but it also features the lowest

annual maintenance cost when compared to other siding materials.

If you’ve noticed your stucco is somehow failing, the faster you decide to deal with the issue, the better. Stucco remediation addresses the causes of the problem, so if you decide to go with it, know that even though it’s pricier, you’d still pay less if you act right away. 

Homeowners often leave it up to professionals like our team at AA Brite to choose which method is best for the stucco in question: repair or remediation. Stucco repair is the most fitted option when the damage is isolated and there’s no structural harm to the walls or the rest of the property. On the other hand, if there’s more than what meets the eye, our professionals can remediate the stucco, too.

FAQs

What is the biggest problem with stucco?

One of the major issues with stucco is its porosity. In other words, it means stucco is dry and prone to cracking.

How often should stucco be redone?

In general, stucco is very durable. With the right maintenance, you can expect your stucco to last for up to 50 years or more. On the other hand, stucco finishes are best redone every 4 to 5 years.

Is it expensive to re-stucco a house?

Remediating stucco on residential properties is more expensive than redoing drywalls. In essence, yes, redoing the stucco is more expensive than repairing it since the process will involve every wall in the building. 

Roof Flashing: What Is It & How Do You Install It?

In most cases, water damage to the inside of the home is caused by a leak in the roof. This may look like a small problem at first, but it may lead to greater damage to your home or office. One of the best ways to solve it is by installing roof flashing and thus preventing potential damage.

Roof flashing comes in a variety of styles that is employed in various situations. Some are intended to be installed by roofers around features such as chimneys, roof windows, and vents. Others are intended to protect the roof where it meets the house wall.

If you’re wondering, “What is roof flashing?” and if it is important for you, keep reading this article. We’ll also cover how to install flashing on a roof, the benefits of having it, and the potential consequences of not having it.

What Is Roof Flashing?

Wondering, “What is roof flashing?” 

Roof flashing is a flat material used by roofers and constructors to waterproof roof portions prone to leaks. It is typically made from metal, such as aluminum or copper, and usually installed in areas where the roof meets a vertical surface, such as a wall or chimney, so that water can flow down the roof and into the drain. 

However, this can change depending on the type of roof and the flashing. Simply put, the purpose of flashing is to create a barrier that directs water away from vulnerable areas on the roof, preventing water damage. 

Types of Roof Flashing

There are several types of roof flashing. Determining which one to use can be tricky, which is why you should first understand the most common types. The most common ones include:

  • Step flashing – It is used on shingle roofs and involves installing small pieces of flashing behind each course of shingles.
  • Continuous flashing – This one is used on flat roofs and creates a continuous barrier along the entire length of the roof-to-wall intersection.

Another distinction we can make is according to the placement of the flashings and their shapes. Some common shapes include L-shaped step flashing, J-shaped counter flashing, and Z-shaped continuous flashing.

How to Use Flashing & Why Should You Get It?

Installing roof flashing the right way and maintaining it is essential to guarantee the longevity and efficacy of your roof. If not properly installed or maintained, roof flashings can become damaged, allowing water to penetrate the roof and cause damage to the interior of the home.

How to Use It

To properly use roof flashing, it is vital to understand the different types and the appropriate installation methods for each. So, how to use flashing

For example, as we mentioned, step flashing is used on shingle roofs, and it has to be installed behind each course of shingles. On the other hand, the continuous flashing has to be placed like a barrier along the roof-to-wall intersection.


Proper installation is vital for the efficacy of flashing. Although theoretically, it may seem simple, installing roof flashings is not something everyone can do. That is why it’s best to hire professionals to take care of the problem. 

Why Should You Have It?

Having flashing in your roofing system is a savvy investment for your home. It can prevent costly repairs and even structural damage caused by water penetrating the roof. To ensure the proper functioning of the flashing, it is important to have it inspected periodically and to make any necessary repairs or replacements promptly.

How to Install Flashing on a Roof? A Description of the Process

Installing flashing on a roof is a crucial step in safeguarding your property from any type of water damage. The process involves several steps, including measuring and cutting the flashing, preparing the surface, applying flashing cement, installing the flashing, and checking and inspecting the installation. 

Below is a more meticulous explication of each step.

Step 1: Measure and Cut Flashing

The first step is to measure the area where the flashing will be installed. This will help to select the accurate size and shape of the flashing that is needed. Once the measurements are taken, the flashing can be cut to the correct size and shape.

Step 2: Prepare the Surface

Before installing the roof flashing, it is important to prep the surface where the flashing will be installed. This may involve cleaning the area, removing any old flashing, or making any necessary repairs to the roof. Suitable surface preparation is vital to guarantee that the flashing will adhere correctly.

Step 3: Apply Flashing Cement

Once the surface is prepared, the next step is to apply flashing cement to the area where the roof flashing will be installed. This will help to create a secure bond between the flashing and the roof.

Step 4: Install the Flashing

The next step is to install the flashing in the correct location. This may involve attaching the flashing to the roof using nails or other fasteners. It is vital to ensure that the flashing is placed at a level and that it is properly sealed to stop water from penetrating through.

Step 5: Check and Inspect

Finally, it is important to check and inspect the installation to ensure that it has been completed correctly. This may implicate checking for proper alignment and examining for any leaks or additional problems. Any crucial repairs or alterations should be made at this time.

Note: Besides knowing what is flashing on a roof and how it’s done, it is crucial to remember that flashing installation can’t always be done by oneself. It is always advised that installing roof flashing is done by a professional since it requires proper measurement, cutting, and placement. Call our skillful team at Aabrite today, and let us help you fix your roof!

How to Install Roof Flashing Against a Wall?

Installing roof flashing against a wall is as crucial as placing it on your roof. This will also help safeguard your home from water damage. The process of installing flashing against a wall may vary, but the general steps are similar to the ones used when installing it on a roof. They go as follows:

Step 1: Measure and Cut

The first step is exactly the same as for installing the flashing on a roof. As we said, this will help to determine the correct size and shape of the flashing that is needed. Once you take the measurements, you can cut it to the right size and shape.

Step 2: Clean the Surface

Before installing the flashing, make sure that you prepare the surface. Clean the area, remove any old flashing, or make necessary repairs to the wall. This will leave you with a “clean wall” on which you can start working.

Step 3: Stick the Flashing to the Wall

Once you prepare the surface, the next step is to apply flashing cement to the area where the flashing will be installed against the wall. This way, you’re sure that the flashing sticks in all situations.

Step 4: Place the Flashing

Next comes the main part – putting the flashing in the correct location against the wall. Make sure that you stick it securely to the flashing cement and on the right area.

Step 5: Let it Dry & Inspect

Finally, let the flashing dry-stick to the wall, meaning let the cement harden and lock in the flashing to the wall. This should mainly take 1 day. After that, you can check how you’ve finished the work and whether or not you need to fix some places. This step is crucial in making sure that any following potential water damage is prevented.

Roof Flashing: Should You Get It?

The short answer is yes. Roof flashing can only bring benefits to your home – now and in the long run. Although you may think that your roof can do without roof flashings, it is far better for any type of roof to have this component. The reason is quite simple – it aids in preventing water from penetrating through the roof and into the home.

However, to get the most out of this advantage, you need to have your roof flashings installed properly. Correct installation and maintenance are essential to ensure the longevity and effectiveness of a roofing system. 

Needless to say, it can prevent costly repairs caused by water damage. Remember that installing it is not enough – regular inspection and maintenance are highly important to prolong the flashings’ lifespan.

FAQ

What does flashing on the roof look like?

Roof flashing usually blends with the roof (if colored) and thus can be tricky to spot. 

In some cases, this component of the roof is placed under the shingles or tiles so that the house can keep its overall design. But in others, you can spot it as usually metal or aluminum pieces placed around the chimney, vents, or skylights.

Do I need roof flashing?

It is advised that all houses have roof flashing since it’s essential in deterring water from entering the house.

What are the different types of roof flashing?

There are several types of roof flashing. The most common ones are step flashing and continuous flashing. But there is also counter flashing and cricket flashing.

Soft Washing a Roof: What Is It & How to Go About It?

The roof of your house is the construction element most exposed to external conditions. Sunlight, rain, snow, ice, wind, and tree branches are some of the many factors that can cause damage to the roof over your head. Regularly cleaning your roof is an essential part of a house or building occupancy since it extends the overall lifespan of the roof and property.

One of the best ways to clean your roof with minimal damage is by employing the technique of soft washing.

In this article, we will discuss what is soft wash roof cleaning, and we will get into more detail on the chemicals used, the process, and the benefits of using this method. We will also provide step-by-step instructions on safely and effectively cleaning a roof using the soft washing method. 

Whether you are a homeowner or a professional roof cleaner, this article will provide valuable information on how to maintain the appearance and longevity of your roof.

What Is Soft Wash Roof Cleaning?

The approach to cleaning roofs that utilizes a low-pressure and high-volume cleaning system is called soft wash roof cleaning. Soft washing uses a blend of water and specialist cleaning chemicals to remove unwanted grime and stains.

The process is designed to be gentle on roofs and prevent damage to shingles, tiles, or other roofing materials. Soft washing is a more effective and efficient way to clean roofs than traditional pressure washing. Why? Because it helps to remove algae, dirt, and mold, while removing other stains that are difficult to eliminate with high pressure. 

The process is also more environmentally friendly, using less water and reducing the risk of water damage to the roof and surrounding areas. It does take a bit longer to complete, but that may be the only downside when compared to other techniques.

Overall, soft-wash roof cleaning is a safer, more efficient, and more effective way to clean your roof and maintain its appearance and longevity.

Soft Wash Roof Cleaning Chemicals: What Do You Need?

Soft wash roof cleaning chemicals are specialized solutions that are used to remove dirt, colorants, mold, algae, and other pollutants from roofs. Low-pressure cleaning systems use soft wash cleaning chemicals specifically designed for these systems, while high-pressure systems require the use of traditional pressure washing chemicals.

The main chemical used in soft wash roof cleaning is a cleaning solution specifically designed for roofs. This solution comprises a mixture of detergents, surfactants, and other cleaning mechanisms that operate concurrently to break down and clear dirt and stains from the roof. 

Some of the most common cleaning agents used in these solutions include sodium hypochlorite, which is an effective mold and algae remover, and sodium hydroxide, which is a strong degreaser.

Another chemical used in soft wash roof cleaning is a rinsing agent, which neutralizes the cleaning solution and removes any remaining dirt or stains. This agent is typically a solution of water and mild acid, such as vinegar, that helps to remove any remaining cleaning solution and dirt from the roof.

In addition to these chemicals, a soft-wash roof cleaning system requires water, a low-pressure pump, and a spray wand. It is important to use the proper portion of chemicals and water pressure to avoid harming the roofing material and surrounding areas. 

Consulting with a professional roof cleaning service is highly recommended to ensure that you are using the correct chemicals and techniques for your specific roofing material.

How to Soft Wash a Roof: Detailed Instructions

There are a few essential steps that you have to go through to soft wash a roof successfully. Detailed below are 5 steps that will help you with roof soft washing.

Step 1: Preparation

  • Examine the roof for any damage, such as missing or unconsolidated shingles.
  • Clear away any debris, such as leaves or branches, from the roof.
  • Conceal any nearby plants or landscaping to shield them from the cleaning chemicals.
  • Wear safety gear, such as a hard hat, safety goggles, and slip-proof footwear.

Before starting the soft wash cleaning process, inspect the roof thoroughly for any damage or hazards. Wear appropriate protective gear to safeguard yourself while operating on the roof.

Step 2: Mix the Cleaning Solution

  • Mix the appropriate amount of cleaning solution with water as per the manufacturer’s instructions.
  • Use a low-pressure pump to apply the solution.

Use the correct cleaning chemicals and the proper ratio. Use a low-pressure pump to lay the washing-up liquid on the roof in order to prevent damage to the roofing materials.

Step 3: Apply the Solution

  • Begin at the top of the roof and work your way down, applying the mixture in a back-and-forth movement.
  • Be sure to cover the entire roof, including the gutters and any hard-to-reach areas.
  • Allow the mixture to sit for the instructed time portion, routinely between 5 and 15 minutes.

Step 4: Rinse the Roof

  • Use a low-pressure pump and spray wand to flush the roof with clean water.
  • Start at the top of the roof and work your way down, making sure to rinse off the entire cleaning solution.

Use a low-pressure pump and spray wand to preclude damage to the roofing fabrics.

Step 5: Check for any remaining stains or areas that need additional or repeated cleaning

After the cleaning and rinsing process, it is important to check the roof for any remaining stains or elements that need to be rewashed. This will ensure the roof is completely clean, free of stains and dirt.

It is important to note that while the steps above provide a general overview of the soft wash roof cleaning process you should know. However, it’s best to consult a professional roof cleaning service to ensure you use the correct chemicals and techniques for your specific roofing material.

How Long Does It Take to Soft Wash a Roof?

How long does it take to soft wash a roof can alter by counting on the proportions of the roof, the quantity of dirt and stains present, and the specific cleaning methods used. On average, a residential roof can take anywhere from 2-4 hours to clean. However, the process can take longer for larger or more complex roofs.

The time it takes to apply the cleaning solution and allow it to sit also varies, usually between 5 and 15 minutes, depending on the cleaning solution used. Rinsing the roof with clean water typically takes less time than applying the solution, usually between 30 minutes to an hour.

It is significant to note that weather conditions can also affect the time it takes to clean a roof. The general recommendation is to avoid cleaning a roof on a hot, sunny day, as the cleaning solution can dry too quickly and be less effective. 

Cleaning a roof on a cooler, overcast day is ideal, as it allows the cleaning solution to work more effectively and reduces the risk of damage to the roofing materials.

Overall, the procedure of soft washing a roof can take a few hours, depending on the roof’s size and condition. It is important to use the correct cleaning methods and techniques to ensure that the roof is thoroughly cleaned while also preventing damage to the roofing materials. Contacting a professional roof cleaning service is always recommended for the best results.

Soft Wash Roof Cleaning: Is It a Good Way to Go?

Soft washing is the modality if you want to clean your roof securely and efficiently. This procedure removes dirt, algae, and debris from your roof using low-pressure cleansers and biodegradable detergents. It’s also great for cleaning sections that power or pressure washing can’t reach. 

Soft washing your roof regularly can assist in increasing the life of your roof, keeping it looking good, and avoiding stains and fading.

Our guide answers your question about how to soft wash a roof. However, if your roof is discolored and clogged with debris, the professionals at AA Brite can assist you. They provide roof cleaning services to renew and extend the life of your roof as part of their roof repair and roof coating services.

Some roofs may require a moderate etching soap to aid in the cleaning procedure. The folks at AA Brite utilize environmentally friendly cleansers to keep your house, plants, and pets safe throughout the process. 

FAQ

Is it good to soft wash your roof?

Soft washing our roof is a good practice since it increases your roof’s lifespan, and you will avoid the damage that comes from pressure washing.

How long does soft wash last?

Soft washing typically lasts 1 to 3 years, depending on your property’s state and the rainfall in your location.

Do you rinse the roof after a soft wash?

Once finished, the solution is often left to sit for some time on the surface in order to remove everything down to the roots. Still, if sprayed on siding, it is typically washed off.

The Writing on the Wall: Cleaning Pencil Marks from Walls

We all love creative, witty, and imaginative child drawings. Apart from that, art is known to help child development. So, when raising a little art genius, it can be hard to distinguish where the art starts and where it finishes. The fact is that sometimes it can end up on your fine and clean walls.

Though you can take a moment to appreciate the talent, the second one is already a strategy-developing moment on how to get pencil off walls without taking paint off!

Breathe in deeply, good news is on the way. There are ways to get those nice and clean walls back into shape. Keep on reading, and you’ll find out several ways on how to clean pencil off walls, and we’ll even throw in the BEST way to remove pencil from wall

Pencil Marks on the Wall: Can You Clean Them?

We all love when kids express themselves, especially parents. But seeing your walls turned into a canvas covered in markings of different shapes may cause discomfort, especially if you’ve spent hundreds of dollars on a fine paint job.

So, how to clean pencil off wall? There are various ways to make your walls pretty again. Although repainting walls (over and over again) may provide the best results, there are multiple ways to clean them from pencil marks. 

The solution can range from a basic homemade baking soda paste cleaner or hairspray to a magic eraser and rubbing alcohol solution. In addition, if you go for repainting, it can be challenging to pull a DIY because of color matching and even paint distribution. All of these methods should be carried out properly, with a lot of care to limit wall damage and other potential issues.

We’ll discuss all these methods and questions in a second. But first, let’s start with why pencil marks are so difficult to clean off a wall. 

Why Are Pencil Marks So Persistent?

Pencil marks on walls tend to be stubborn, and the longer they are there, the more persistent and difficult it is to clean them. Another point is the marks’ depth, which can also influence the cleaning process. 

Having said that, if the pencil marks affect a larger area of your walls, that will pose an additional issue and make it more difficult to clean effectively. Of course, the risk of smudging the marks and making them even worse exists. If you have already tried something, you know that another big problem is the wall may start to peel off while trying to clean the pencil off them. 

Need help on how to get pencil off walls without taking paint off? We got you! Read on to learn some helpful tricks for cleaning pencil marks off walls without damaging them.

How to Clean Pencil Off Wall: The Essential Guide

The big question is, how to clean pencil off wall? Below are three cost-effective and suitable ways to clean the pencil off your walls. 

Some methods explained here will require some arm work, but they achieve results. They may have varying degrees of success depending on the marks’ depth, how long they’ve been on the wall, and the kind of wall coating.

The Eraser 

This is a very straightforward way how to get rid of pencil marks on wall, which may almost come as a surprise. Use a rubber eraser to clean pencil marks from your walls. Note that when erasing pencil marks, you should use a new eraser because using an old one could spread more graphite tracks as you wipe across the painted wall. 

To keep the paint on the wall from peeling off, rub the pencil mark slowly and gently. Also, an art gum eraser can do a similar job and be found at most art supply stores. The trick is to be patient with this method. Use a good-quality eraser for better results. 

Dish soap mix

Using a mild dish soap mixed with water can remove pencil marks. Mix warm water and a few drops of dish soap in a bowl, and use a clean cloth to remove pencil marks gently. The second step is to wipe it with clean water and then let it air dry. 

One useful tip is testing the mixture on a small corner of the wall. If the wall paint or wallpaper is fine, continue; if not, switch to a different method.

Baking Soda

How to erase pencil from wall if the eraser and dish soup mix don’t work? Turn to the most versatile home cleaning ingredient – baking soda! To effectively remove pencil marks from your walls, scrub softly with baking soda paste. 

To make the paste, you need to combine 1/2 tbsp (14 g) of baking soda and 1 tbsp (15 mL) of water. Again, it is important to use a clean cloth with this method. After gently rubbing the paste, wipe it off. 

Bear in mind that baking soda is mildly abrasive, so it can damage paint or wallpaper. Perform this method only if your walls are washable. You may want to test the technique on a small patch before going in big.

Other Techniques to Use

Here are a few other techniques we singled out for you to try:

  • Toothpaste technique: Let the applied toothpaste react for 15 minutes and then wipe it with a cloth. 
  • Rubbing alcohol technique: Alcohol works well to get rid of pencil marks. For this technique, dampen a dry cloth with alcohol before rubbing it over the affected area.
  • Hairspray technique: Hairspray the area loosely, then wipe with a fresh cloth. 
  • Nail polish remover technique: Apply nail polish remover to a Q-tip and gently rub the pencil marks. 
  • Magic eraser technique: Try to wipe out pencil marks with a magic eraser.

The Best Way to Remove Pencil from Wall

Ultimately, even though we went through various techniques on how to clean pencil off wall, the best results are achieved by painting over those persistent pencil marks. Repainting will completely remove the pencil marks, freshen up your walls and elevate your living space. That’s why this method is probably the best way to remove pencil from wall

Repainting can be done in two ways, depending on your willingness to commit to the project. You can go for a DIY job and go the extra mile, or make your life easier and call on a professional painting service

DIY Steps to Repaint Your Walls 

One way how to get pencil off walls without taking paint off, is to apply a new coat of paint. Firstly, it’s of utmost importance to ensure that the color matches the existing one precisely, so you need to make sure of this before purchasing it. The most difficult step is to match the right colors. Otherwise, the new color will stand out, and not in a good way. 

The second step is to sand the area where the pencil marks are. Sand very lightly; you don’t want to get too deep inside the wall. Then, apply primer, and once it’s set, add a fresh coat of paint over it. Be careful to apply the paint evenly. That is how to get rid of pencil marks on wall DIY repaint style.

Call up a professional

Hiring a professional painting service might be a better option if the pencil marks are deep or affect a large wall area. If you smudge or make the pencil marks even worse by improperly applying home cleaning methods, this will be your best way out. 

The biggest advantage to calling a professional and experienced commercial painting service is you don’t have to worry about using the wrong color or applying the paint evenly. If you are facing these issues, contact AA Brite and schedule a painting date in no time. Don’t wait! Those pencil marks can only get worse.   

Cleaning Pencil Marks: It Can Be Done

Whatever you set your eye on while reading this article as the right option for you on how to clean pencil off walls, the important thing is that it can be done! You should stop worrying right away and start cleaning. On the other hand, if you decide that repainting is your best wall savior, get to work, or get your phone and call up a professional! Life is good when you have options! 

FAQ

Do pencil stains come out?

Yes, they do. May require some work, but you can clean your walls in several ways. Be careful not to damage the walls while cleaning.

What cleaner removes pencil?

You can try a clean rubber eraser, dish soup mix, baking soda, and toothpaste, and here is an additional one. Car owners already have WD-40 spray. You can also use this to remove pencils from walls. The graphite in the pencil marks is removed with oil and alcohol found in a WD-40. 

Does alcohol remove pencil?

Yes, it does. Rubbing alcohol is an effective way of removing pencil marks off a wall surface. 

Everything You Need to Know About Removing Paint from the Wall

One of the best ways to revamp an old room is to paint the walls. This is also the most budget-friendly thing to do, considering that buying new furniture whenever you want to change things up will not be easy on your bank account.  

A fresh coat of paint can do wonders for your room and even lift your spirits. But how do you go about changing the paint? What is the best way to remove paint before applying a fresh coat? 

If you are interested in learning more about this, you have come to the right place. Let’s get into the guide and discuss everything you need to know about removing paint from walls

Removing Paint from Wall: When Should You Do It?

Before we discuss removing paint from walls, let’s discuss the right time to remove paint. We are not alluding to day or night, summer or autumn, but to the importance of checking the state of the old paint before starting your project. 

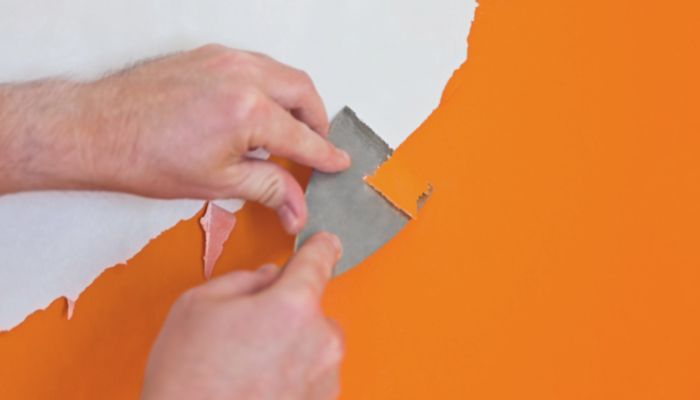
If there is one thing you should be looking for, it is chipped, cracked, or peeling paint. Painting over damaged old paint doesn’t look good and the new paint will likely chip or peel much quicker.

To avoid this, the first thing you should do is inspect the state of the old paint. If you see any sign of damage, you must remove that layer of paint before applying a new one. 

In contrast, if the room has been painted in the last few years and the paint shows no sign of damage, you can go ahead and apply the new coat of paint without removing the old one. Either way, the entire project should be relatively inexpensive and should take you at most a day.

How to Remove Paint from a Wall: Step-by-Step Guide

Now, let’s get into the fun part – a detailed guide on how to remove old paint from walls before applying a fresh coat of paint. Before we get into it, you should know that there are several ways to remove paint, including sanding, scraping, paint stripping and a heat gun.

You can go with any of these methods, depending on your preference and the time you want to spend on this project. Also, remember that you need to gather all the required things before you start with the project. That would include the following: 

  • Protective gloves
  • Long-sleeve shirt
  • Protective goggles
  • Face mask
  • Scrapper
  • Sanding block and sanding paper
  • Chemical paint stripper
  • Neutralizer
  • Heat gun
  • A bucket of hot water
  • Mild soap
  • Cloths
  • Floor covering (plastic cover/kraft paper/rosin paper)

Finally, we want to mention that we will have separate steps for each paint removal method, but that does not mean you have to apply all when removing paint from walls. Choose one of steps 3-5 and consider going with a second one only if the first one is not effective enough. 

With that being said, let’s get right into the detailed step-by-step guide: 

Step 1 – Clear the Room

The first thing you want to do is remove all furniture from the room, or at least move it away from the walls. Use a plastic cover to protect it from dust and paint splatters. 

Next, remove all paintings, curtains, carpets, etc. Keep the room as empty as possible, so you do not have to worry about damaging anything. At the same time, remember that it is wise to keep the area ventilated, especially if you plan on using sanding or chemicals to remove the paint. 

Step 2 – Clean the Wall

The next step involves cleaning the walls. Before chipping away at the old paint, clean the walls with hot water and soap. Soak a clean cloth in the mixture and start rubbing it over the walls. Make sure you cover the entire room before you go on to the next step. 

Optional Step 3 – Try Sanding the Walls

Sanding the walls can be pretty time-consuming, but it is also relatively easy. We do not recommend sanding only when the paint contains lead, as it is toxic and should not be inhaled. So, do a lead test before you start and ensure it is safe to do the sanding. 

To sand your walls, all you need is a sanding block and some sanding paper, preferably an 80-grit one. Depending on your room size, you might need between 3 and 5 large sanding papers. 

Before you do anything, put on your old clothes, goggles, and face mask because it’s going to get very dusty. Then, wrap the sanding paper over the sanding block and start rubbing it all over the walls. Switch to a paint scrapper if you find any stubborn spots.

When the sanding paper becomes dull, replace it with a new piece. 

Optional Step 4 – Try Paint Strippers

Many paint strippers are available on the market, so you can easily choose one that fits your needs best. We would recommend that you go with something biodegradable and water-based, not something that contains harsh chemicals. Remember to wear protective gear.

The paint stripper or paint remover should come with instructions on the packaging. Make sure to read them to find out how long you need to keep the solution on the walls and how to remove it thoroughly before applying the new paint. Generally, this is what you will need to do:

  1. Apply a thick layer of the paint stripper on the wall or walls. That will ensure the stripper will not drip down the walls and cause damage to anything else. 
  2. Wait about 15 minutes before removing the stripper. Tiny air bubbles will form on the walls meaning the paint is softened and ready for removal. 
  3. Grab your scraper and peel the paint. If the stripper has been on long enough, the paint should come off easily and in large rolls. Go over the entire room, dispose of the rolls, and then prepare the neutralizer. 
  4. You should use the neutralizer according to instructions provided by the producer or similarly to the water-soap mixture mentioned in the first step of this guide. Mix and bit of the neutralizer with warm water and soap and use the mixture to wash the walls. 

Neutralizers are not always recommended, but they go together with some chemical paint strippers. They can help you remove all remaining chemicals from the walls so that you know you are fully prepared for the new paint. 

Please remember to keep the area well-ventilated during this entire process. You do not want to be inhaling those nasty chemical fumes!

Optional Step 5 – Heat Guns

Heat guns are only to be used on wooden walls or furniture. 

After putting on your protective gear, grab the heat gun. Point it towards the wall, but ensure you are at least two inches away from the wall. You should be pointing the gun toward one area for a few seconds so the heat has enough time to soften the color. It would be best if you heat three-inch sections at a time. 

Once the color is softened, use a scrapper to remove it, just like in the previous method. Repeat this process for the entire wall or piece of furniture because you start applying any new paint. 

How to Get Acrylic Paint Off Walls?

Getting acrylic paint off walls is similar to removing regular old paint. Here is what you need to do:

  1. Wash the walls with warm water and soap.
  2. Make a thick baking soda and water paste and apply it to the wall. Leave it on for a few minutes. 
  3. Use rubbing alcohol, acetone, or heated vinegar to loosen the paint further. 
  4. Now, use a piece of sandpaper or a scrapper to remove the loosened paint. 

The Best Way to Remove Paint: Seek Professional Help

While you can always try to remove paint with any of the methods mentioned above, getting the job done will take significant time and effort, especially if you are dealing with a large area. 

If you do not have the time or willingness to do this yourself or are still trying to figure out how to get paint off walls and want to avoid making a mess, you can always seek professional help. 

AA Brite has a team of professionals that can help you with interior or exterior painting, commercial painting, or even stucco and parapet repairs. We even have a blog with helpful information on choosing and applying the best paints and finishes. 

So, do not hesitate to contact us and do a free estimate – we can help you with any painting questions you might have!

Getting Paint Off the Wall: Bottom Line

Thank you for reading this guide. We hope you now know the best way to remove paint and how it can help make your room look brand new!

Remember that your options are to choose the paint removal method you like best and start chipping away the old paint or call AA Brite and have professionals take care of the painting for you. We are available 24/7, so contact us at your earliest convenience!

FAQ

What removes paint instantly?

For us, paint strippers have always been the easiest way to remove paint and prep the walls for new paint. All you need to do is apply a thick paste, wait for a while, and then remove it using a scrapper. 

What naturally removes paint?

Natural solutions to remove paint are a great option because they do not contain harsh chemicals. You can try soy-based or citrus-based removers, but chemical removers will be quicker and more effective. Also, remember that you can always use some of the manual paint removal methods if you want to avoid chemical-based removal altogether. 

What liquid can dissolve paint?

Some of the liquids known to dissolve paint are acetone and alcohol. If you check the ingredient lists on most paint removers, you will find at least one of them mentioned. If you decide to go with alcohol, ensure you use rubbing alcohol and apply pressure to help remove the paint quickly.

Stucco Shadowing-The Most Important Concept

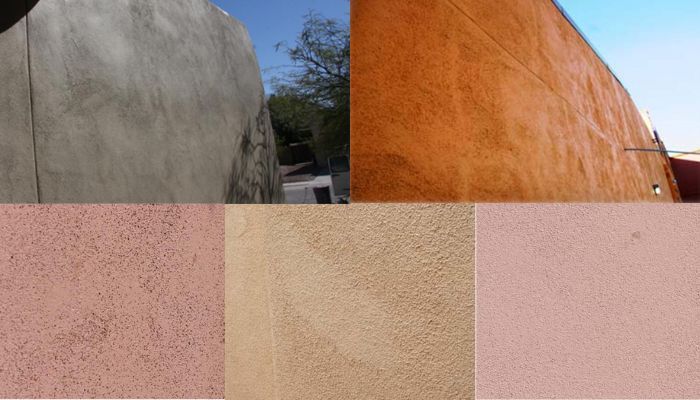
Even though most people think of stucco as flat, or almost flat it is the opposite. Stucco is mountainous with hills, valleys, ridges, peaks, caves, and overhangs. In many ways viewing stucco is similar to a mountain from an airplane. Looking straight down from a high altitude, the mountains do not appear to have much definition, even flat in appearance. As you move closer, the mountains appear and have more details with jagged edges. Viewing stucco is similar. When the sun is almost parallel to the stucco wall, even small bumps and variations cast long shadows.

To some, the stucco will look more uneven and less desirable. In this article, I’ll discuss the process of stucco shadowing, the tools and materials you’ll need, and how to achieve the best results. By the end of the article, you’ll have a better understanding of this important concept and why it’s essential for your home’s exterior.

No Perfect Match

There is not a great deal of information written about stucco repair. Even determining the types of stucco finishes available is difficult, and there is an apparent reason for this. Tim Carter, the famous newspaper columnist, and contractor, wrote:

“Patching stucco so that you don’t see the repaired area is as difficult as patching a hole in a piece of fabric using scrap from the original bolt of cloth. It is virtually impossible to do. A stucco mason can create an infinite amount of textures depending upon the materials used to create the stucco and the tools used to finish it. Blending the new texture with the original is a true art and craft. If you succeed in creating the illusion, go out and immediately purchase a lottery ticket!”

Though he conveys that patching stucco is difficult, for people with experience and patience a good-looking (read not noticeable) stucco patch is possible in some situations. In many other situations patches that can be seen but are not obvious to casual observers are also achievable. But, unfortunately, there are still situations where the correct answer is to live with the defects or re-stucco the entire exterior of the building.

What Is Stucco Shadowing?

Stucco shadowing is an important concept that is often overlooked when it comes to stucco work. This concept involves creating the illusion of depth and shadows on the surface of a wall or other structure. The effect is created by applying a thin layer of stucco on the surface of the wall, then adding a heavier layer of stucco in certain areas to create the illusion of shadows. Stucco shadowing can be used to create a sense of depth and dimension on a wall, making it appear more interesting and aesthetically pleasing.

The first step to creating a stucco shadowing effect is to select the materials you will use. You’ll need a base layer of stucco, a deeper layer of stucco, and a finishing layer of stucco. The base layer should be applied in a thin and even layer, while the deeper layer should be applied in thicker and uneven layers to create the illusion of shadows. Finally, you’ll need a finishing layer to protect the stucco and add a final touch of texture and color.

Once you’ve selected the appropriate materials, you’ll need to prepare the wall surface. This involves cleaning and removing any debris, such as dirt and dust, from the wall. Then, you’ll need to prime the surface with a bonding agent to ensure a strong and lasting bond between the stucco and the wall.

After the wall is prepped, you can begin to apply the stucco. Start by applying the base layer of stucco in an even and thin layer across the entire surface. Then, you can begin to apply the deeper layer in certain areas to create the illusion of shadows. This can be done by applying the stucco in thicker and uneven layers, or by using a special stucco shadowing tool.

Finally, you’ll need to apply a finishing layer of stucco over the entire surface. This layer is important, as it will protect the stucco from the elements and add a final touch of texture and color to the wall.

Stucco shadowing is an important concept to understand when it comes to stucco work. By using this technique, you can create the illusion of depth and shadows on the surface of a wall, making it appear more interesting and aesthetically pleasing. With the right materials and preparation, you can easily create beautiful and unique stucco shadowing effects on your walls.

Advantages Of Stucco Shadowing

Stucco shadowing is a popular concept in architecture and interior design that involves creating a three-dimensional effect on walls and other surfaces. By adding texture and depth to a space, stucco shadowing can create the illusion of depth and movement that can have a powerful effect.

When it comes to the advantages of stucco shadowing, there are many to consider. For starters, it can add visual interest to a space. By creating shadows and angles, stucco shadowing can make a room look bigger and give it more character. It can also help to create a sense of cohesiveness within a room, as it can unify seemingly disparate elements.

Stucco shadowing can also be used to improve the durability of a wall or surface. By adding texture, it can help to reduce wear and tear and protect the surface from damage. Additionally, stucco shadowing can be used to disguise imperfections or blemishes on a wall or surface, and it can also provide additional insulation.

Finally, stucco shadowing can be used to create a more luxurious look and feel. By adding texture and depth, it can create a more sophisticated and elegant atmosphere. It can also be used to create a warm and inviting atmosphere, as the shadows and angles can create an illusion of depth and movement.

Overall, stucco shadowing can be an effective way to add visual interest, improve durability, and create a more luxurious atmosphere. It can be used to create a sense of cohesiveness and can also disguise imperfections and provide additional insulation. When done correctly, stucco shadowing can be an invaluable tool for creating a beautiful, inviting, and unique space.

How To Identify Stucco Shadowing

Now that you know the advantages of stucco shadowing, you may be wondering how to identify it. The first step is to take a close look at the building’s exterior. Stucco shadowing can be identified by a distinctive texture on the walls, which may look like a pattern of ripples or waves.

The second step is to look for signs of fading. Stucco shadowing can cause paint to fade, which can make the walls appear darker or lighter than the surrounding structures. Additionally, stucco shadowing can cause cracks and other damage to the walls, so be sure to look for any signs of deterioration.

Finally, you can look for the presence of stucco sand. This is a course material that is used to create the texture of stucco shadowing. If stucco sand is present, then you can be sure that the building has been stucco shadowed.

Identifying stucco shadowing can help you determine whether it is necessary for your building. If you find that the exterior walls are in need of repair or that the paint has faded, then it is likely that stucco shadowing will be beneficial. By taking the time to identify stucco shadowing, you can make sure that your building looks its best.

Types Of Stucco Shadowing

Now that you know how to identify stucco shadowing, it’s important to understand the different types of stucco shadowing. Stucco shadowing can be classified into two main types: light and dark shadowing.

Light stucco shadowing is usually found on light-colored stucco and gives the wall an even, matte finish. This type of stucco shadowing is often used to create a subtle and elegant look. Dark stucco shadowing, on the other hand, is used to create a dramatic and bold effect. This type of shadowing usually features dark streaks or splotches on the wall and can be used to create a striking visual contrast.

Along with these two main types of stucco shadowing, there are also several other variations. For example, you can find stucco shadowing that has an ombre effect, which is when the shadowing gradually lightens or darkens in color. You can also find stucco shadowing that is a combination of both light and dark colors. This type of shadowing can create an eye-catching effect and can be used to draw attention to certain areas of the wall.

Stucco shadowing is an important concept to understand when it comes to creating a unique and beautiful look for your walls. Whether you’re going for a subtle and elegant look or a bold and dramatic one, there’s a stucco shadowing variation that can help you achieve the perfect look for your home.

Preparation For Stucco Shadowing

Before you can begin stucco shadowing, there are a few important steps that must be taken in order to ensure a successful end result. The first step is to prepare the surface that you’ll be applying the stucco to. This means making sure that it is clean, free of debris, and free of any oils or grease that can interfere with the adhesive.

Next, I like to measure the area that I’m going to be covering. This will help me to determine the amount of stucco mix that I’ll need to create the desired effect. Once I have the measurements, I can start gathering the materials that I’ll need. This includes the stucco mix, a trowel, a hawk, and a damp cloth.

Before I start mixing the stucco, I like to do a test patch. This allows me to make sure that the stucco is the correct consistency, and that it’s ready to be applied. Once I’m happy with the test patch, I can move on to the actual application.

Stucco shadowing is a great way to add texture and dimension to any surface. But in order to ensure a successful end result, it’s important to take the necessary steps to prepare the surface and gather the materials before you begin. With the right preparation, you’ll be sure to create a beautiful finished product that you can be proud of.

Applying Stucco Shadowing

Now that you’ve completed the preparation for stucco shadowing, it’s time to start applying the stucco. Depending on the area of the wall you’re working on, you may need to make some adjustments to the mixture beforehand. For example, if you’re working on a vertical surface, you may need to thin out the stucco with some water to make it easier to apply.

Once you’ve adjusted the mixture to your needs, you’ll be ready to start applying the stucco. I like to use a specially designed stucco trowel for this, as it helps to create a smooth and even finish. When you’re ready to begin, start at the bottom of the wall and work your way up. You’ll want to make sure you apply the stucco in thin, even layers.

As you work your way up the wall, be sure to keep an eye on the shadows. This is the most important concept when it comes to stucco shadowing. You want to create a natural-looking texture that emulates the shadows of the environment around it. Pay close attention to the light and the direction of the shadows, and make sure to apply the stucco accordingly.

Once you’ve finished applying the stucco, you can begin to add a little bit of texture. Use a stiff brush to create some subtle ridges and peaks that will help to create a more natural look. This is a great way to add some character to your stucco shadowing and to create a unique and eye-catching effect.

Applying stucco shadowing is an art form that requires patience and practice. But with a little bit of effort, you can create beautiful and unique wall textures that will make your home stand out from the rest. Just remember to keep the shadows in mind and to apply the stucco in thin, even layers, and you’ll be sure to have a stunning result.

Finishing Touches For Stucco Shadowing

Now that you’ve applied the stucco shadowing, you’ll want to finish off the look with some final touches. This is the part of the process that will really tie the look together and make your stucco shadowing stand out. Here are some of the best ways to give your stucco shadowing a professional finish.

First, you’ll want to use a small brush to fill in any gaps or cracks that may have been left by the stucco shadowing. I like to use a soft-bristled brush and a bit of white paint to fill in any small gaps. This will help to create a smooth and seamless look.

Next, you’ll want to add a bit of texture to the stucco shadowing. This can be done by using a variety of different tools, such as a trowel, a paint roller, or a sponge. This will help to give the stucco shadowing a distinctive and unique look.

Finally, you’ll want to add a bit of color to your stucco shadowing. This can be done by adding a bit of paint to the mix, or by using a colored brush. If you’re feeling adventurous, you could even add some glitter or glitter paint to the mix. This will help to give your stucco shadowing a unique and eye-catching look.

With these finishing touches, you’ll be sure to have a stunning and professional-looking stucco shadowing. Just remember to take your time and be precise with your brush strokes, and you’ll be sure to have a beautiful and unique stucco shadowing in no time.

Tools Needed For Stucco Shadowing

Now that you know the most important concept of stucco shadowing, it’s time to talk about the tools you’ll need to do the job. Depending on the type of stucco you’re using, the tools may vary, but there are a few that you should always have on hand when you’re shadowing.

First off, you’ll need a good quality stucco trowel. This is the tool that you’ll use to apply the stucco and create the design you want. It’s important to choose a trowel that’s the right size and shape for the job. A trowel that’s too small can make it difficult to get a smooth finish, and one that’s too large can make it hard to create the detail you need.

Next, you’ll need a mixture of sand and cement to create the stucco. The amount of sand and cement you use will depend on the desired final look, so you’ll need to experiment with the ratio until you find the right balance.

You’ll also need a few other tools to help you get the job done. These include a damp sponge, a bucket of water, a whisk broom, a spray bottle, and a soft-bristled brush. The sponge will be used to dampen the stucco during the application process, the bucket of water will be used for rinsing, the whisk broom will help to remove excess material, the spray bottle will be used to lightly mist the stucco, and the soft-bristled brush will be used to help create the shadows.

By having all the right tools on hand, you’ll be able to get the job done quickly and easily. With the right tools, you can create the beautiful stucco shadowing designs that will give your home a unique and stylish look.

Stucco Shadowing Techniques

Now that you have all the tools you need for stucco shadowing, it’s time to learn the techniques needed to create a beautiful design. Stucco shadowing is a unique way to add texture and depth to any surface, and the key is to create a variety of shadows. This can be done in a variety of ways, depending on the look you are going for.

The most basic technique is to use a brush to create an uneven, textured surface. You can use a stiff brush to create thick, dark shadows, or a softer brush to create more subtle, light shadows. You can also use a sponge to create a softer, more mottled effect.

Another technique you can use is to thin the stucco with a specialized thinning agent. This will create a more even texture, and will allow you to create the perfect balance of light and dark. You can also mix the thinning agent with paint to create a more vibrant look.

Finally, you can use a spray gun to create a wide variety of shadows. This technique is great for creating a more dynamic look, and can also help you to create a uniform look. Just make sure to adjust the pressure and distance of the spray gun depending on the look you are going for.

Stucco shadowing can be a great way to add texture and depth to any surface. With the right tools and techniques, you can create a beautiful design that will add character and style to any room. So, if you’re looking to add a unique touch to your home, then stucco shadowing is definitely something you should try!

Professional Tips For Stucco Shadowing

Now that you know the basics of stucco shadowing, let’s take a look at some professional tips you can use to make your project even better. Keep in mind that these tips are specific to stucco shadowing, and may not work for other types of construction.

First, let me tell you about the importance of light. Lighting plays a huge role in how dramatic your shadows will look, so take the time to get the lighting just right. The best way to do this is to experiment with different angles and intensities until you find the perfect combination.

Next, I’d suggest considering a textured stucco finish. This can help to add depth to your shadowing, and will have a better chance of catching and reflecting the light. Not only that, but it can also add an interesting visual element to your project.

Finally, you’ll want to consider the color of your stucco. Darker colors will create deeper shadows, while lighter colors will create brighter, more dramatic shadows. Experiment with different colors to see which one works best for your project.

Stucco shadowing is an important concept to understand when it comes to construction and design. By following these professional tips, you’ll be able to create stunning shadows that will bring your project to life. So, take the time to experiment and find the perfect combination of lighting, texture, and color, and you’ll be sure to have a beautiful and unique result.

Conclusion

Stucco shadowing is a concept that is essential when it comes to creating a beautiful and durable stucco finish. It involves using shading techniques to create a three-dimensional look on the surface. It is important to keep in mind that the stucco finish should be applied in even layers to ensure a uniform and lasting finish.

Having the right tools and materials is also essential for a successful stucco finish. Using high-quality stucco and the correct application techniques can help to ensure a long-lasting and attractive finish. Additionally, it is important to take the time to practice and perfect the stucco shadowing technique before applying it to a project.

With the right approach, stucco shadowing can bring a unique and beautiful look to any project. Taking the time to practice and perfect the technique can help you achieve the desired effect or hire a professional such as AA Brite.

FAQs

What Is The Cost Of Stucco Shadowing?

When it comes to stucco shadowing, one of the most important concepts to understand is cost. Stucco shadowing can be a great way to add depth and texture to your home’s exterior, but it can also be a pricey undertaking. The cost of stucco shadowing can vary widely depending on the size of the project and the type of materials used.

To get a better idea of the cost of stucco shadowing, I recommend speaking with a professional contractor. They can provide you with a more accurate estimate based on your specific needs. Generally speaking, you can expect to pay between $3 and $15 per square foot for stucco shadowing. The total cost of the project will also depend on any additional materials or labor needed, such as scaffolding and masonry tools.

If you’re considering stucco shadowing for your home’s exterior, it’s important to factor in the cost before making a final decision. While stucco shadowing can be a great way to add interest and texture to your home, you may find that the cost is simply too high for your budget. If this is the case, there are other options to consider such as faux stone or brick veneer.

No matter what type of stucco shadowing you choose, be sure to do your research and get multiple quotes before making a final decision. Understanding the cost of stucco shadowing can help you make an informed decision that fits your budget.

What Maintenance Is Required For Stucco Shadowing?

Now that you know what stucco shadowing is and the cost of having it installed, it’s also important to understand what kind of maintenance it requires. Generally speaking, stucco shadowing doesn’t require much in terms of upkeep, but it is important to do some basic maintenance to keep it looking its best.

For starters, I recommend checking your stucco shadowing regularly for cracks or damage. This will help to ensure that your home is protected from water damage or other issues that could arise. Additionally, it’s important to keep an eye on the caulking between the stucco and the wall to make sure it’s still secure.

It’s also a good idea to wash the stucco shadowing every couple of months or so. Using a mild detergent and a soft brush, you can easily remove any dirt or grime that may have built up over time. Be sure to rinse off the detergent thoroughly afterwards to avoid any damage.

Finally, it’s important to inspect the stucco for any discoloration. Stucco will naturally fade over time, so it’s important to check it regularly to make sure it still looks like the day it was installed.

Overall, stucco shadowing requires very little in terms of maintenance. With some basic care and upkeep, you can ensure that your stucco shadowing will look great for years to come.

Is Stucco Shadowing Suitable For Outdoor Use?

Now that we’ve covered the maintenance requirements for stucco shadowing, you may be wondering if it’s suitable for outdoor use. The answer is yes! Stucco shadowing is an excellent choice for outdoor applications, as it offers both durability and beauty. Not only will it look great outdoors, but it is also highly resistant to weathering and fading.

When it comes to choosing a product for outdoor use, it’s important to consider the environment. If your area is subject to frequent rain, snow, or other weather conditions, then you’ll want to make sure that the stucco shadowing you choose is designed to handle these conditions. You’ll also want to make sure that the product is designed to withstand UV rays, and that it won’t fade or deteriorate over time.

Although stucco shadowing is a great choice for outdoor use, it’s important to remember that it still requires some maintenance. You’ll want to make sure to clean it regularly, to remove any dirt or debris that may have accumulated. You’ll also want to check for any signs of damage or wear and tear, and repair any issues as soon as possible.

Finally, it’s important to remember that stucco shadowing is made from a natural material, so it is subject to some natural wear and tear. If you live in an area with extreme weather conditions, you may find that you need to repair or replace the material more often than in more temperate climates.

Overall, stucco shadowing is an excellent choice for outdoor use. It is both durable and beautiful, and with proper care and maintenance, it can last for years. Just remember to clean and inspect it regularly, and to repair any issues as soon as they arise. With the right product and a little bit of TLC, your stucco shadowing will look great outdoors for years to come.

Does Stucco Shadowing Require A Sealant?

When it comes to stucco shadowing, one of the most important considerations is whether or not it requires a sealant. The answer is yes – in order for stucco shadowing to last and look its best, it should be sealed with an exterior grade sealer. The sealant will provide an extra layer of protection against the elements and help keep the stucco shadowing looking vibrant and beautiful.

I should note that not all sealers are created equal. It’s important to choose one that is specifically designed for stucco shadowing. These sealers will help to protect the stucco shadowing from fading and chipping, as well as provide extra water resistance.

Applying the sealer is easy – simply brush it on and let it dry. Make sure to apply two coats for extra protection. You should also reapply the sealer every few years, or whenever you notice that it’s starting to wear off.

By taking the time to seal your stucco shadowing, you can ensure that it will look great for years to come. Not only will it add an extra layer of protection against the elements, but it will also help to keep your stucco shadowing looking vibrant and beautiful. So don’t forget to seal your stucco shadowing – it’s an important step in keeping it looking its best.

Are There Any Environmental Benefits To Using Stucco Shadowing?

Now that we know what stucco shadowing is and why it’s important, let’s explore some of the environmental benefits of using it.

When it comes to the environment, stucco shadowing is a great choice. It uses less energy to create the shadowed finish and is the most sustainable way to add texture to a building. It doesn’t require any additional materials, like paints or sealants, so it doesn’t create any extra waste. Plus, it can be easily recycled or reused, so it won’t end up in a landfill.

Stucco shadowing is also a great choice for homes or buildings in areas prone to natural disasters. It helps to provide additional protection against strong winds, heavy rains, and other extreme weather conditions. This helps to keep buildings safe and secure, which is important for both the environment and people’s safety.

Stucco shadowing is also a great way to reduce energy costs. By using the shadowing technique, you can insulate your home or building from the outside elements. This helps to keep your home or building cooler in the summer and warmer in the winter. This helps to reduce energy costs and helps to conserve energy in the long run.

Overall, stucco shadowing is a great choice if you want to do your part to help the environment. Not only does it provide a beautiful and unique look, but it also helps to reduce energy costs and provides additional protection against natural disasters. So if you’re looking for an eco-friendly option, stucco shadowing is definitely worth considering.


What To Know About Roofing Inspections In Tucson

Roofing inspections are a critical part of home ownership in Tucson, Arizona. Without a thorough inspection, homeowners can face costly repairs and renovations down the road. This article will provide an overview of what you need to know about roofing inspections in Tucson.

For those living in Tucson, roofing inspections are an essential part of home ownership. Not only do they ensure that your roof is in good condition and up to code, but they can also help detect any potential risks before they become costly problems. It’s important for homeowners to be aware of the various types of roofing inspections available, as well as when these should be performed and who should be conducting them.

In this article, we’ll give an overview of all you need to know about roofing inspections in Tucson so that you can keep your home safe and secure for years to come. We’ll cover everything from the types of inspections available, to how often they should be done, who should perform them and more – so read on to get informed!

Benefits Of Roofing Inspections In Tucson

One of the most important benefits of roofing inspections in Tucson is their ability to identify early signs of potential problems. By having a professional inspect your roof, you can detect any issues while they’re still relatively minor and inexpensive to fix. This helps ensure that you don’t have to deal with costly repairs down the line. Furthermore, regular inspections are essential for protecting the structural integrity of your home and ensuring that it remains safe and secure.

Inspections also allow you to get a better understanding of the condition of your roof and what kind of maintenance it may require in order to stay in good shape. For instance, if your inspection reveals signs of wear and tear or damage, you can take steps to repair it before it gets worse. Additionally, an inspection will help you determine whether or not it’s time to replace your roof altogether. This can save you from dealing with bigger problems later on down the road.

It’s also important to note that many homeowners insurance policies require regular inspections in order for them to remain valid. Thus, having an inspection done each year could help you avoid a lapse in coverage if something were to happen. Furthermore, certain insurance companies offer discounts for those who regularly maintain their roofs with inspections and other preventative measures. All in all, getting regular roofing inspections in Tucson can be incredibly beneficial for both homeowners and insurance companies alike.

When To Schedule A Roofing Inspection

Scheduling a roofing inspection is an important step to take when it comes to maintaining the integrity of your home. It’s essential to find an experienced professional who can assess the state of your roof and determine if any repairs or maintenance are necessary. This is especially true for Tucson homeowners who experience extreme temperatures, high winds, and intense UV radiation from the sun throughout the year.

The ideal time for scheduling a roofing inspection is before or after monsoon season in Tucson. Monsoon season can cause significant damage to roofs due to heavy rains and strong winds that often accompany them. An experienced inspector will be able to identify any potential issues with your roof and make recommendations on how best to repair them before they become bigger problems.

In addition, it’s important to keep in mind that regular inspections should be done throughout the year, even when there isn’t a monsoon season taking place. This will help ensure that any damage caused by the elements is detected early on and properly addressed before it causes further damage or requires more expensive repairs down the line. A good rule of thumb is to get an inspection twice a year: once in spring and once in fall.

Overall, scheduling regular roofing inspections in Tucson is one of the most effective ways to protect your home from weather-related damage and keep it in top shape for years to come. By taking proactive steps such as these, you can save yourself time, money, and frustration down the line when unexpected repairs come up.

What To Expect During A Roofing Inspection

A roofing inspection is a key part of the process for maintaining your roof’s condition and preventing costly repairs. Inspections provide you with an in-depth look at the condition of your roof, so it’s important to know what to expect. Here’s a closer look at what happens during a roofing inspection in Tucson.

First, the inspector will examine the exterior of your roof – its size, shape, materials, and overall condition. They’ll also check for any signs of damage such as missing shingles or other wear and tear. The inspector will take pictures so they can analyze the condition of your roof in more detail later on.

Next, the inspector will check all components of your roof like skylights, vent pipes, and chimneys. They’ll make sure these parts are securely connected to the structure and that there is no sign of rust or decay. After these checks have been completed, the inspector will move on to checking the interior components like insulation and ventilation systems. This ensures that there are no air leaks from outside into your home or office building.

Finally, once all components have been examined inside and out, the inspector will provide you with a detailed report outlining any areas that need repair or replacement. This report can be used to identify potential problems before they become major issues down the line – saving you time and money in the long run!

Common Roofing Issues Found During Inspections

Roof inspections in Tucson are a critical part of maintaining the health of your roof and protecting your home from the elements. It’s important to know what to expect when you get a roof inspection, and also what common issues may be identified during an inspection.

During an inspection, a qualified professional will inspect the integrity of your roof’s construction, checking for damage or deterioration. They’ll also check for any signs of leaks or water intrusion. In addition to these physical tests, they’ll also take measurements to determine the proper slope and grade of your roof.

When it comes to common issues found during inspections, one of the most frequent is wear-and-tear due to weathering. This can include cracked or missing shingles, as well as curled shingles that have been damaged by wind or hail. Roofers will also look out for signs of moisture accumulation, which can lead to mold growth if not addressed quickly enough. Finally, they may identify damaged flashing around vents and chimneys which can cause problems with water penetration if left unchecked.

Knowing what to expect from a roof inspection in Tucson is key to ensuring your home remains safe from the elements and is able to withstand even the harshest weather conditions. By understanding the possible issues that could arise at any given time, you’ll be better prepared for whatever comes your way.

What To Look For In A Qualified Roofing Inspector

When it comes to roofing inspections in Tucson, it’s important to know what to look for in a qualified inspector. After all, they will be the ones assessing your roof and making sure that any potential issues are caught and addressed before they become major problems. So how can you make sure you’re hiring the right person for the job?

First, it helps if you get referrals from people who have had their roofs inspected recently. Ask them who they used and why they chose them. Also, check online reviews to see if previous customers were satisfied with the quality of service they received. This can give you an idea of which inspectors are more reliable than others.

Next, it’s good to inquire about their qualifications and experience level. Are they certified by a reputable organization? Do they have years of experience in inspecting roofs? These are important questions to ask when making your decision so that you know that you’re getting someone with the necessary knowledge and expertise for the job at hand.

Finally, make sure that you’re comfortable with them as a person too. It’s important that you feel like your opinions are being taken seriously during the inspection process, so look for an inspector who is friendly, professional and open to communication with their clients.

Costs Of Roofing Inspections For Tucson Residents

When planning a roofing inspection in Tucson, it’s important to know the cost. Generally, the cost of an inspection can vary depending on the size of your home and any additional services you may need. Typically, inspections range between $200 and $500. It’s important to note that these costs don’t include potential repairs, so if something is found during your inspection, you’ll likely have additional costs.

It’s also wise to ask your inspector about any additional fees that may be included in the inspection. You should also inquire about the experience and qualifications of your inspector before hiring them for the job. This helps ensure that you are getting qualified service and a thorough roofing inspection.

In addition to asking questions about an inspector’s credentials and fees, it’s also important to ask what they will be checking for during the inspection. A good inspector should look for deficiencies such as missing shingles or damaged flashing, as well as signs of water damage or mold growth within the attic space. They should also check around chimneys and ventilation systems for any potential issues. Knowing what an inspector will be looking for can help you decide if they are qualified enough to do your roofing inspection in Tucson properly.

Getting an accurate estimate of what it will cost to have a roofing inspection done in Tucson is vital before making a decision on who to hire for the job. Taking time to research local inspectors and their qualifications can help ensure that you end up with quality service at a fair price.

What To Do After A Roofing Inspection

After a roofing inspection in Tucson, the next step is to determine what needs to be done. Homeowners need to prioritize any repairs that have been noted in order to ensure their home is safe and structurally sound. Depending on the severity of the repair, it may require professional intervention or simple DIY fixes.

It’s important that homeowners familiarize themselves with the findings of the inspection report and understand what it means for them and their property. They should ask questions if they don’t understand something, or if they need clarification on an issue raised by the inspector. This could help them decide whether to fix something themselves or hire a contractor for more complicated repairs.

Homeowners should also consider getting a second opinion from another roofing inspector if they’re unsure about something found during the initial inspection. Second opinions from experienced roofers can help confirm any suspicions, as well as provide additional advice on how best to approach any recommended repairs. It’s always better to be safe than sorry when it comes to making sure your home’s roof is secure and in good condition.

Standardized Roofing Inspection Protocols

Standardized roofing inspection protocols are important to follow when inspecting a roof in Tucson. All inspectors should adhere to these regulations, as it is the best way to ensure that all roofs are inspected thoroughly and accurately. This includes assessing the condition of the roof, checking for any signs of damage, and determining what repairs or replacements may need to be made.

The most important standardized protocol is to check for potential weak spots in the roof’s structure. This may include looking for cracks, loose shingles, sagging gutters, exposed nails, and other signs of wear and tear. Roofers should also inspect the insulation and ventilation systems in order to ensure proper air circulation throughout the home. Additionally, they should check for any signs of mold or water damage which could indicate a leaky roof.

It is also important that all inspectors pay special attention to areas where there may be hazardous materials such as asbestos or lead paint. Inspectors should note any such materials found during their inspections and make sure that appropriate measures are taken if necessary. It is also essential that all inspectors document their findings in writing so that homeowners can refer back to them when making decisions about their roofs. Doing so will help protect both parties involved from potential legal issues down the line.

No matter what kind of inspection is being done on a Tucson roof, following standardized protocols will help ensure safety and accuracy while providing peace of mind for all involved parties.

Roof Maintenance Tips For Tucson Homeowners

When it comes to roof maintenance in Tucson, homeowners need to be vigilant. Regular inspections can help them identify potential problems and take action before they become major issues. But what are some tips they can use? This article will explore nine key tips that homeowners should keep in mind when it comes to roof maintenance in Tucson.

One of the most important tips is to keep up with inspections. Homeowners need to make sure their roofs are checked by a qualified professional at least once a year. They should also check for any damage after severe weather events like hailstorms or heavy rain. This will help them spot any potential problems before they become more serious.

Another important tip is to clean the gutters regularly. Clogged gutters can lead to water buildup and possible damage to the roof and walls of the home. Homeowners should also check for signs of wear and tear on their roof, such as missing shingles or bent flashing, as this could indicate a problem that needs attention. In addition, trimming back trees near the house can help prevent debris from collecting on top of the roof and causing damage over time.

Finally, homeowners should be aware of their warranty coverage and what it covers in terms of repairs or replacements due to storms or other disasters. Understanding these details can help them make an informed decision about how best to maintain their roof’s integrity and longevity over time. With these simple tips, Tucson homeowners can stay ahead of any potential roofing problems that may arise down the line.

How To Find A Reputable Roofing Inspector In Tucson

When it comes to roofing inspections in Tucson, finding a reputable inspector is key. Homeowners should take the time to properly vet any potential inspector before hiring them. That way, they can ensure that their home’s roof will be inspected correctly and any necessary repairs can be made.

Research is the best way to find a reputable roofing inspector in the Tucson area. Start by asking family, friends, and neighbors for recommendations. It’s also a good idea to read online reviews so you can get an idea of what other people are saying about certain inspectors. You may even consider calling the Better Business Bureau (BBB) to see if any complaints have been filed against a particular inspection company.

Once you’ve narrowed down your list of potential inspectors, make sure you ask plenty of questions before making a decision. This includes questions about their qualifications, experience level, and how long they’ve been in business. You should also ask for proof of insurance and references from previous customers. By doing this research upfront, you’ll be more likely to hire someone who can provide an accurate and thorough inspection of your roofing system.

Taking these steps will help ensure that your home is protected with a quality inspection done by a reliable inspector. With the right information and preparation beforehand, homeowners can rest easy knowing their roof is in good hands when it comes time for an inspection in Tucson.

Conclusion

In conclusion, roofing inspections in Tucson such as AA Brite, are an important part of the homeownership process. It’s essential to know the average lifespan of a roof in Tucson, whether or not roofing inspections are required by local building codes, and if additional inspections are needed after repair or replacement. Knowing that the most common roofing materials used in Tucson are tile, clay, concrete and asphalt shingles can also help to inform your decision-making process. Finally, it’s advisable to check with your home insurance provider to see if roofing inspections are covered under your policy. With all this information in mind, you’ll be able to make an informed decision when it comes to inspecting and maintaining your roof in Tucson.

FAQs

What Is The Average Lifespan Of A Roof In Tucson?

When it comes to roofing inspections in Tucson, one of the most important things to consider is the average lifespan of a roof. Depending on the type of material used and how well it’s maintained, roofs can last anywhere from 10-30 years in Tucson’s climate. To ensure your roof lasts longer, regular inspections are essential. During an inspection, a professional will examine the entire roof to identify any potential issues or damage that could cause problems down the line.

In addition to checking for any damage, a roofing inspection should also check for signs of aging. Components like shingles and gutters can deteriorate over time due to exposure to extreme temperatures, UV rays, and other elements. This can create weak spots or holes which can cause water leaks and other issues if not addressed in a timely manner. A good roofing inspector will be able to spot these signs and recommend any necessary repairs or replacements before they become an issue.

It’s also important to keep an eye out for any irregularities in your home’s ventilation system as this can affect your roof’s performance as well. Poor ventilation can lead to moisture buildup within your attic and walls which can accelerate the deterioration of your roof over time. Having an experienced inspector inspect your home’s ventilation system regularly will ensure that everything is functioning properly and reduce the need for more costly repairs down the road.

By understanding the average lifespan of a roof in Tucson and taking preventative measures like regular inspections, you can help extend its life and save money on costly repairs in the long run.

Are Roofing Inspections Required By Tucson Building Codes?

When it comes to roof repair and installation, it’s important to be aware of the local building codes. In Tucson, AZ, one such code concerns roofing inspections. Are they required? Let’s take a look.

In Tucson, roofing inspections are required for all residential and commercial properties. This applies to both new construction and existing roofs that are being repaired or replaced. The inspection must be completed by an experienced and certified inspector before the roof can be approved for use. The purpose of this inspection is to ensure that the roof meets all safety and structural standards set by the city.

Inspection fees vary depending on the scope of the project, but in general they can range from $50-$200 per inspection. Typically, these fees cover an on-site visit as well as a report outlining any issues found during the inspection process. The report must then be submitted to the relevant building department for approval before any work can begin on the property.

So if you’re considering a new roof in Tucson, it’s important to factor in time and money for a professional inspection first – it could save you from costly repairs down the line!

Are Additional Inspections Needed After Roof Repairs Or Replacements?

The question of whether additional inspections are needed after roof repairs or replacements is an important one to consider when looking into roofing inspections in Tucson. It all depends on the scope and severity of the repair or replacement that is being done. In some cases, there may be a need for a city inspector to come in and verify that the work was completed according to code.

In most instances, however, a second inspection isn’t necessary. The contractor who did the job should have already performed an inspection themselves prior to completing the work. They may also provide a certificate of completion that can be used as proof for any future inspections if needed. If a homeowner is concerned about potential code violations, they can request an inspection from their local building department. It’s important to note that this will almost always require a fee but it does offer peace of mind knowing that everything has been done correctly and up-to-code.

All in all, additional inspections are not usually required after roof repairs or replacements, but it is something worth considering if there are any doubts or concerns about compliance with building codes. Homeowners should always confirm with their local building authority before making any decisions regarding these types of projects.

What Are The Most Common Roofing Materials Used In Tucson?

When it comes to roofing inspections in Tucson, one of the first things to consider is what type of materials are most commonly used. The material used on a roof can significantly affect its longevity, so it’s important to choose the right option. From asphalt shingles to tile and metal, there are several popular options available to homeowners in Tucson.

Asphalt shingles are usually the most common choice for residential roofs in Tucson. They’re inexpensive and relatively easy to install, making them a great option for new construction or replacement roofs. Asphalt shingles also come in a variety of colors and styles, allowing for greater flexibility when designing your home’s exterior.

Another popular choice for residential roofs is tile. Tile has been used in the Southwest for centuries due to its durability and aesthetic appeal. Clay tiles offer an authentic look that complements many southwestern-style homes, while concrete tiles provide a more modern look. While tile can be more expensive than asphalt shingles, its long life span helps make up for the cost difference over time.

Choosing the right roofing material for your home is an important decision that should not be taken lightly. With so many options available in Tucson, it’s important to do research before committing to any particular material. Understanding each type of roofing material’s pros and cons can help ensure you make the best decision possible when selecting a roof for your home.

Are Roofing Inspections Covered By Home Insurance Policies?

When it comes to roofing inspections in Tucson, one of the most important questions homeowners have is whether or not their home insurance policy will cover them for costs related to the inspection. Unfortunately, the answer isn’t a simple one. It depends largely on the type of coverage that you have and the specific details of your policy.

Generally speaking, if you have comprehensive coverage on your home insurance policy, then you may be covered for some or all of the costs associated with a roofing inspection. This includes damage caused by natural disasters such as windstorms, hail storms and fires. You should always check with your insurer to make sure that they do provide this coverage before scheduling an inspection.

Homeowners without comprehensive coverage are unlikely to be covered for any costs associated with roofing inspections. However, there may be other forms of assistance available depending on your location and circumstances. For example, if your roof was damaged by a natural disaster such as a hurricane or tornado, then you may qualify for grants from government agencies to help pay for repairs or replacement of your roof.

In short, it’s important to understand what kind of coverage is included in your home insurance policy before you schedule a roofing inspection in Tucson. Doing so can help ensure that you’re properly prepared financially if something goes wrong during the inspection or repair process.

What To Look For In A Professional Roofing Company In Tucson

Are you looking for a professional roofing company in Tucson? With the Arizona sun beating down on your home, it’s essential to find a reliable and experienced team of roofers. But where do you start? What should you look for when selecting a roofer? In this article, we’ll give you an overview of what to consider when hiring a roofing company in Tucson.

From insurance requirements to customer reviews, there are several factors that will help ensure that you get high-quality workmanship at a fair price. We’ll also provide some tips on how to avoid common pitfalls associated with choosing the wrong contractor. By following our advice, you can rest assured that your new roof or repairs will be done right the first time!

You don’t want to take any risks when it comes to something as important as your home’s roof. Read on to learn more about what makes a great professional roofing company in Tucson—and why finding one is so vital for protecting your property from the elements.

Licensure And Insurance Requirements

When it comes to finding a professional roofing company in Tucson, there are certain requirements that you should look for. First and foremost is licensure and insurance. It’s important to make sure the contractor has all of the necessary permits from local governing bodies, as well as liability and workers’ compensation insurance. This ensures that any work done on your home meets safety standards and regulation codes, while also protecting both parties if anything goes wrong during the project.

It’s also essential to check references from past customers who have used the roofer’s services before. Make sure they were satisfied with their experience, including quality of workmanship, cost estimates, customer service and final results. A good roofing contractor will be happy to provide this information upon request.

In addition, you want to select a company that offers warranties on materials or labor performed by its staff members. This shows confidence in their products and services and gives you peace of mind knowing that if something does go wrong after installation is complete, then it can easily be repaired without additional expense down the road.

So when searching for a professional roofing contractor in Tucson, make sure they meet all applicable licensure and insurance requirements; ask them for references from former clients; and inquire about warranty options available for their products or services. Taking these steps will help ensure you get the best possible outcome for your next home improvement project.

Types Of Roofing Materials And Services Offered

When it comes to selecting a professional roofing company in Tucson, it’s important to consider the types of materials and services they offer. From asphalt shingle roofs to metal roofs, there are several options available when looking for a reliable contractor. Additionally, some companies may also provide other specialized services like gutter installation or repairs, attic insulation, and more.

Do your research before deciding on which kind of roof you want and make sure that the contractor is experienced with installing them. If possible, visit their portfolio page online or ask around for references from past clients who have been satisfied with the work they’ve done. You can also inquire about any warranties they might offer on their products or services as well.

Keep in mind that certain roofing materials require special care when being installed so be sure that the roofers you hire have expertise in this area too. A reputable roofing company will be able to advise you on what type of material is best suited for your home’s architecture and climate conditions as well as answer any questions you may have regarding maintenance requirements down the line.

No matter what service you’re looking for, take time to ensure that the professionals you choose are properly licensed and insured so that your investment is protected if something should go wrong during the installation process.

Reputation And Reviews

It is important to establish a strong reputation when looking for any type of service, especially roofing. Before you make your decision, take the time to research and read reviews from previous customers on various sites such as Yelp or Google. This will give you an idea of what kind of workmanship and customer service the company offers, as well as how their prices compare with other local companies.

You should also check if there are any complaints lodged against them with the Better Business Bureau (BBB). Additionally, ask around within your social network to see if anyone has had experiences – good or bad – with certain roofers in Tucson. It can be helpful to get honest feedback directly from someone who has used their services before.

Look into how long they have been in business too – experience matters when it comes to roofing! A reliable contractor will be able to provide proof that they are licensed and insured through Arizona’s Registrar of Contractors and up-to-date on safety regulations. They should also offer warranties on their materials and labor so that you know your investment is protected in case anything goes wrong down the line.

Choosing a professional roofer doesn’t need to be stressful; just do your due diligence and gather enough information about them beforehand so that you feel confident in making an informed decision.

Cost Estimates And Payment Options

When it comes to finding a professional roofing company in Tucson, cost estimates and payment options are key considerations. Sure, you want the job done quickly and efficiently – that’s certainly important. But if the contractor can’t provide accurate quotes or offer feasible payment plans, their services may not be worth your time.

The first thing to look for is an itemized breakdown of all associated costs with any given project. This should include labor charges, materials fees and any other applicable expenses. It’s also essential to determine how much money will need to be paid upfront before work begins on your roof. If a contractor demands full payment up front, consider this a red flag; reputable companies typically only require a small deposit at the start of the job.

Payment methods are another area where potential contractors should be thoroughly scrutinized. While most established businesses accept major credit cards and paper checks as forms of payment, some opt for more unconventional methods such as cash or even cryptocurrencies like Bitcoin. Be sure to inquire about accepted payment types ahead of time so there are no surprises once the bills come due.

At the end of the day, you’ll want to make sure you have access to flexible financing terms when selecting a roofer in Tucson. Doing research beforehand can help ensure that both parties understand what exactly needs to get done and how much it will cost – without blowing your budget!

Workmanship Guarantees

When it comes to a professional roofing company in Tucson, there are several important considerations. One of those is the workmanship guarantees they offer their customers. This will provide peace-of-mind that the job has been done correctly and will last for years to come.

The quality of materials used on your home is critical, but if the installation isn’t up to snuff, then you won’t be getting the best value or longevity out of your investment. Working with an experienced and certified team who offers solid warranties can help ensure that any issues arising from their work are quickly addressed without cost or hassle. Look for companies who guarantee labor and performance over time such as lifetime shingle warranties against manufacturer defects; this could save you money down the road should something fail prematurely.

In addition to product warranties, look for a contractor who stands behind their craftsmanship as well by offering some kind of satisfaction guarantee like a one year warranty after completion of the project, plus additional services during that timeframe at no extra charge if needed. They should also use only qualified subcontractors when necessary so that all involved parties have insurance coverage in case any damage occurs during installation or repair.

Choosing a reliable roofer with strong workmanship guarantees helps protect both your wallet and your house in the long run – making sure you get exactly what you need without having to worry about hidden fees and costly repairs later on!

Customer Service And Communication

When you’re looking for a professional roofing company in Tucson, customer service and communication should be at the top of your list. It’s important to ensure that the contractor will communicate effectively with you throughout the entire process. Make sure they are available when you need them, answer your questions promptly and thoroughly, and provide clear information regarding their services. This can help make sure you get the outcome you want without any added stress or confusion on either end.

It’s also essential that the company provides quality customer service throughout each step of the job – from initial consultation to installation completion. A reputable roofer will have an experienced team of professionals who understand how to handle unexpected issues while providing ongoing support and follow-up. They’ll work hard to keep things running smoothly so that you don’t have anything to worry about during your project.

Lastly, it’s crucial to look for a business with good reviews and references from past clients who had similar projects done by them. Verify their success stories online, ask if there were any unresolved problems after completion, and read through customer feedback to see what others thought about their experiences with this particular provider. Choosing a positive, trustworthy partner is key in having a successful roofing experience in Tucson!

Safety Practices

When it comes to roofing, safety should always be a top priority. It is essential that you work with a professional roofer who takes safety seriously and has the necessary safety protocols in place to protect their staff and customers. When looking for a roofing company in Tucson, make sure to take note of their safety practices before committing to any services.

It’s important to ask questions about the company’s safety policies when interviewing them. Find out if they have safety training programs in place so their workers are up-to-date on all current safety regulations and best practices. Ask how often they inspect their equipment and materials, as well as what type of personal protective equipment (PPE) they provide employees when working on your project. A reliable roofing contractor will also carry comprehensive liability insurance coverage, which may come in handy if there is an injury or accident during the job.

In addition to these points, make sure you understand exactly how the team plans to manage risks while working at your property. This could include anything from using harnesses while accessing high areas of the building to having proper fall protection systems installed around ladders or scaffolding structures. Pay attention to whether or not the team wears bright clothing and hard hats when on site – this indicates that they are taking workplace health and safety very seriously.

By conducting thorough research into each potential contractor’s approach towards workplace health and safety measures, you can ensure that your home project runs smoothly without compromising anyone’s wellbeing along the way.

Conclusion

It’s important to do your research when looking for a professional roofing company in Tucson. By knowing the average lifespan of a roofing project, asking whether they offer free inspections and warranties on materials, understanding what types of systems they provide, and inquiring if emergency services are offered, you can make sure that the company you hire is experienced and reliable such as AA Brite!

Be sure to ask questions about their experience with different kinds of roofs; this will give you an idea of how well equipped they are to handle any issues that may arise during installation or repair. Additionally, it’s always wise to get references from previous customers so you can be confident in the quality of service provided by the contractor.

When selecting a professional roofing company in Tucson, take the time to look into all aspects of their business before making any final decisions. Doing so ensures that your new roof will last for years to come and provides peace of mind knowing that I have chosen someone who is knowledgeable and trustworthy.

FAQs

What Is The Average Lifespan Of A Roofing Project?

When hiring a professional roofing company in Tucson, it’s important to consider how long their work will last. The average lifespan of a roofing project is about 20-30 years for most materials, depending on the type and quality of material used as well as the climate conditions in which it was installed. Asphalt shingles typically have the shortest life span of 15-20 years while metal roofs can last up to 50 years or more with proper maintenance. It’s also crucial that you hire an experienced contractor who has worked on similar projects before, otherwise any repairs may not be done correctly and could lead to costly damages down the road.

In addition to considering longevity, look into warranties offered by professional roofers in your area. Most companies offer some kind of warranty or guarantee on their services and products so make sure to read through all terms carefully before signing anything. This way, if there are issues after installation, such as leaks or damage caused by improper installation, you’ll know that they’re covered under your agreement with the roofer.

Before making any decisions, always ask questions and compare different quotes from various contractors in order to find one that best suits your needs. Make sure you understand everything included in each quote so there aren’t any surprises once construction begins! Research customer reviews online too; this can provide valuable insight into the experiences other people had working with certain professionals in your area. Taking these steps can help ensure you get quality service at a fair price when choosing a professional roofer for your next project.

Do You Offer A Free Roof Inspection?

When it comes to finding a professional roofing company in Tucson, one of the most important questions to ask is: do they offer a free inspection? A thorough and detailed inspection by a reputable contractor can help you determine the condition of your existing roof and provide an estimate for any potential repairs or replacements that may be necessary.

Having access to a free roof inspection can save you time and money by giving you clarity on what needs to be done before beginning work. During this process, experienced contractors will assess your current roof, check for damage due to weather or wear-and-tear, and give their opinion on whether or not replacement is necessary. If so, they should also provide an accurate quote with no hidden fees or surprises down the line.

In addition to inspecting your roof’s condition, professionals should also explain how long their products are expected to last – as well as details regarding warranties on materials and labor. This information is key when making decisions about investing in new roofing projects; understanding the average lifespan of a particular product or service helps ensure that your investment will pay off over time.

By asking if professional roofers offer free inspections, you’ll get all the answers needed for peace of mind when deciding which option is best for your home. Taking advantage of these services will help secure cost efficiency now while protecting from potential future problems.

Is There A Warranty On The Roofing Materials?

When hiring a professional roofing company in Tucson, it’s important to determine if they offer warranties on their materials. A warranty on the roofing material is essential because it ensures that should anything go wrong with it during installation or over time, you are covered and can get repairs done at no extra cost. Plus, having a warranty shows that the contractor has faith in their work and will stand behind it even after they’re gone.

Before signing any contracts, make sure to ask what type of warranty is included as well as how long it lasts for. This way you know exactly what kind of protection your investment provides. Additionally, inquire about what parts of the job are guaranteed and which ones aren’t so there won’t be any surprises down the line. It’s also good practice to check reviews from previous customers who have used the same roofer before making a decision on which one to hire.

The last step is confirming that all necessary permits and inspections have been completed prior to starting any work on your home or commercial building. Doing this will ensure everything is up-to-code and meets state regulations – something that cannot be overlooked when selecting a reputable roofing company in Tucson. Having a good understanding of these steps beforehand will help ensure you end up with an experienced team that offers quality service backed by solid warranties.

What Type Of Roofing Systems Are Available?

When it comes to finding a professional roofing company in Tucson, one of the most important factors to consider is what type of roofing systems are available. There are numerous options out there and selecting the right system for your home or business can be overwhelming at times. It’s essential that you find a reliable contractor who has experience with different types of roofing systems so they can help guide you through the selection process.

The two main categories when it comes to roofing systems are asphalt shingle roofs and metal roofs. Asphalt shingle roofs are often an affordable option, as well as easy to install and maintain over time. They come in many colors, styles, shapes, and sizes offering homeowners plenty of choices when deciding what look they want their home to have. Metal roofs on the other hand offer superior protection against hail, wind damage, fire hazards, rot, rust and pests making them ideal for any environment regardless of climate conditions. While more expensive than asphalt shingle roofs upfront, metal roofs usually last much longer requiring less maintenance while providing increased energy efficiency throughout the year.

No matter which option you decide on going forward make sure that you check references from previous clients and ask about any warranties offered by the contractor before signing a contract. A reputable roofer should be able to provide detailed information on each material used during installation as well as walk you through exactly what’s included in their warranty coverage if anything should go wrong down the line. Taking this precaution could save you thousands of dollars in repair costs further down the road!

Do You Provide Emergency Roofing Services?

When it comes to finding a reliable roofing company in Tucson, it’s important to consider the services they provide. In particular, you should ask if they offer any emergency roofing services. This is especially valuable for those dealing with unexpected issues or disasters such as severe weather conditions.

Emergency roofing services can be incredibly helpful when trying to protect your home from further damage. A professional roofer will be able to quickly assess the situation and determine what needs to be done in order to repair any existing damages in an efficient manner. Furthermore, an experienced team of professionals will know exactly how to handle these types of situations that require immediate attention.

It’s also beneficial to find out whether a provider offers warranties on their workmanship and materials used during repairs or replacements. If so, this could save you money in the long run by ensuring that all repairs are performed correctly and effectively the first time around. Ultimately, choosing a reputable provider who is willing and able to offer emergency roofing services can help ensure that your home remains safe and secure even after facing unforeseen circumstances.

If you’re looking for the best roof coating in Tucson, contact AA Brite today!

The Dangers Of DIY Roofing In Tucson

Do-it-yourself roofing projects can save money, but they come with a risk. In Tucson, the intense heat and changing climate conditions of Arizona make DIY roofing potentially dangerous for homeowners who don’t know what they’re doing. Even those familiar with roof repair may find that their efforts quickly become overwhelmed by the area’s extreme temperature swings and other environmental factors. This article will discuss the dangers of DIY roofing in Tucson, as well as how to mitigate these risks if you decide to take on the project yourself.

Roofs are essential parts of any home, providing insulation from heat and protection from rain, snow, and hail. But when temperatures reach over 100 degrees Fahrenheit in summer months, combined with low humidity levels and frequent dust storms, roofs need extra care to keep them safe and functional. Without proper maintenance or repairs done correctly, it can be difficult to protect against long-term damage caused by sun exposure or wear and tear due to weather events like haboobs or monsoons.

As a result, many homeowners opt for professional services rather than trying to tackle such an important job themselves. However, there are still some who choose DIY roofing despite the potential consequences; this article aims to inform people about why taking on this task is risky business in Tucson. Read on to learn more about the hazards associated with attempting DIY roofing projects in this desert city so you can make an informed decision about your next home improvement project!

Common Roofing Problems In Tucson

One of the most common roofing problems homeowners in Tucson face is extreme heat. There’s no denying that this desert city sees some of the hottest temperatures in all of Arizona, and while it may be a great place to enjoy sunny days, it can wreak havoc on your rooftop. The constant exposure to high temperature takes its toll on shingles over time, leading them to become brittle and start breaking down quicker than usual. This causes a myriad of issues such as leaks and even collapse if left unchecked.

Another problem faced by DIY roofers in Tucson is weather-related damage due to monsoon storms or hail. Homeowners often find themselves unprepared for these occurrences because they’re not familiar with proper installation practices when it comes to their roofs. Without the right techniques and materials, homes are vulnerable to intense wind speeds that could easily cause major damage like crumbling tiles, detached gutters and missing Shingle tabs from flying off during the storm.

DIY roofers also need to be aware of potential safety concerns associated with completing work on their own rooftops without proper training or experience. Not only do you risk damaging your home further but you can also put yourself in harm’s way if you don’t fully understand how to climb up onto a steep pitch or navigate around an old tile setup properly. It’s always best to leave any kind of significant repairs or maintenance task up to professionals who have been trained specifically for these kinds of jobs so you know everything will be done correctly and safely.

When tackling roofing projects at home, there are many risks involved that shouldn’t be overlooked. Understanding the conditions specific to Tucson as well as learning what precautions must be taken before beginning any repair job can go a long way towards ensuring safe outcomes each time – both for your wallet and wellbeing!

Risks Of DIY Roofing

It’s understandable why some people might be tempted to take on a DIY roofing project in Tucson. After all, it could save money and give the satisfaction of doing the job yourself. However, there are risks involved with this kind of work that shouldn’t be overlooked.

The first risk is safety — without the right equipment and expertise, attempting any kind of major home repair can put you at serious risk for injury or even death. Furthermore, if done improperly, it may not provide adequate protection from extreme weather conditions like intense sun exposure or monsoon storms that plague Arizona during certain times of year.

Another major concern is cost. While DIY projects can help reduce costs initially, mistakes made along the way can end up costing more than hiring an experienced professional roofer in the long run. This comes from having to purchase additional materials as well as pay for labor when fixing errors that were made earlier. Plus, do-it-yourselfers often lack access to manufacturer warranties which means they won’t have coverage should something go wrong down the road.

Overall, while DIY roofing projects may seem like a good idea at first glance, they come with real dangers that must be taken seriously before embarking on such an endeavor. It’s important to weigh these risks carefully against potential savings so you’ll know whether taking on a roofing project by yourself is really worth it or not.

Costs Of Professional Roofing Services

The costs of professional roofing services can vary depending on the complexity of the project. While it may be tempting to try and save money by taking a DIY approach, hiring a qualified contractor often pays off in the long run. This is especially true when it comes to roofing projects in Tucson, where the intense desert sun can take its toll on inferior materials or shoddy craftsmanship.

A good starting point for determining cost is to request an estimate from local contractors who specialize in residential roofs. These estimates should include material costs, labor fees and any associated taxes that apply to your area. Once you have this information, you can compare prices between different contractors and make sure that you are getting the best value for your money. It’s also important to consider any additional services they offer such as maintenance plans or warranties which could end up saving you money over time.

For many homeowners, there is no substitute for peace of mind knowing their roof was installed correctly with top-quality materials and workmanship—and that’s why investing in professional roofers often makes sense. Not only do experienced professionals guarantee quality results but they may even help insure against future repairs due to bad weather or other unforeseen issues down the line. In short, while DIY roofing sounds like a great idea at first glance, ultimately leaving it in the hands of experts is usually more cost-effective than attempting it yourself.

Tips For Safe DIY Roofing

When it comes to DIY roofing in Tucson, safety should always be a top priority. While many people may feel they can save money by taking on this project themselves, there are several potential dangers that could result from improper installation and maintenance of the roof. To help ensure safe DIY roofing practices in Tucson, here are some essential tips you should know before getting started.

First off, make sure your ladder is properly secured when attempting to access your roof for any reason. If possible, have someone hold the bottom of the ladder while another person works atop the roof. In addition, take extra care when walking around up there—it’s easy to lose balance due to uneven surfaces or loose nails sticking out of boards. Wear rubber-soled shoes with good treading as well; this will help keep you steady on slippery surfaces like metal roofs or wet tiles.

Another key point is to inspect all materials prior to installation and replace anything that looks worn or damaged. Also double-check measurements against blueprints for accuracy and don’t forget about weatherproofing measures such as shingle underlayment and ridge vents if applicable. It’s important not to skimp on these steps since they provide an added level of protection from water penetration during heavy rains or snowfall.

Finally, always practice proper ventilation techniques during construction and ensure no combustible materials are left near sources of heat like chimneys or exhaust fans – doing so could create serious fire hazards down the line if overlooked! Taking these precautions into consideration before beginning work on your own rooftop will go a long way towards helping you complete the job safely without having to hire professional assistance afterwards.

Best Roofing Materials For Tucson

When it comes to roofing in Tucson, choosing the right materials is essential. The hot Arizona sun and desert climate can take a toll on traditional roofing materials, making durability an important factor when selecting the best material for your DIY project. Here we’ll discuss some of the top options for safe and effective roofing solutions in this unique environment.

Clay tile roofs are one of the most popular choices among homeowners in Tucson due to their longevity and ability to withstand extreme temperatures. Clay tiles come with many benefits including superior fire protection from heat or flames, natural insulation that helps keep indoor temperatures comfortable, and resistance to ultraviolet light fading so they stay looking great year after year. They may be more expensive than other options, but if you want long-term value for your money then clay tiles are definitely worth considering.
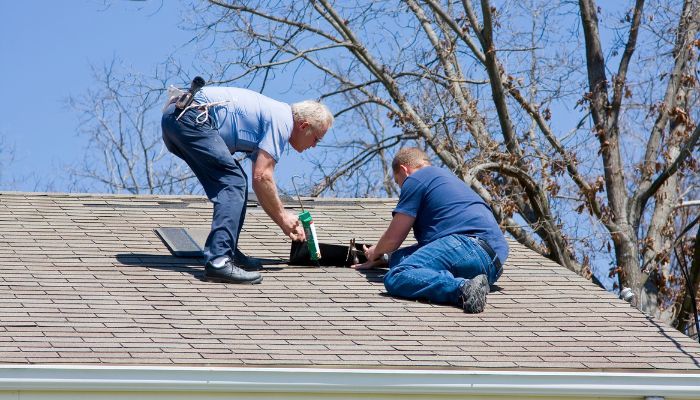
Another excellent choice for Tucson roofers is synthetic slate – an affordable alternative that looks just like real stone yet weighs much less and offers better impact resistance against hailstones and heavy rain storms. Synthetic slates also offer superior flexibility which makes them easier to install than regular slate while still providing maximum water drainage efficiency. Additionally, these modern shingle systems require little maintenance over time so they remain durable despite harsh conditions.

Before starting any DIY roofing project in Tucson it’s important to consider both cost and quality when selecting the ideal material option for your home or business needs. Whether you opt for classic clay tiles or cutting edge synthetics there’s no doubt that either will provide excellent protection from the elements as well as lasting beauty you can enjoy for years to come.

How To Find A Reliable Roofer

When it comes to roofing, Tucson is a unique environment. The extreme heat and intense sun can put stress on roofs that are not properly built or maintained. DIY projects may seem appealing at first, but they can actually be dangerous for homeowners if done incorrectly. That’s why finding a reliable roofer is key when taking care of your home in the Arizona desert.

The best way to find someone you can trust with such an important job is through word-of-mouth recommendations from people who have already used their services. Ask around to family, friends, and neighbors who have recently had work done on their own homes and see what experiences they had with different contractors. You should also look into reviews online as well as checking out any licenses, certifications or awards received by potential companies before making a decision.

Once you’ve chosen someone who meets all these criteria, make sure that there’s clear communication between both parties about the scope of the project, expected timeline and cost estimates up front. Having this kind of transparency is essential for avoiding any miscommunications throughout the process and will help ensure that the job gets done safely and correctly – something no homeowner wants to take chances with!

Benefits Of Professional Roofing Services

Professional roofers offer several benefits when taking on a roofing project in Tucson. For starters, they have the experience and expertise necessary to ensure the job is done correctly and safely. They understand local building codes and are familiar with the materials that work best for different climatic conditions, meaning your new roof will be resilient against extreme weather changes. Working with a professional also gives you peace of mind knowing all aspects of the installation process will be handled efficiently.

Not only do professional contractors provide quality results but their services often come with valuable warranties. This allows homeowners to avoid costly repairs down the line if there’s an issue or unexpected damage caused by extreme temperatures. Professional companies may even offer additional services such as inspections and maintenance, so you can rest assured any problems will be addressed promptly and effectively.

The cost-effectiveness associated with hiring a professional contractor should not be overlooked either, especially given how expensive DIY projects can become due to mistakes or miscalculations made during installation. When it comes to protecting your home from hot summers and monsoon storms, seeking out an experienced expert ensures your investment pays off for years to come.

Conclusion

In conclusion, DIY roofing in Tucson can be dangerous if you don’t know what you’re doing. It’s important to assess the condition of your roof before making any repairs and consider the special regulations that may apply. Roofs typically last between 15-20 years in Tucson, but certain materials may not hold up as well due to its climate. Lastly, it’s worth considering hiring a professional such as AA Brite as this may end up being less expensive than you think when factoring in potential damages from using incorrect materials or installation methods. Ultimately, it is best to weigh all options carefully before deciding how to go about repairing your roof.

FAQs

What Is The Best Way To Assess The Condition Of My Roof?

It’s important to assess the condition of your roof if you live in Tucson. After all, DIY roofing can be dangerous when it isn’t done properly and could end up costing more money than hiring a professional. So how should someone go about evaluating their own roof?

First off, safety is key. If you’re feeling uneasy or unsure about climbing onto your roof for any reason, don’t do it! Hire a qualified contractor instead who has experience with roofs in the area. This will ensure that no one gets hurt while also guaranteeing quality workmanship on the project.

If you’re comfortable doing so, then start by looking at the exterior of your roof from ground level first. Check out shingle cupping (when they curl upwards), granule loss (which indicates wear and tear) as well as discoloration due to sun exposure or water damage. You’ll want to look for any signs of moss growth, too; this could indicate improper slope which would need to be addressed right away before taking on any DIY projects yourself.

Next, check inside the attic for evidence of moisture buildup or leaks around pipes or vents. You might even see some wood rot caused by water intrusion over time – another sign that repairs are needed sooner rather than later. Checking these areas carefully will help you determine whether there is an issue that needs fixing immediately or if it’s something that can wait until a licensed contractor can come take a closer look and make recommendations accordingly.

Taking stock of your current situation is essential when it comes to assessing the condition of your roof in Tucson – especially given the potential risks associated with DIY projects gone wrong. Being proactive now will save headaches down the road, so keep safety top-of-mind and get started today!

Are There Any Special Regulations To Consider When Doing DIY Roofing In Tucson?

When it comes to DIY roofing in Tucson, there are certain regulations that homeowners should be aware of. While the benefits of completing a repair or replacement yourself can include savings and convenience, it is important to ensure that all rules and regulations are followed as failure to do so could result in costly fines or damage.

Before beginning any project, it is essential to understand what permits may need to be acquired. In Arizona, many counties require contractors who work on roofs over 4:12 pitch (18 degrees) have an R-45 rating or better with either a Class A building permit or other specialized licensing. Even if you don’t think your roof requires one of these permits, checking with the local authorities first is always recommended before undertaking any work.

Additionally, when doing repairs or replacements you must use approved materials such as those listed by Underwriters Laboratories (UL). This will guarantee that the roof meets safety standards for fire resistance, wind uplift protection and hail impact resistance. It’s also important to remember that warranties for products used during DIY projects may not carry the same coverage as professional installations due to incorrect installation techniques used by inexperienced workers.

No matter how confident you feel about taking on a DIY project like this, making sure you research current regulations and check with local authorities beforehand is key for ensuring success without penalties from non-compliance.

What Is The Typical Lifespan Of A Roof In Tucson?

When doing DIY roofing in Tucson, it’s important to know the typical lifespan of a roof. Roofs can take quite a beating from the extreme heat and sun here, so understanding how long your roof should last is key for making sure you don’t have any unexpected surprises down the line.

The average lifespan of a residential roof in Tucson is 20-25 years, depending on a few factors like what type of materials were used and whether or not regular maintenance was carried out. Metal roofs tend to be more durable than asphalt shingle roofs, lasting up to 40 years with proper care. On the other hand, an asphalt shingle roof may only last 15 to 20 years if left unchecked. It’s also important to remember that different types of roofs require different levels of maintenance; metal roofs need significantly less work over their lifetime while composite roofs are often more difficult to maintain due to warping and discoloration caused by UV rays.

It’s always best practice to consult with experienced professionals when considering tackling any large scale projects such as replacing your entire roof. Experienced contractors will be able to provide advice on which material would best suit your needs as well as estimate cost based on size and complexity. Ultimately, knowing the expected lifespan of your existing or future roof can help you make informed decisions about maintaining it properly – ultimately saving time and money!

Are There Any DIY Roofing Materials That Are Not Recommended For Tucson’s Climate?

When considering roofing in Tucson, it’s important to research which materials are suitable for the climate. DIY roofers need to be especially aware of what type of material is recommended and whether or not there are any that should be avoided. Are there any DIY roofing materials that are not recommended for Tucson’s climate?
In short, yes. Asphalt shingle roofs tend to have a shorter lifespan when exposed to direct sunlight on a regular basis – something common in Arizona due to its desert climate. In addition, some manufacturers may not provide warranties if their product has been installed by an unlicensed contractor or homeowner. For example, metal roofs can reflect heat quite effectively but only with proper installation – otherwise they could end up causing more harm than good during hot summers! Lastly, tile roofs require special equipment and training as well as maintenance outside of the manufacturer’s warranty period; this makes them ill-suited for the average do-it-yourselfer looking to save money on repairs.

The best way to ensure your roof will last is by having it professionally installed according to local building codes and regulations. A properly trained professional knows how different types of materials respond to extreme temperatures and can install them correctly so they’ll last longer under harsh conditions – like those found in Tucson. They also know which products should never be used because they’re likely to fail prematurely and create more problems down the line. Additionally, most reputable contractors offer warranties with their work so you won’t be stuck footing the bill for costly repairs caused by improper installation techniques or unsuitable materials.

It pays off to consult with an experienced contractor before beginning a project such as installing a new roof yourself in Tucson’s unforgiving climate – no matter how confident you feel about tackling the job on your own. Doing so ensures that you get exactly what you need without risking damage or failure later on due to using an inappropriate material or inadequate installation methods.

Are There Any Additional Costs To Consider When Hiring A Professional Roofer?

When it comes to roofing, DIY can be a risky endeavor. While some people may think they can save money by taking on the job themselves, there are several potential pitfalls that could end up costing them more in the long run. One issue that should not be overlooked is additional costs associated with hiring a professional roofer for the job.

There are many advantages to having an experienced contractor take care of your roofing needs rather than attempting it yourself. Professional installers know what materials will work best in specific climates, like Tucson’s extreme heat and monsoon season, which allows them to provide you with options that are reliable and long-lasting. Furthermore, contractors have access to special discounts from wholesalers or manufacturers, giving them greater flexibility when it comes to pricing their services.

If you do decide to go ahead with a DIY project, make sure you factor in all the necessary components needed for completion. This includes tools such as ladders or scaffolding, protective gear like dust masks and gloves, ventilation equipment if chemicals are used during installation, and other items related to safety protocols. Additionally, research local building codes before starting any project so you don’t face fines down the line due to noncompliance.

Hiring a professional roofer might cost more upfront but provides peace of mind knowing that your home is being taken care of properly and safely while providing superior quality results. Taking these factors into account will help ensure that your investment pays off in both monetary savings and satisfaction over time.

The Benefits Of Regular Roof Maintenance In Tucson

Are you a homeowner in Tucson? If so, it’s important to understand the importance of regular roof maintenance. Without proper upkeep and inspections, your roof may not last as long as it should – leading to costly repairs and even replacement. In this article, we’ll discuss the benefits of regular roof maintenance in Tucson and how they can help protect your home now and in the future.

When living in Arizona’s dry climate, your roof is constantly exposed to harsh conditions that could lead to damage over time if not properly maintained. The intense heat during summer months causes thermal expansion on shingles which cause them to eventually crack or break off completely, while monsoon season brings heavy rains that can wreak havoc on a weakened structure. Regularly maintaining your roof will ensure these issues are addressed before they become serious problems.

Regular maintenance also helps extend the life of your roof by allowing for small issues to be identified and fixed quickly before more severe damage occurs. A professional inspection allows for an experienced eye to spot minor signs of distress such as broken tiles, missing nails or loose flashing around chimneys or skylights. By catching these issues early-on, homeowners can prevent larger damages from occurring down the road – saving both money and headaches!

The Impact Of Tucson’s Climate On Roof Maintenance

Regular roof maintenance is important in Tucson, as the city’s climate can have a big impact on the condition of your roof. The heat and sun cause the surface of roofs to be more vulnerable to damage over time; without proper care, this could result in costly repairs. In addition to that, because Tucson gets quite hot during summer months, regular roof inspections help detect potential issues before they become too serious and require expensive solutions.

One way to ensure that your roof remains safe from any long-term damage caused by Tucson’s weather conditions is to hire a professional for regular inspection services. This will give you peace of mind knowing that an experienced expert has taken a look at your property and will provide recommendations if something needs attention or repair. Even if it turns out nothing needs repairing right away, having an annual checkup helps maintain the overall quality of your home’s roofing system and reduce future problems down the line.

Having someone inspect your roof also allows them to do preventive maintenance services like cleaning gutters, removing debris, sealing cracks or openings around vents, replacing broken tiles or shingles – all things that should be done regularly as part of a good preventative plan. Taking these steps now will save money later on major damages and can extend the life span of your roof significantly with just minimal investment upfront.

It pays off to invest in routine upkeep through either hiring a pro or doing DIY projects yourself – it’ll keep costs low while protecting one of the most critical aspects of your house: its rooftop!

Advantages Of Regular Roof Inspections

Regular roof maintenance in Tucson is essential due to the desert climate. Fortunately, there are several advantages associated with regular inspection and care of your roof. In this article, we’ll be looking at a few of these benefits and why they’re important to consider when deciding how best to keep your home safe from damage caused by the elements.

First of all, inspecting your roof regularly can help you detect problems early on so that they can be fixed before they become more serious or cause major damage. This helps reduce the costs associated with repairs since many issues can be resolved simply through timely intervention rather than costly replacements. Additionally, if any leaks or other potential sources of water damage are identified during an inspection, appropriate preventative measures can be taken to ensure no further harm is done to your home.

Another advantage of regular inspections is that it allows for preventive maintenance such as cleaning out gutters and clearing debris from drains which will help protect against future water or wind damage. Furthermore, having professionals inspect your roof on a regular basis also gives them the opportunity to check for signs of deterioration including cracks in shingles or tiles which could indicate larger structural issues lurking beneath the surface. By taking action quickly, you can prevent small problems becoming bigger ones down the line while ensuring that the integrity and lifespan of your roof remains intact.

All things considered, it’s clear that regular roof maintenance in Tucson plays an integral role in protecting homes from extensive damages caused by weather conditions like heat waves and monsoon storms common in our area. While some may see investing in routine inspections as an unnecessary expense, doing so actually saves money over time – not just financially but also by providing peace-of-mind knowing that one’s house is secure against nature’s onslaught!

Identifying Potential Roof Damage

Regular roof inspections in Tucson can help identify any potential damage to the roof before it becomes a major problem. By catching small issues early, homeowners can save time and money on costly repairs that could have been avoided with regular maintenance. Furthermore, performing annual inspections allows for preventive measures to be taken which will extend the lifespan of your roof.

It is important to check for signs of wear such as missing shingles or chipped paint, water spots on ceilings or walls, and other indications like mold growth or cracks in the foundation. Additionally, checking around penetrations like vents and chimneys should also be part of a routine inspection because these are sources where water may enter if not properly sealed.

Inspections should also include an assessment of the drainage system to make sure there are no blockages causing water buildup. Homeowners should also inspect their attic space since this area often reveals problems related to ventilation and insulation that can lead to further deterioration over time if not addressed quickly. All these steps combined provide a comprehensive overview of your roof’s condition so you know exactly what needs attention now and what might need attention later down the road.

Taking all necessary precautions when inspecting your home’s roof helps protect against expensive repair costs while extending its longevity – two benefits that everyone appreciates!

The Benefits Of Prompt Roof Repairs

One of the key benefits of regular roof maintenance in Tucson is that it allows you to identify potential damage before it becomes a bigger problem. But another important benefit is the opportunity to address any issues quickly and efficiently with prompt repairs, which can save time and money down the line.

It’s critical to take action as soon as possible when there are signs of damage on your roof. Ignoring these problems could lead to further water intrusion or serious structural concerns such as warped trusses or sheathing, which would be far more expensive than simply addressing early warning signs while they’re still manageable. Plus, investing in timely repairs can help preserve the integrity of your roof for years to come.

In addition, having an experienced contractor assess damages and make necessary repairs will ensure that all work meets industry standards and local codes. This way, you don’t have to worry about whether or not your roof is up-to-date—you’ll know it is! Furthermore, skilled professionals can also provide helpful advice on how best to maintain your roof going forward so that future incidents may be avoided altogether.

By taking advantage of the benefits offered by prompt roof repair services, homeowners in Tucson can enjoy peace of mind knowing their roofs are safe and secure from long-term damage.

Benefits Of Regular Roof Cleaning

Regular roof cleaning is an essential part of proper maintenance that can’t be neglected. Doing so will help protect your property from the harsh desert climate in Tucson, and ensure it remains safe for years to come. When dirt and debris build up on a roof, it can cause damage over time if not properly cared for.

The benefits of regular roof cleaning are vast. For starters, removing any built-up debris prevents water from becoming trapped between shingles, which can eventually lead to mold growth or other structural problems. Additionally, professional cleaning removes unsightly stains caused by moss or algae buildup—a common issue in humid climates like Tucson. Not only does this improve the look of your home’s exterior but it also extends the life of your roof by protecting against UV rays and heat damage.

Having a professional clean your rooftop also gives you peace of mind knowing that potential safety hazards such as loose tiles causing tripping risks have been removed before they become dangerous. Regular inspections are recommended to check for signs of wear or deterioration and repair them promptly, ensuring your family stays safe while enjoying all the benefits a well-maintained roof has to offer.

Proper upkeep through regularly scheduled cleanings allows homeowners to enjoy the long-term protection their roofs provide without worrying about unexpected repairs or replacements down the line. Investing in routine inspection & maintenance services now could save thousands later on!

How To Find Professional Roofers In Tucson

Finding a reliable roofer in Tucson can be difficult. However, it’s important to make sure that you find someone who is experienced and trustworthy. Regular maintenance of your rooftop not only keeps it looking great but also ensures that any potential problems are caught early on before they become more serious or costly issues. So how do you go about finding professional roofers in Tucson?

The first step is to look for recommendations from friends or family members who have recently had their roofs serviced by an expert contractor. Ask around the neighborhood or check out online reviews to see what people have said about different companies. You may even want to contact local contractors directly and ask questions about their experience and qualifications. This will give you a good idea of which ones might be the best fit for your needs.

Another option is to use a service like HomeAdvisor, which helps connect homeowners with qualified professionals in their area. They’ll provide detailed information about each company including customer ratings and reviews so you can easily compare them side-by-side. Additionally, many home improvement stores offer free consultations where customers can meet with knowledgeable staff who can answer questions about roofing services and recommend the right type of material for their project.

Once you’ve narrowed down your options, reach out to each one and set up a meeting or phone call to discuss details such as pricing structure, timeline, materials used, guarantees offered, etc. Be sure to get everything in writing so there’s no confusion down the road over what was agreed upon initially. Taking these steps will ensure that you hire an experienced professional and receive quality workmanship when maintaining your roof here in Tucson!

Tips For Maximizing The Life Of Your Roof

Maintaining your roof regularly can help to keep it in good condition and extend its lifespan. There are a few simple steps that you can take to maximize the life of your roof, especially if you live in Tucson. Here’s what you need to know about protecting your roof from the harsh Arizona weather.

First, make sure to inspect your roof for any signs of damage or wear and tear at least once every six months. This will give you an idea of how well your roof is holding up against the hot sun and heavy rains. Additionally, be on the lookout for loose tiles or shingles as these can cause water damage inside your home if not addressed quickly enough.

It’s also important to clear away debris from around the edges of your roof after storms so that water can flow properly off into gutters without being blocked by leaves or branches. If possible, try to have a professional come out twice each year – once in spring and once in fall – to perform a more thorough inspection and maintenance session. They’ll be able to spot potential issues before they become costly problems.

These tips should help ensure that your roof remains in top shape no matter what Mother Nature throws at it! With regular inspections and routine cleaning, you can maintain its integrity over time while avoiding expensive repairs down the line.

Conclusion

It’s important to keep up with regular roof maintenance in Tucson and have a roof repair company on speed dial like AA Brite. Doing this is the best way to ensure your roof stays healthy and that costly repairs are avoided. By understanding when and how often you should inspect, repair, and maintain your roof, you’ll be able to make sure it lasts for years to come.

Knowing what kind of materials work best for repairing roofs can also save a lot of time and money down the road. Flat roofs require special considerations because they don’t shed rainwater as well as pitched or sloped roofs do. I recommend talking with an experienced contractor who understands the specific needs of flat roofs in order to get the most out of your investment.

Overall, regular roof maintenance is essential if you want your roof to last through hot summers and cold winters in Tucson. When done correctly, these preventive measures will help prevent any damage from occurring while ensuring optimal performance over its lifespan. With proper care, there’s no reason why your home won’t continue looking great for many years!

FAQs

What Is The Best Time Of Year For Roof Maintenance In Tucson?

When it comes to roof maintenance in Tucson, many homeowners find themselves wondering when the best time of year is. It’s important that regular maintenance take place so that any potential issues can be caught and addressed early on. Knowing when to do this work will help ensure maximum protection for your home.

There are two primary times of year that are most suited for roof maintenance: spring and fall. Springtime brings warmer temperatures, which make it easier for contractors to identify damage or wear-and-tear more easily than during harsher winter months. This makes it a great time to fix problems before they become bigger ones later in the summer heat. Fall also provides mild enough temperatures for repair work while avoiding the risk of intense summer rains or snow melts from heavy winter snows.

In addition to temperature considerations, there may be other factors at play depending on your specific situation — such as whether you need an inspection for a new home purchase, if you’ve experienced recent extreme weather conditions, etc. Consulting with a professional contractor can provide advice tailored specifically to your needs so you know exactly what kind of work is necessary and when it should be done. Being aware of these details helps protect your investment and keeps your family safe all throughout the year.

No matter what type of roofing project you’re tackling, scheduling routine inspections and maintenance ensures longevity and peak performance over the long run. Taking extra care now could prevent major headaches down the line while keeping costs low in the process!

Can I Perform Regular Roof Maintenance Myself?

Regular roof maintenance is an important part of keeping your Tucson home in good condition. But can you perform the necessary upkeep yourself, or do you need to enlist a professional?

On one hand, some basic tasks like cleaning out gutters and removing debris from roofs are manageable for most homeowners. You’ll also want to check for obvious signs of damage like missing shingles or cracked tiles that may require repair. However, if more extensive repairs are needed – such as replacing flashing or resealing exposed seams – it’s best to leave those jobs to experienced professionals who understand how these sensitive components work together.

You should also consider the time of year when undertaking any major projects on your roof. Summer temperatures in Arizona can be extreme, so scheduling regular maintenance during cooler months is ideal for both comfort and safety reasons. Plus, with less wear-and-tear due to sun exposure and heat, there will likely be fewer issues needing attention come springtime.

Ultimately, the decision about whether you handle routine maintenance yourself or hire a contractor depends on your level of expertise and comfort working at heights; either way, staying ahead of potential problems through regular inspections and repairs helps ensure your Tucson roof remains healthy for years to come!

What Kind Of Materials Should I Use For Repairs?

Regular roof maintenance is essential for preserving the life of any Tucson home. It’s important to use quality materials when making repairs or performing upkeep on your roof, as this will help ensure that it stays in good condition and continues protecting your house from the elements. So what kind of materials should you be using?

When repairing a roof, start with high-quality asphalt shingles. They are durable enough to withstand Arizona’s hot summers and can provide years of protection against weather damage if installed correctly. Additionally, opt for metal flashing around chimneys and vents; this material is great at blocking heat and moisture while also lasting longer than other types of flashings. Finally, make sure to use strong sealant along all joints and seams; this helps keep water out and prevents leaks.

It pays off to invest in higher-quality materials when maintaining your roof – not only does it guarantee a better job done, but it’ll save you money in the long run by keeping problems away. Just remember: research products before buying them so you know exactly which ones are best suited for your specific needs. That way, you can rest assured knowing that your roof is well taken care of!

How Often Should I Have My Roof Inspected?

Regular roof inspection and maintenance is important for Tucson homeowners to keep their roofs in top shape. It’s an essential part of keeping the home protected from potential damage caused by extreme weather conditions in the area. So, how often should you inspect your roof?

The frequency of inspections depends on several factors, including the age of the roof, its condition, the type of materials used for construction, and the climate in which it exists. Most experts recommend that a professional inspection be conducted at least once every three years. However, if you live in an area with extreme temperature fluctuations or heavy winds and precipitation, then more frequent inspections may be necessary. Additionally, older roofs will require more frequent inspections than newer ones due to wear and tear over time.

If any issues are detected during routine inspections, repairs or replacements should be done as soon as possible to avoid further damage down the line. Regular maintenance can help extend the life of your roof significantly while helping ensure that all components remain secure and operational. Homeowners who take proactive steps when caring for their roofs enjoy peace-of-mind knowing they have taken measures to protect one of their most valuable investments – their home!

It’s also wise to schedule an additional inspection after major storms or other severe weather events since they can cause unseen structural damage that only a professional can assess properly. By following these guidelines – scheduling regular inspection intervals and taking action upon identifying problems – homeowners in Tucson can rest assured that their roofs are performing optimally year round.

Are There Any Special Considerations For Flat Roofs In Tucson?

Are there any special considerations for flat roofs in Tucson? Roof maintenance is an important step to protecting your home or business from the elements, and this is especially true in a desert climate like that of Tucson. Flat roofs are particularly susceptible to damage due to their lack of drainage, so it’s essential to take steps to ensure they’re properly taken care of. Here we’ll look at what precautions you should take when maintaining a flat roof in Tucson.

First, be sure to inspect your roof on a regular basis – at least once every 6 months is recommended. Doing so will help identify any potential problems before they become too serious, allowing you to repair them quickly and avoid costly repairs down the road. You should also check for signs of wear-and-tear such as cracks or discoloration which could indicate water damage or even pests like termites. Pay particular attention around areas where two different materials come together, since these can easily become loose over time without proper upkeep.

Next, make sure that your roof has adequate insulation and ventilation. Without both of these components working correctly, heat can build up inside your house causing air conditioning bills to skyrocket during summer months. Additionally, having sufficient insulation keeps water out by providing a barrier between the outside elements and the interior of your home or building. Finally, consider installing elastomeric coatings on top of your flat roofing material as extra protection against sun exposure and UV rays; this helps prevent premature aging of the surface material and extends its lifespan significantly.

When caring for a flat roof in Tucson it’s important to remember that regular inspections combined with proper installation techniques go a long way towards keeping it safe from harm caused by extreme weather conditions. Investing time into researching appropriate solutions specific to flat roofs will save money in the long run while ensuring maximum efficiency from your property’s structure for years to come!

If you’re looking for professional roof coating in Tucson, contact AA Brite today!