
How to Paint Your Home’s Interior in 17 Steps

Step 1: Remove pictures, paintings etc. from the interior walls in preparation of painting.
A good rule of thumb for all interior painting, regardless of the contractor, is for you to take down anything expensive yourself. Painters don’t know if Great Great Grandma gave you that picture or if it was purchased at the flea market.

Step 2: Move furniture away from the wall when practical. i.e. if its not too big to be moved.
We will move the furniture away from the wall for you and cover it with plastic or canvas as required.

Step 3: Scrape loose and flaking paint.
We will remove loose and flaking paint with a scraper prior to repainting.

Step 4: Set up scaffolding and ladders as required.
99% of the time we do our work using ladders, which we ALWAYS lay down at the end of the day. Whether we use ladders or scaffolding as the owner you need to make plans for keeping children – and adults who act like children safe. Being a tort-filled world I have to add we are not responsible for children or adults playing on any ladders or scaffolding at your house. If there is an injury from this, excluding my employees, your homeowners policy is going to be held responsible. Not much fun to talk about but important to know. Shown below is a picture from 2010 and one of the rare occasions where we had to use scaffolding.

Step 5: As required cover windows, doors, fixtures, etc. with plastic.
Walls and ceiling of empty building are frequently sprayed with paint, which means lots of plastic to protect non-paintable items. Furnished buildings are typically brushed and rolled and don’t need every door and window covered. If you have a preference one way or the other please let us know as we’re easy to work with.

Step 6: Degrease or clean walls as required with a liquid TSP type cleaner.
If your walls are not greasy or stained with nicotine then skip this step. Surfaces with grease or heavy nicotine stains require TSP type cleaning. TSP and TSP substitute cleaners are basically industrial strength soap. Several times over the years we’ve had to scrub down an entire house prior to painting it. If necessary it’s included as a part of the bid.

Step 7: Neutralize and rinse off TSP.p>
“Neutralizing TSP” is a fancy way of explaining the application of baking soda water to neutralize the soap. The baking soda water is also rinsed off prior to painting.

Step 8: Remove switch plate covers, outlet covers, etc
As a standard we remove switch plate and outlet covers so you get a cleaner paint job. The exceptions being covers dealing with electronic data cables such as Cable TV, phone, internet and networks. We don’t remove these so there is no risk of bumping a loose wire and disabling the system.
Step 9: Caulk cracks.
Cracks a few inches long are not problematic. If you have one running the length of your wall or ceiling then there are some more things you need to know. Please see the stucco repair section of this web site.
Step 10: Fill nail holes.
PLEASE tell us if you want to return your pictures and paintings to the same spot so we don’t fill the holes. Many people want to re-organize after painting and we fill the holes unless told otherwise.
Step 11: Spot patch stucco texture on sheet rock.
We paint the body AND the fascia since a job is not complete until they are both painted.
Small patches on an interior are not usually a problem, as the size grows from a postage stamp to a deck of cards, the rules on what to expect change. See Interior Stucco Repair. Raw wood, new sheet rock patches, caulk lines etc. will be primed and repaired to facilitate a good finished product. Unfortunately, I don’t have any good pictures of interior stucco patching. So shown below is what my wife and I did with our house. Stucco before and after. For reference, the window in the middle left of the before the picture is pass-through at the sink in the “after” picture.
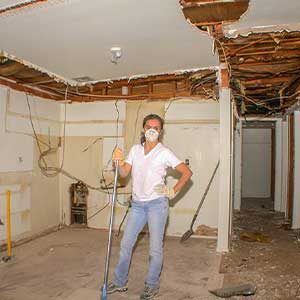
Before
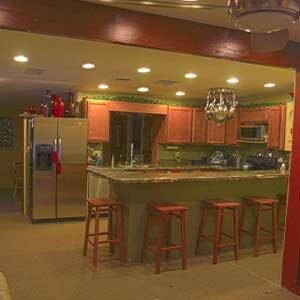
After

Step 12: Paint with premium grade interior paint.
Premium interior paint is the way to go. It covers better and runs less. If you want to see a painter frowning, give them cheap interior paint and ask them to make the finished product look nice. Our two favorite paints are Suprema and VersaFlat. Suprema is hard and wear resistant (scrubable) while Versaflat adheres well and is softer. It’s great for ceilings and low wear areas. If you prefer another paint, we have additional choices from most all main line manufactures.
Step 13: Remove scaffolding and ladders.
Step 14: Reinstall switch plate covers.
After the painting is complete, switch plate covers are put back on. Painting without switch plate covers on is one of the single biggest ways to get the professional look.
Step 15: Professional Clean up
We always clean up the job site.
Step 16: Quote includes all material and labor for list above.
Step 17: Job inspection and walk around with the client.
We walk the finished project with you. Our interior motto is “It’s easier to paint than to argue.” In the process of walking the job, if you see anything we missed, we will take care of it. Occasionally people see shadows and think it’s a missed spot. Instead of arguing we paint it again, and move on. When we’re finished with the walk around, we collect the final payment.
More Painting Tips


