Serving Southern Arizona Since 2003
Call (520) 406-5900

Author: aabrite

The Basics of Roof Coating: What Every Homeowner Should Know

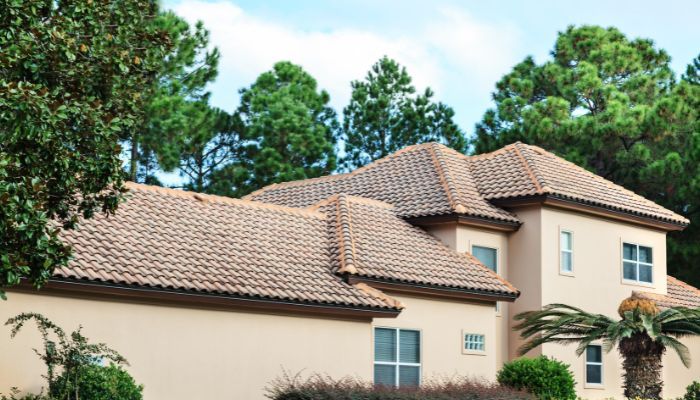
Adding a coating to the roof will give the roofing components an extra layer of protection and help keep them in good condition for years to come! And as every homeowner knows, the roof is one of the most important aspects of your home.

A home’s roof acts as its first line of defense against the elements, be it rain, sun, or hail. Yet, despite its significance, many homeowners overlook essential upkeep measures, notably the magic of roof coating. At first glance, it might seem like just another layer of paint or an unnecessary expense.

However, delve a little deeper and you’ll discover that roof coating plays a pivotal role in preserving the life of your roof, boosting energy efficiency, and even enhancing the overall appearance of your home. If you’re a homeowner eager to keep your sanctuary in tip-top shape, this blog will guide you through the basics of roof coating and why it should be on your radar.

What is Roof Coating?

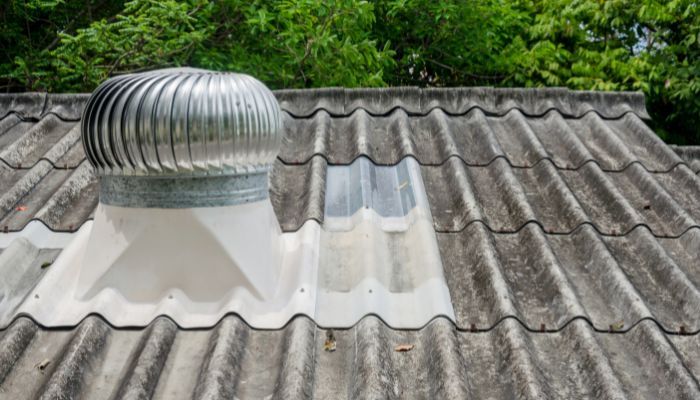
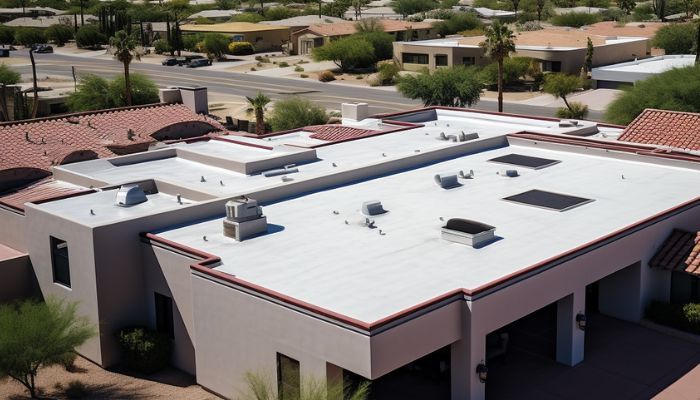
Roof coating, at its essence, is a protective layer designed to be applied directly onto the surface of a roof. Think of it as a shield, specially formulated to defend your roof from the everyday wear and tear it encounters. Depending on its composition, a roof coating can offer varying benefits, from reflecting harmful UV rays to preventing water infiltration.

Now, it’s important to understand that there isn’t a one-size-fits-all when it comes to these coatings. Different types cater to distinct needs. For instance, reflective coatings are engineered to bounce back sunlight, ensuring your home remains cool during scorching summer days. Asphalt coatings, on the other hand, are primarily known for their waterproofing properties. For those leaning towards a more modern approach, polyurethane coatings might catch your interest, renowned for their durability and versatility in both flat and sloped roofs.

Why should homeowners care about this extra layer? Apart from the obvious protective measures, roof coatings can save you money in the long run. By enhancing the longevity of your roof and improving energy efficiency, this seemingly simple addition could mean fewer repairs, replacements, and shockingly high utility bills in your future.

How Does Roof Coating Work?

At its core, the science behind roof coating is both intriguing and practical. These coatings, while appearing as mere layers on the roof, serve as guardians against external elements, particularly the relentless sun. They either reflect or absorb UV rays, depending on their type and formulation. This function not only keeps your home cooler but also prevents the premature aging of roofing materials. Imagine a sunscreen for your house; just as it prevents skin damage, a roof coating shields your roof from potential harm.

Moreover, a well-applied roof coating creates a seamless barrier, significantly reducing the chances of water seepage. This feature is especially vital to protect against heavy monsoons here in Southern Arizona. By keeping moisture at bay, roof coatings prevent the growth of molds and algae, ensuring the structural integrity of your roof isn’t compromised.

Beyond protection, one of the unsung benefits of roof coatings is how they can prolong a roof’s lifespan. Every day, a roof faces the brunt of weather patterns, from scorching heatwaves to high winds and heavy rainfall. Over time, these conditions can cause roofs to crack, warp, or degrade.

However, with the shield of a roof coating, the impact of these adversities is greatly mitigated. In essence, the roof coating acts as a protective buffer, enhancing the longevity of the roof and ensuring homeowners get the most out of their initial roofing investment.

Key Benefits of Roof Coating

Roof coatings offer a range of benefits, both immediate and long-term. Roof coatings can protect your roof from the sun’s UV rays, which can cause it to fade and crack over time. Roof coatings are seamless, and when installed correctly, can solve roof leaks. Roof coatings also help protect your roof from rain and sun, which can cause damage and deterioration over time. Here are some additional advantages of applying a roof coating:

  • Prolonged Roof Lifespan: Roof coatings provide an added layer of protection against UV radiation, weathering, and other environmental factors, ultimately extending the life of the roof.
  • Energy Efficiency: Reflective roof coatings can repel a significant amount of solar radiation, keeping the building cooler and reducing the need for air conditioning. This can result in noticeable energy savings, especially in hotter climates.
  • Prevention of Leaks: Many roof coatings are waterproof, forming a seamless barrier that can prevent water infiltration, protecting the roof from potential water damage and the interior of the building from leaks.
  • Cost Savings: By extending the lifespan of a roof and preventing potential damage, roof coatings can save homeowners and businesses the cost of early roof replacements and frequent repairs.
  • Aesthetic Enhancement: Over time, roofs can appear aged or worn. A fresh coating can rejuvenate the look of a roof, improving the overall appearance of a building.
  • Temperature Regulation: Besides reflecting sunlight, certain roof coatings can provide insulative properties, helping to keep buildings warm during colder months and cool during hotter months.
  • Resistance to Mold and Algae: Many roof coatings have properties that prevent the growth of mold, mildew, and algae, which can degrade roofing materials over time.
  • Versatility: There are roof coatings available for nearly every type of roofing material, from asphalt and metal to concrete and EPDM. This makes it possible for almost any building to benefit from a roof coating.

In summary, roof coatings are a valuable addition to a building’s maintenance strategy, offering protective, aesthetic, and cost-saving benefits. It’s essential for homeowners and facility managers to understand these advantages and consider a roof coating as a proactive measure in roof maintenance and longevity.

When Should You Consider a Roof Coating?

The timing of a roof coating application is pivotal to maximizing its benefits. While it’s tempting to think of it only when noticeable problems arise, proactive consideration can save you both time and money. First and foremost, the age of your current roof is a decisive factor. As roofs approach the middle of their expected lifespan, they might benefit from the protective embrace of a coating, adding years to their service life.

Visible signs of wear and tear, like minor cracks, fading, or uneven surfaces, are tell-tale indicators that a roof might be ripe for coating. Acting promptly upon spotting these signs can prevent minor issues from escalating into costly repairs. Additionally, after any professional inspection or repair, a coating might be recommended to seal the dealt areas and provide an extra layer of defense.

Furthermore, your local climate should play a central role in your decision-making. If you reside in areas where the sun blazes with intensity or regions that get battered by heavy rain or hail like in Southern Arizona, a roof coating can act as a safeguard against these extremities, ensuring longevity and sustained performance. In essence, while roof coatings can be a reactive measure to existing problems, their true value shines when used proactively, ensuring a roof’s extended health and functionality.

Local Tucson Roof Coating Services Near You

The roof is more than just a structural component of our homes; it’s standing guard against the unpredictable whims of Mother Nature. As homeowners, our role is to ensure that this guardian remains resilient and ready to protect for years to come.

Roof coatings emerge as a potent tool in this endeavor. They not only extend the life of our roofs but also bring about a wide range of benefits, from energy savings to protection of your investment. By understanding the ins and outs of roof coatings, we equip ourselves with the tools to make informed decisions, ensuring our homes remain in good condition for years to come.

For residents of Tucson, AZ, the intense sun and fluctuating weather can take a toll on your roofs. Enter AA Brite 24/7 – the leading professional roof coating service in the area! With years of expertise under our belt and a commitment to excellence, we offer Tucson homeowners the highest quality roof coatings designed to withstand the unique challenges of Arizona’s climate.

Our skilled technicians use only the best materials, ensuring your roof not only looks pristine but also offers maximum protection against the elements. Whether you’re looking to extend the lifespan of your existing roof, save on energy costs, or simply give your home a fresh look, AA Brite 24/7 has got you covered. Invest in the best; let AA Brite fortify your home against Tucson’s harsh weather.

Frequently Asked Questions About Roof Coating

How often should I get my roof coated?

The frequency depends on the type of coating used, the local climate, and the condition of the roof. Generally, a high-quality roof coating can last anywhere from 5 to 15 years with proper routine maintenance. It’s a good practice to have a professional inspect your roof annually and consult with your roofing expert to determine if a new coating is needed.

Can I apply a roof coating myself, or should I hire a professional?

Applying a roof coating requires expertise to ensure it’s done correctly and safely. A professional will prep the roof by cleaning it and repairing any damages, ensuring the coating adheres properly. They’ll also be knowledgeable about the best type of coating for your specific roof and climate. For optimal results and longevity, it’s recommended to hire a professional.

Will a roof coating change the appearance of my roof?

Yes, a roof coating can refresh the appearance of your roof, making it look cleaner and newer. Some coatings are available in various colors, allowing homeowners to change the color of their roofs or opt for a reflective coating that appears brighter and can help in energy savings.

Repairing Stucco: A Comprehensive Guide

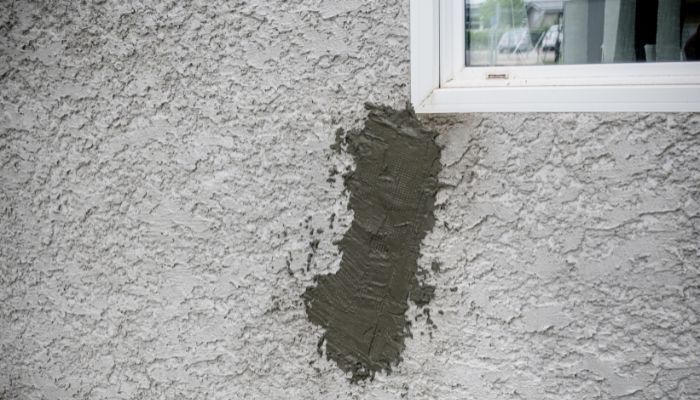
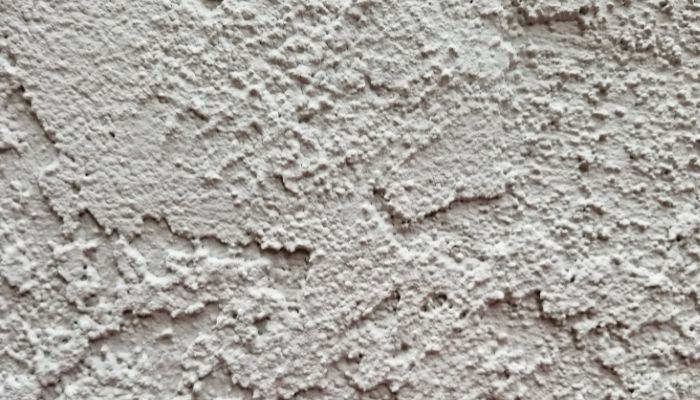
Because of its beautiful, and long-lasting finish, stucco is an often-used building material. Stucco is a substance applied to the outside structures to create a continuous, weather-resistant coating. Sand, cement, and water are the main elements.

While stucco offers excellent protection, it is not resistant to damage. Over time, cracks or different kinds of damage can happen. If you want to maintain your property’s durability, regular stucco care and timely repairs are necessary.

In this article, we’ll walk you through the process of how to repair stucco and give you a general idea of the stucco repair cost

The Right Time to Repair Stucco

Not everyone is a professional when it comes to stucco crack repair. Many people will wonder when is the right time to do so. We’ll address questions such as how to repair stucco cracks or how to repair stucco holes, but first, let’s go over the warning signs that suggest stucco repair is necessary.

Visible Cracks

If you notice cracks in your smooth wall, this indicates that a repair is needed. These cracks can be in the form of a hairline, spider shape, or pattern. If you do not assess these issues on time, you’ll notice areas where the stucco seems wet and almost swollen. Water can easily enter those cracks and eventually cause significant damage to your wall. Not to mention, the stucco repair cost will be higher than it should be. 

Stains and Discoloration

Having noticeable stains or different shades on your wall is another indicator that a repair is needed. This can also mean that water has found its way inside, or perhaps a bigger issue is hidden behind that discoloration. 

Damage Due to Accidents or Natural Causes

Accidents happen, whether done by human hand or nature itself, due to harsh weather conditions. For example, a tree might fall due to a storm and cause great damage to your stucco. Depending on the area where you live, your house structure can be exposed to even more challenging weather conditions. In such cases, make sure you do a proper inspection to evaluate the damage that has been done in order to repair it. 

Mold Growth

Unfortunately, mold can also grow as a result of water entering inside that waterproof layer. While it may not be visible on the stucco’s surface, discoloration or spots sticking out are clear signs. The smell is also a strong suggestion that mold is present. Therefore, if you can smell mold, check the entire house structure. Not only can mold damage your house’s structure, but it can also cause potential health issues. 

If you notice any of these signs, act on repairing them rather than ignoring them. Another sign you can look out for is if your stucco is peeling or parts are falling off. It is important to act immediately so you can enjoy the comfort of your house much longer and have peace of mind. If you are not confident about when to act on how to repair cracked stucco, seek professional assistance. 

How to Repair Stucco: The Steps You Need to Follow

Below is a step-by-step guide on how to repair stucco cracks and how to repair stucco holes to restore the durability and safety of your structure.

Identifying the Damage

The first step in stucco crack repair is to inspect your house’s structure and identify the areas that need repairing. Do this by searching for any cracks or holes. You can start by checking your window corners and the connection parts where your roof and wall meet. If these are minor issues, you might be able to fix them yourself. You will need safety gear like gloves and a ladder to start with. 

However, if you notice that the damage is beyond your knowledge and expertise, the best advice would be to hire a professional. They will do a thorough inspection and evaluate the state of your stucco. 

Preparing the Work Area

The next step would be to clean the areas that need repairing. You can use a brush to gently remove the parts that are falling off. You can also scrape the excess or the bits that are not secured anymore. This is necessary for the stucco to stick properly. If these areas are near your windows or plants, ensure you cover them to avoid accidentally damaging them. 

Before repairing your stucco, you also need to consider the weather conditions.It might not be the ideal time to repair stucco if it’s freezing or the weather is too hot and windy. Instead, wait for nighttime when it is not too dry so your stucco can stick nicely. 

Mixing and Applying the Stucco Patch

Once you have cleared the areas, it is time to mix and apply the stucco patch. But, before doing so, you need to cover the exposed areas with builder’s paper and mash. This will help those holes seal nicely and the stucco to stick. If you are not sure how to mix the ingredients, you can check your local stores for some ready-mixed materials and follow the instructions. Then, add water for the right mix. The stucco paste should not be too thick or too runny. 

Once you have your mixture, apply it to the area needing repair. Make sure you spread the stucco evenly. Your first application will be your base coat. Once you have sealed the hole, you will have to wait for it to dry. Depending on where you live and the weather conditions, this might take a day or a week. You can cover it with a plastic sheet to prevent the stucco from drying out or falling without sticking properly on your foundation. 

The following step will be to apply your second coat. Remove the plastic sheet, add a bit of water to your first base, and add your second stucco layer. Ensure that you are applying evenly. Cover it again with a plastic sheet and wait a few days. 

The last step would be to apply your final coat. The goal of this finish coat is to blend the stucco to look like the rest of your foundation. However, don’t worry if the texture is not exactly the same. The most important thing is that you have repaired the damage. 

Painting the Repaired Stucco

This is an optional step if you’d like to paint the repaired areas. If you choose to do so, wait a couple of days for the stucco to dry properly. The great thing about painting is that you won’t even notice the area you have just repaired. 

Stucco Repair Cost

To determine the cost, you have to consider a few factors. You’ll have to evaluate the damage and area that needs repairing. The budget is another thing that you should keep in mind. Stucco is an expensive siding option, and the average stucco repair cost varies from $6 to $9 per square foot, not including the materials.

If you enjoy doing simple DIY projects, you might think about saving money by taking care of minor problems yourself. However, DIY repairs not done correctly can be difficult and expensive.

On the other hand, hiring a skilled stucco repair service offers advantages. They have the right knowledge and expertise when it comes to repairing stucco. Although it may initially cost more, the long-term advantages in terms of durability are worth it because your home will be safer and more durable. 

Final Words on Stucco Repair

With these steps, you have the basics on how to repair cracked stucco. Repair minor stucco damage right away because, if ignored, it could develop into a larger problem. Giving your stucco the care it requires will ensure that your home has a solid and beautiful exterior for many years. 

Remember, if you don’t feel confident enough to repair even the smallest stucco cracks yourself, seek a professional to do it for you. It’s better to ask for help and repair the cracks properly instead of causing more damage. 

FAQ

Can I repair stucco myself?

If you have the right equipment and skills, then handling minor repairs yourself could be an option. However, for major damages, it’s recommended to seek expert assistance who will properly fix those issues for you. 

What materials do I need for stucco repair?

In order to do the stucco repair by yourself, you will need stucco patching material, water, mixing tools, a putty knife, and a brush for texturing. Matching paint is optional if you prefer to paint the repaired parts so they don’t stick out. 

Is it better to repair or replace stucco?

Stucco restoration can be an effective and affordable solution for small issues. However, long-term durability may require repair if the damage is significant. It is best to hire a professional who will examine the state of your stucco and inform you whether the damaged areas can be repaired or a replacement is needed. 

How often does stucco need to be repaired?

Many factors influence the repair frequency, including the environment, preservation, and the quality of your initial installation. In general, it may require minor repairs every few years. However, we recommend you do an inspection every two years to ensure there are no signs of damage. 


Repairing a Shingle Roof: The When, the Why, & the How

The roof is one of the most functional components of your house. They protect it from water, cold, heat, and other external conditions. While roof shingles are a blessing, they are expendable materials that need regular and proper maintenance to function properly and last longer. Ultimately, there are times when you need to replace them fully.

As a house owner, you need to know everything about shingle roof repair and maintenance. From signs that signal it’s time for maintenance or repair to the importance of high-quality service and the costs of an entire roof replacement. 

When Should You Repair Roof Shingles?

Like any other material, shingles also have an expiration date. It’s important to know when you need to repair roof shingles, so look for some or all of the following signs:

  • Leaking Roof: This is one of the most obvious signs that signalize it’s time for roof shingles repair. However, a leaking roof doesn’t only mean actual water draining from the roof but also the appearance of yellow or gray stains, molds, or peeling paint. 
  • Droopy Roof: This is one of the alarming signs that your roof needs immediate replacement. Droopy or sagging roofs have trapped water inside that can cause even more costly damage to your house. When moisture overwhelms the roof, it may break, and you’ll face a literal situation of the roof falling on your head. Therefore, check for sagging spots, trapped moisture, or rotting boards. You can even take a look from a distant angle to see if the roof is flat or looped. 
  • Mold and Fungi: If you notice your roof has mossy spots with mold and fungi, then it’s definitely because of trapped moisture that will rot the shingles if not maintained immediately.

These are just a few of the obvious signs when a roof needs repair. However, unless you work with roof repairs, you ought to call an expert to inspect your roof regularly. Often there are other specific signs that give out the roof deficits and need for a replacement that a person cannot spot right away.

Shingle Roof Repair: Why It’s Important

Shingles in bad condition affect the overall house. Roofs with structural defects cannot be considered functional. A missing shingle is all it takes for water and moisture to enter the roof and start rotting the board. As a result, the walls may start cracking or appear bubbly, and leaks may appear when it rains. Therefore, repairing a shingle roof is imperative and should be done as soon as the homeowner notices the first signs.

Putting off a shingle roof repair can only worsen the situation. Storing moisture in your walls is a breeding ground for fungi, mold, or even bacteria. Allowing them to grow in your house may expose all household members to various health issues and allergies.

On the other hand, the shingle roof repair delay can even cause constructional damage. The wooden support may become unstable due to rotting and moisture, and in the worst-case scenario, it may collapse.

How to Repair Roof Shingles: Must-Knows

How to repair roof shingles on your own?” is one of the most commonly asked questions. Although it may seem impossible, repairing a shingle roof on your own is possible. If you are handy with tools, you can fix your roof by following the steps below, but it is always recommended to hire a professional for the job. 

Get the Necessary Equipment

Getting the safety equipment is the first and most important step. You need glasses, gloves, and gripping boots – suitable for walking on shingle roofs. Use a high-quality ladder to climb up to the roof securely.

Roof repairs are not a one-man job. You should never climb and do roof shingles repair alone. Always have someone with you to help you and ensure you avoid dangerous situations.

Assess the Damage

Inspect the area and assess the damages. Check to see how many shingles need replacing. Replace any curled or cracked shingles immediately. However, if you spot many dry, brittle, and curled shingles, it’s pointless to repair only the damaging spots. You must repair the entire roof.

A pro tip: Repair and replace the shingle roof during colder months or in cool weather. Asphalt heats up in hot weather, and removing and replacing it is much more difficult. Check the weather forecast for rain because you wouldn’t want to do repairs or replacements on rainy days. 


Mark and Fix the Rotten Areas

After you assess and identify the rotten roof areas, you need to mark and replace the rotten shingles. The whole shingle roof replacement is quite demanding and requires experience to set up the shingles effectively. This is why we don’t suggest turning it into a DIY project.

If you find small areas with rotten shingles, you need to use a crowbar, pry bar, or a hammer claw to get under the shingles. Separate the adhesive and reveal the nails of the shingles underneath. How much do you need to replace? All you have to do is remove at least 5 tabs in the second row over the damaged shingle. Ensure you pull off enough shingles around the damaged part to make sure you get rid of everything.

Replace the Old Shingles with New

You’ll need new materials to replace the old shingles with new ones. Find shingles that are an exact match to the old ones. Carefully install the new shingle and nail them, ensuring that they are securely placed. Don’t forget to check for the adhesive strip because some are unbacked shingles that will require purchasing additional adhesive. The final step is to use roofing nails to secure the shingles firmly.

Reseal the Old Shingles

To reseal new shingles effectively, you need to apply an inch-diameter spot of the shingle cement under the tabs. Make sure you press down hard on each shingle and secure them in place. Continue applying shingle cement and pressing down on each shingle until you smooth out the surface. 

Once you finish the damaged area, you can proceed to inspect the other parts of the roof and see if other shingles are secured by lifting them. If the shingle is not sealed to the roof, make sure you reseal all of them to avoid further damage and costly repairs.

Call a Shingle Roof Repair Service

To ensure your shingles are sealed and repaired correctly, call an expert to make the evaluation and get a professional opinion. Homeowners who repair shingles often skip important signs due to a lack of experience and expose themselves to further costs.

However, finding a reputable roof replacement service can be hard. Here at AA Brite, you will find a professional, experienced, and skilled team that will renew and help you maintain your roof. If you have any questions, feel free to reach out to them.

Shingle Repair Cost

The shingle repair cost varies from provider to provider but also depends on the damage that needs fixing. Here are some average prices for roof repair:


  • Minor repairs: The costs for covering small leaks, replacing small shingles, repairing holes and cracked shingles, resealing, and releasing pooled water are between $150 and $400.
  • Major repairs: The costs for roof sagging or dropping, electrical issues, huge water issues, and chimney repairs are between $1,500 and $7,000.
  • A total roof replacement costs around $8,000.

Note that homeowners should perform a major shingle roof repair or a total roof replacement after 25-30 years. Whether you are looking for small repairs or thinking about an overall roof replacement, it’s wise to call a professional service company and get an exact estimate for your roof. 

Closing Thoughts on Roof Shingle Repair

Shingle roofs are quite popular roofing choices in the US because of their functionality and aesthetic appeal. However, just like any other material, shingles are expendables and require routine roof shingle repair to last longer. 

Any person can repair shingle roof on their own, in terms of sealing and replacing old shingles. There are signs like a mossy shingle, droopy roof, or missing shingle, suggesting the roof needs a minor repair. However, after 30 years, every homeowner needs to consider major shingle repair or a total roof replacement.

AA Brite is a specialized roofing company that can conduct a professional service for your roof regardless of whether you need major or minor repairs for an affordable price. Therefore, feel free to contact them

FAQ

What happens when roof shingles are damaged?

Damaged roof shingles lead to roof leaks, mossy roofs, fungi, or bacteria entering your home, ultimately leading to a roof collapse.

Can you repair a section of roof shingles?

Yes. You don’t need to make a total roof replacement for a minor shingle roof issue. Reach out to an expert for a professional opinion because homeowners often omit important signs that point to the need for repair.

What is the average life expectancy of a shingle roof?

The average life expectancy of a shingle roof is 25-30 years.

Can you replace a small section of shingles?

Yes. Replacing a small section of shingles is a common roof repair service that an expert or a homeowner can perform.


Stucco Siding: Definition, Benefits, & Costs

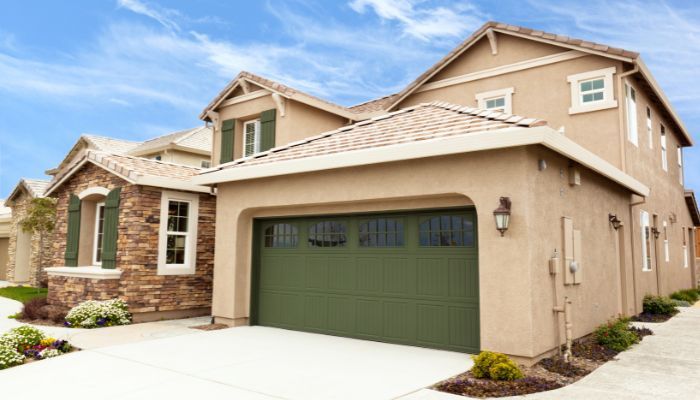
Stucco siding is one of the most popular exterior siding options and a must-have feature in classic Spanish and Mediterranean architecture. The influence and stucco retro finish is present in modern architecture and exterior design, and the demand for stucco siding for 2022-2027 is expected to grow massively. Also, apart from the aesthetic features, stucco siding is a highly durable option for your facade.

However, stucco siding has some downfalls, such as the costs and difficulty in repair. Many DIY enthusiasts tried to repair stucco but ended up in an even bigger mess. In this article, we’re discussing what is stucco siding in detail, stucco siding panels, what makes it difficult to repair independently, its advantages and disadvantages, and the costs. 

What is Stucco Siding?

Stucco siding is a retro siding option that is a derivative of Mediterranean architecture. The cement-like texture that bonds well with many understructures, including brick, block, wood, etc., makes stucco a durable material. 

Traditionally, stucco siding contains sand, water, and lime from the Mediterranean. When mixed, the texture is applied directly to the exterior of a house to dry and bond with the understructure. Depending on the homeowner’s preferences, the finish can be rough or smooth, but smoother finishes require multiple coats of stucco.

Once dried, your house gets the final and permanent look. Depending on your preference, you can further add ornaments. However, before we get to the ornaments and final looks, you should know all your options for exterior stucco siding. 

Types of Stucco Siding

If you search for stucco types, the internet will throw you various articles with numerous “types” of exterior stucco. Some of the most popular names are float or finish, lace and skip, dash, Santa Barbara, and English – the list goes on. However, these are not exactly “types” but finishes that can be achieved by adding more or fewer coats of stucco. Otherwise, you can find stucco as traditional and synthetic. 

Traditional Stucco Siding

The traditional stucco siding includes only water, sand, and lime. Nowadays, exterior designers recommend adding Portland cement ideally to the mixture for long-lasting results. 

Before the cement-like mixture is applied to the walls, the exterior workers will prepare the understructure of the building by adding paper and a twofold/threefold lath (wire mesh). However, if the base is made of mason, there is no need for paper and wire mesh below. 

The stucco goes directly to the mason or the construction cloth, and there are several layers:

  • “Scratch layer” is the first layer, which will be the base for the other layers. 
  • “Brown layer” is the second layer, and it boosts the structure’s firmness and prepares it for the final layer.
  • “Finish layer” is the final layer that has a different application method, as experts spread the stucco with a hand trowel that allows them to play with the texture and design for the final look.

Synthetic Stucco Siding

Warmer and hot climates work better with traditional stucco siding. Humid does not work well on stucco as it is a breathable material, and water can easily penetrate and cause cracks. However, synthetic stucco, also known as the “Exterior Insulation and Finish System,” includes synthetic polymers. These replace the cement and lime to provide better insulation, protection from water, and flexibility to use in all climates. 

Synthetic stucco has a different approach and application process compared to the traditional one. Here, the initial stucco coat tops the base made of foam board and fiberglass mesh. 

Synthetic and traditional stucco have different looks. The synthetic stucco is thinner, water-resistant, more insulated and flexible, and definitely more expensive.

Benefits of Stucco Siding

There are many advantages that come with stucco siding, which are probably the reason for the high demand on the market. Here are some of the most distinct features of stucco siding.

Sustainable Material

Stucco Manufacturers Association calls stucco siding one of the most sustainable materials with years of proven success. With proper maintenance, it is likely to endure more than 50 years without any costly repairs.

Sound-Proof Material

Applying stucco requires blocking every opening of the house’s understructure, including cracks where sounds pass. However, as the worker applies the layers of stucco, all the cracks get blocked, which results in sound proof. The thicker the layer, the better the insulation. 

Fire Resistant Material

Stucco siding is fire-resistant because it contains incombustible materials. Portland cement, lime, sand, water, and lime are all fire-proof materials that make the stucco siding a fire-resistant siding, too. Moreover, stucco keeps interior walls safe from fire for the duration of about 1 hour.

Super Flexible Material

Stucco is a material that goes along any architecture type and sustains corrections without losing its original quality. Additionally, it fits well with any type of decoration, which allows you to experiment with the designs and get a fresh look at your house.

Breathable Material 

Thanks to the natural materials used, stucco is a breathable material that prevents the occurrence of fungi or molds. For a material to endure more than 80 years and appear in modern architecture, experts inform us that the secret is in the maintenance.

Stucco Siding Maintenance Tips

Stucco siding is known as a low or maintenance-free material. However, experts suggest that routine maintenance is what makes the material durable. Otherwise, part of the routine maintenance is inspection for small hairline cracks on the siding and proper cleaning.

Usually, if you spot small cracks, you need to seal them with sealant as soon as possible to prevent further damage. However, if you notice larger cracks, do not try to fix them on your own. You will have to make the cover exactly the same as the original and plus detect the origin of the crack. In this case, it’s best to call a professional.

As for the cleaning, you need to remove all the dirt that piles over time. However, use softer tools whenever you can, and if you need to brush tougher, use a medium bristle scrub brush with soap and water. Make sure that you don’t scrub too hard using too much pressure, as you may destroy the stucco. 

If you make a mess or you need more help than regular routine maintenance, make sure to call experts to repair the stucco. Otherwise, you’re risking the durability of the material.


Cost of Stucco Siding

As mentioned, stucco is considered one of the most expensive siding options. The same goes for stucco repair. The average stucco siding cost is around $8 per square foot in 2023. The highest cost is $9, and the lowest is $6. You should expect to pay for labor and materials additionally. In other words, the average cost for stucco siding goes between $8,000 and $11,000. 


Stucco repairs are also salty. According to Home Guide, the average cost of stucco siding repair per square foot is $5 – $50, while the average total price for stucco repair is $150 – $500. 

However, it’s important to note that a well-installed stucco panel siding, or any siding at all, will cost you only once in your lifetime. The classic Spanish looks from the previous century are still there as proof that stucco is a high-quality material.

If you consider stucco for your house exterior, make sure you contact an expert team. AA Brite is a highly professional and licensed Tucson-settled company with 20 years of experience in exterior housing. We are a team of highly skilled experts who will get the job done right and for an affordable price. We are available for any questions or dilemmas you have. Feel free to contact us, and we will provide you with a cost estimate for a properly installed stucco siding. 

Stucco Siding: Key Takeaway

Stucco is a long-lasting, classical, and versatile exterior siding option. You can choose between traditional and synthetic stucco siding. The traditional recipe is recommended for warmer climates, whereas the synthetic is recommended for colder climates.

The costs of stucco siding can be considered an investment, but given the results, and proof of the material’s durability, we can conclude it’s worth every penny. Routine maintenance is a must to extend the life of stucco siding.

FAQ

What is the biggest problem with stucco?

Stucco is difficult to repair. There are many guides for enthusiastic DIY-ers that explain the repair of stucco siding step-by-step. However, in most cases, the final results of the home stucco repair are an even bigger mess. If you notice a crack or discoloration on your stucco siding, do not act on your own unless you work with stucco. If you don’t, make sure you call the experts.

Does stucco siding increase home value?

Stucco significantly increases the home value, given that it is durable, easy to maintain, versatile, and aesthetically pleasing.

Is stucco better than wood siding?

Yes. Unlike wood siding that is susceptible to rotting, synthetic stucco is highly durable.

When should I replace the stucco siding?

If your stucco panels show signs of mold, get crispy, and fall apart, it’s time to replace them altogether.


Painting Shingled Roofs: The Need-to-Know

Painting roof shingles can be an exhausting DIY adventure, but the instant and shiny transformation will make your house look unique! However, you must know when, how, and with what purpose you paint the roof shingles! They’re made of tricky materials, such as asphalt or composite, which can quickly lose the paint or damage your roof.

And it doesn’t matter since we’ll provide a step-by-step guide on how to paint roof shingles and the main benefits and drawbacks! You’ll also learn more about the shingles’ materials and their specific characteristics, including the right coloring and how to use them efficiently.

Now, let’s grab our spray guns!

Roof Shingles: A Quick Overview

Before answering the question, “Can you paint shingles on a roof?” we must delve a little deeper into the shingle materials and their characteristics. Firstly, what are roof shingles? It’s a roof installation made of rectangular and flat pieces of various roofing materials, such as asphalt or composite. 

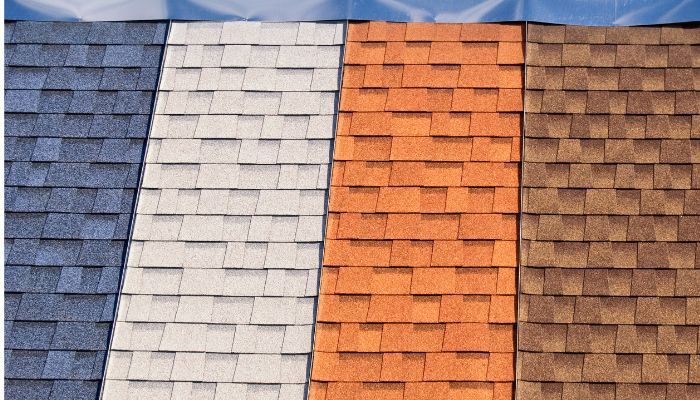
You can install shingles in different colors and textures based on your preferred color palette and materials. For example, you can choose the color and texture based on the type of shingle material – from wood and slate to clay and asphalt. 

Asphalt shingles are the most popular because they are found in different shapes, sizes, and colors. Sometimes manufacturers design them to mimic wood, clay, or other materials. 

Depending on the shingles’ materials, the durability can vary from one material to another. For instance, asphalt shingles can last up to twenty years with proper maintenance and the usage of high-quality repair materials. On the other hand, wooden or slate shingles can beautify your roof for up to 50 years, although these materials can double the price.

Naturally, the question: “How can you paint a shingle roof based on the materials?” pops into your mind. But first, let’s find out can you paint a shingle roof at all.


Can You Paint Roof Shingles?

Yes, you can! DIY enthusiasts have a special love for painting roof shingles in different colors and textures. You’ll enliven your living space exterior, decrease costs, and increase energy efficiency. 

There’s a logical step-by-step procedure behind painting roof shingles. The first thing you should do is replace the damaged shingles with new ones, clean the roof, and install safety equipment. Climbing to the top of your house can be a risky adventure, so you should take care of your safety before anything else.

After you’ve assured the situation’s safety, you should choose the right time of the year or the day to paint, choose the right color and the tools. For instance, you can use a paint roller or a spray gun based on the texture and the surface. You can use a paint roller with a back brush for wooden roof shingles or a spray gun for asphalt or composite shingles.

There’re many benefits of painting roof shingles. The following are the most instant and pleasuring ones:

  • Painting roof shingles are less expensive than a replacement Professional replacement cost can differ, depending on the surface area that needs covering and the materials. On the other hand, if you paint the roof shingles by yourself, you can significantly reduce the costs and buy high-quality paint for around $1.000 for 20 squares of shingles.
  • Extend the life of your roof – You can extend the life of your roof by applying acrylic latex exterior to the asphalt shingles. Double or triple coloring or other protective materials can boost the durability of the shingles and their resistance to weather and temperature fluctuation.
  • Energy efficiency – If the sun can be annoying where you live, painting your roof shingles with light colors will reflect the sunlight and reduce the cost you pay for keeping your home cool!
  • Easy customization – Using that specific color and texture, you can make your home look like you always dreamed. The beauty of painting roof shingles is that you can choose the right design and color to match the surrounding and the interior.

Painting Roof Shingles: The Process Explained

Even though there are many benefits to painting roof shingles, the process can be risky, exhausting, and thankless. To avoid all the tricky situations, we’ve prepared a step-by-step guide for you on how can you paint roof shingles and ensure that the working environment is safe and you’re doing the right thing.

Get an Inspection

Before you begin painting, ask for a professional inspection to assess the damage and maintenance needs for the whole project. Sometimes you’ll need to replace many of the shingles; other times, you’ll have to alter the painting procedure depending on the damage and other conditions. You’ll get all this information from the professional inspection service provider near you. 

Clean the Debris and Dirt

If you don’t want your fresh new coat of color to get mixed up with debris and dirt and stay shiny, you’ll have to use various tools to remove them from the surface. You can do this by using a lower-powered power washer. Additionally, you can use a 50-to-50 mixture of bleach and water – an effective combination for removing algae or moss.


After you apply the natural or manufactured cleaning mixture, leave it for 10 to 15 minutes before you wash it off. The surface of the shingles should be dry before you apply the color.

Install Safety Equipment

If you don’t hire professional roof coating and painting services, you’ll have to keep an eye on the safety equipment. For example, you should get a safety harness and edge protection to avoid falling from 8 feet or more. Also, you can always call a friend for help or hire another worker to assist you.

Get Paint & Equipment

Depending on the materials and the roof’s position and angle, you may need different equipment to paint roof shingles. That’s why you should get a ladder, a harness, a spray gun, paintbrushes, and more. You’ll also have to calculate the roof’s surface and the gallons of paint accordingly. On top of that, different equipment and tools are most effective for different surfaces and angles.

Watch For The Weather Conditions

Choose a week when there won’t be any rain! Watching for the rain is essential because frequent showers can wash off the paint and destroy your masterpiece! That’s why it’s best to choose the summer months for this DIY endeavor and let the cleaned shingles and the paint coat dry before you can proceed to other activities.

Use the Paint, Tools & Equipment Wisely

After you’ve chosen the paint for roof shingles and all the equipment, you can start painting your rooftop. However, use the tools and equipment wisely. First, you’ll have to paint the edges and valleys using a brush. Then, you can proceed to paint the roof shingles with a high-quality brush, 2-3 inches thick.

You can use the paint roller in equal effect for sizing or applying a coat of color. To paint the rest of the shingles, use either a paint roller or a spray gun. It’s your choice! Many DIY enthusiasts use the spray gun, although it can be more expensive than a paint roller. They use it for slate or clay shingles because it can fill all the gaps and uneven surfaces with the coat. 

Assess the Situation and the Necessary Number of Coats

At this point, before you do anything else, stop and assess the situation. Start by trying the chosen color on a small surface and see how it applies to the whole rooftop. Next, see how to apply a single coat and wait for it to dry within 24 hours. You can then apply the second and decide if there is a need for another coat. After you’ve applied the last coat, let it dry and enjoy the refreshing and shiny appearance of your home.

Closing Thoughts on Painting a Shingled Roof

From finding the right roof paint for shingles to predicting the weather and purchasing the right equipment, painting roof shingles can be an exhausting DIY endeavor. However, if you follow a few simple steps, such as hiring an inspection, cleaning the debris and dirt, and properly assessing and completing the process, you won’t have any problems!

For this purpose, you can always contact professional services, saving you money, time, and effort. Abbrite is always here – to provide you with high-quality coating and maintenance services for your roof shingles!


FAQ

Is painting roof shingles a good idea?

Yes, it’s a great idea if you know more about the materials, tools, and ideal weather conditions.

Do you need to clean a roof before painting?

Yes, you’ll need to clean the debris and dirt before painting roof shingles.

How much does it cost to paint a shingle roof?

You’ll need to pay around $1000 to paint 20 squares of an old shingle roof or between $1.000 and $1.500 for new shingles.

What color is best for roof shingles?

Lighter colors are better because they reflect the UV rays. However, you can also use darker colors depending on the materials and the color preferences.


Painting the Brick Exterior of Your Home: Everything You Need to Know

There is something about brick houses that never gets out of style. A brick exterior gives your home a modern and old-school look, but caring for it can be quite difficult. Over time, and due to weather conditions, bricks can peel and lose their shine and quality. This is why many homeowners opt to renovate their brick exterior by painting the bricks! 

Painting a brick exterior is hard, but not impossible. It’s the perfect opportunity to give your house a makeover, plus it won’t take much of your time, energy, or money! To properly paint your bricks, you need to select the right paints! For those who are new to the brick exterior field, this article is for you! 

If you want to give your home the renovating it deserves, but don’t know how to paint exterior brick, read on! We’ll let you in on all the secrets of maintaining bricks, and show you the best breathable paint for exterior brick, so you know how to care for your home the right way! 

Can You Paint Bricks & Is It a Good Idea?

You can paint brick exteriors but approach the process very delicately. If you live in a home with a brick exterior that has been that way for a long time, you’ll notice that your bricks need refreshing. 

Painting a brick exterior is recommended in certain periods, like summer through fall. Temperatures should range between 50 and 90 degrees Fahrenheit so the paint can quickly and properly dry. If a rainstorm occurred recently, wait at least three days for the brick to dry. If you start painting on wet bricks, they will trap moisture, and you increase the possibility of the paint peeling back and leaving you with a disheveled exterior. 

Painting bricks is ultimately a long-term, irreversible decision that you need to repeat every three to 5 years to keep things looking well and new. Paint your brick exterior if you are preparing to sell or if your house desperately needs refinishing. 

Before painting your brick exterior, examine whether you can actually paint the brick. Some older bricks are not meant to be colored, and you might end up wasting paint and effort.  

Painting your brick wall exterior is a good idea if you want to renovate for your own sake. They also provide a new effective water barrier for rainy and cold winter days. 


How to Paint Exterior Brick: Comprehensive Guide

Sometimes, you only need time, energy, and the right paint to restore your home in tip-top condition! If you plan on painting your exterior brick yourself, you need to follow a set of rules. 

Here’s a full, extensive guide on how to paint brick exterior the correct way! 

Step 1: Preparations 

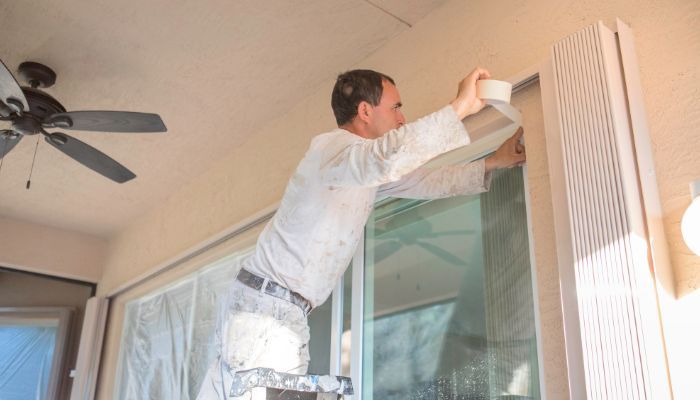
Prepping the bricks and the outside area is the first step toward painting your brick exterior. This step includes removing the following items or covering them with painter’s tape:

  • plumbing outlets 
  • electrical covers 
  • address numbers 
  • window screens
  • light fixtures
  • shutters
  • other household items you have on the house exterior

Don’t forget to cover your patio, shrubs, and driveway so you don’t splatter paint everywhere. 

The next thing you need to do is wash your brick wall with water and mild detergent. A hose is the best thing to help you remove all the dirt and debris from your bricks, but a pressure washer guarantees better results. You can clean even the tiniest cracks and crevices in your brick wall with pressure washers. 

Step 2: Investigate Mold and Mildew 

If you have a few bricks occupied with mildew, try washing the wall with a bleach-and-water solution. Ensure that your wall is dry before painting. 

Check for any cracks in your bricks. You can easily paint over small cracks, but you should repair large holes before painting. A paintable acrylic latex caulk for outdoor use is the best way to fill the cracks in your brick exterior. Leave the caulk to settle before getting your paintbrush. Finally, use muriatic acid to eliminate efflorescence or salt deposits forming on brick surfaces. 

Follow the instructions for preparing the muriatic acid solution. Before adding it, wash the wall again with a hose and scrub it with a stiff brush. You should let the acid settle into the bricks for about 10 to 15 minutes, and afterward, rinse the surface thoroughly with water. 

Step 3: Select the Right Paint 

There are different kinds of brick paints for interiors and exteriors. The most important thing about painting brick exteriors is priming. The best paint for exterior brick walls is latex paint, characterized by higher durability on outer surfaces than oil-based paints. 

Latex brick paint is sought-after for its fade and chalk resistance, flexibility, and gluing. Once you decide on the right paint, first prime the surface with primers or sealers. 

Estimate how much you need to buy to cover the entire exterior to avoid lacking paint. Usually, a gallon of paint will be enough to cover 400 square/feet, but buy more than you need so you can later use the paint for touch-ups. 

Step 4: Begin Painting 

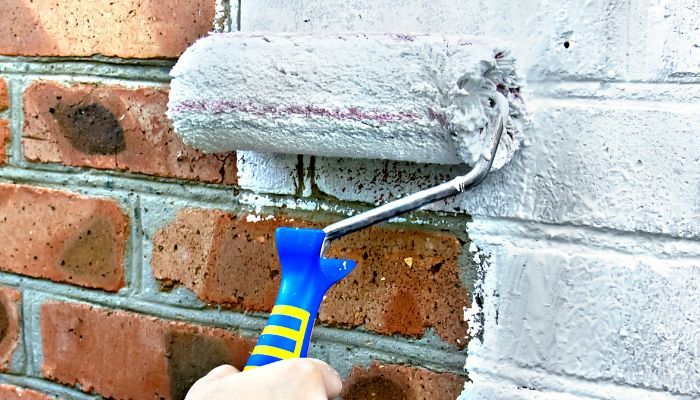
The best tools to paint a brick exterior include paint rollers. You can use paint rollers for both priming and painting indoors and outdoors. Textured surfaces like brick walls need a roller that comes with heavy-duty, 5-wire roller frames and metal extension poles. Using plastic frames and poles can lead to them breaking if you use extra force to paint tiny brick pores. 

Pour your primer into a paint tray. Nicely coat your roller and start painting from the top towards the bottom for optimal results. Use your brushes in spaces where your roller cannot access them. Leave the primer to air dry completely before covering the surface with paint. 

Get professional-grade paint brushes with synthetic bristles and wood handles for comfort. They are the most compatible with latex paint, and it’s advisable to have a couple of different-sized brushes for the job. Use a medium-sized angled brush for small, thin crevices, while a large-sized brush is great for overall painting. 

Apply the paint starting from top to bottom. Thoroughly coat your roller and paint two coats for the best-balanced coverage. 

Step 5: Don’t Forget to Clean Up 

Once you finish painting, clean your rollers, gloves, and brushes. This means thoroughly rinsing the equipment when you finish painting to avoid stains. Before you store them in plastic bags, squeeze your brushes to remove any leftover moisture and water to avoid further damaging the bristles. 

Remove the dry materials from your lawn and remove any painter’s tape. Be careful, though, not to scrub off any paint. 

Choosing the Best Paint for Exterior Brick

The best exterior brick paint should be able to hide weathered and beaten bricks, but it should not trap moisture. Choosing the wrong paint can leave you needing more maintenance, like power-washing, which is never the case for unpainted bricks. 

Besides latex, elastodynamic paint is the best paint for brick exterior. These paints are great for bricks because they have a high level of elasticity. It makes them easier to stick to brick walls, with some elastodynamic paint specifically designed for bricks. Because the paint is elastic, it is perfect for coloring crevices, cracks, and pores on brick exteriors. Elastodynamic paint is recommended because it can prevent future cracks and performs amazingly in severe weather conditions like high humidity. 

You can use acrylic latex paint if you cannot find an elastodynamic paint. Some homeowners find acrylic latex to be a better alternative for bricks. Acrylic latex is the best exterior paint for brick because it can tackle grease and mildew and quickly evaporates any moisture the brick has absorbed. 

Choosing paint for brick exteriors can be confusing, especially since painting bricks is an irreversible process. For guaranteed best results you and your family will be happy with, it’s best to turn to professionals. 

Certified home-keepers will always know how to choose the appropriate paint for your house. If you are looking for the best services for your home exterior, reach out to AA Brite in Tucson! They offer everything from roof repair and coating to interior, commercial, and exterior painting and are available 24/7! 

Painting Brick Exterior: Closing Remarks

Painting a brick exterior is not the easiest of tasks, but it’s possible. If you follow the rules and guidelines mentioned in this guide, your home will look better than ever in no time. For the best paint job, ensure you are painting from top to bottom using both paintbrushes and rollers. Pay attention to the crevices and repair any cracks before painting your brick exterior. The best brick exterior paints include later acrylic and elastodynamic paints. 

When approached with dedication and care, painting your bricks can be just the thing to refresh your exterior. If you are still determining your picks, you can always trust professionals to avoid any mistakes! Repainting your bricks can be one of the best decisions you can make for your home! 


FAQ

Is it better to spray or roll exterior paint on brick?


Using a spray than a roller to paint a brick wall and provide even coverage is easier. 


Does exterior brick need to be sealed before painting?


Yes, the exterior brick must be sealed before painting, so adding a layer or two of masonry sealer should be applied to the bricks. 


How long will painted brick last?


A good paint job on brick exteriors can last 15 to 20 years. 


What is the most durable paint for brick?


The best paints for bricks are elastodynamic and latex acrylic paints.

Painting Over Wallpaper: Can You & Should You?

Can I paint over wallpaper? This is a topic that has sparked many debates between interior designers and homeowners. And we can all agree that it can be a tempting solution when you want to refresh the look of a room without the hassle of removing the existing wallpaper.

While some believe it is a great way to update a room, others view it as a shortcut that could lead to long-term home damage. So, can you paint over wallpaper, and should you even do it? 

We’ll explore the potential benefits and drawbacks of this approach, providing you with the necessary insights to make an informed decision for your next home improvement project. So, let’s go and uncover the facts about painting over wallpaper.

Can You Paint Over Wallpaper?

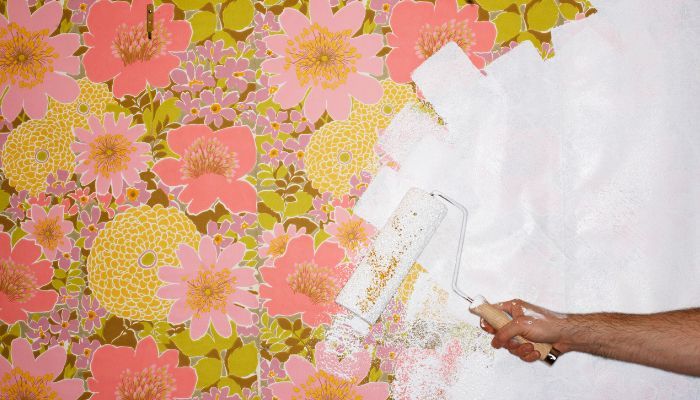
Yes, you can paint over wallpaper but with some caveats. It is possible to paint over wallpaper if the existing wallpaper is:

  • firmly adhered to the walls
  • in good condition
  • free from any peeling or bubbling

Wallpapers like vinyl or washable wallpaper are more suitable for painting compared to others. Before proceeding, assess the wallpaper’s condition and ensure it is a suitable candidate for painting.

Painting over wallpaper requires taking several important factors into account. These factors can significantly impact the success and quality of the paint job.

Wallpaper Condition

If the wallpaper is in good condition with no peeling edges or bubbling, painting over it can be a good option. On the other hand, if the wallpaper is damaged and peeling, painting over it is not recommended.

Wallpaper Type

Different types of wallpaper react differently to paint. Vinyl, washable, or coated wallpapers are generally more suitable to paint over due to their smooth and durable surfaces. On the other hand, textured or heavily embossed wallpapers may not yield satisfactory results.

Wallpaper Texture and Pattern

The wallpaper’s pronounced texture may still show through the paint, resulting in an uneven or textured appearance. Smooth or lightly textured wallpapers tend to work best when painting over them.

Wallpaper Seam Visibility

Note that some wallpapers have more visible seams, and painting over them may not fully conceal them. This will certainly impact the overall appearance of the painted wall.

Potential Adhesion Issues

You should be aware that not all wallpapers have a suitable surface for paint adhesion. Some of them have a glossy or slick finish, which can prevent paint from adhering properly. In such cases, you may need to do additional surface preparation to promote better paint adhesion.

The Thickness of the Wallpaper

Thick wallpaper with raised patterns can create a textured look when painted over, which may be desirable. However, this wallpaper can also cause problems when painted and may require using more paint than needed for a smooth surface.

Looking at the above factors, painting over wallpaper does not seem like a suitable option for all types of wallpaper or situations. Carefully take into account every factor before starting the process.

How to Paint Over Wallpaper: The Process Explained

The process of painting over wallpaper is not complicated, but it requires proper preparation and technique to achieve a smooth and professional finish. Follow this guide to help you paint over wallpaper.

Step 1: Clean the Wallpaper

Thoroughly clean the wallpapered surface to remove any dirt, dust, or grime with a mixture of warm water and vinegar. You can also use water and mild detergent, gently wiping the walls with a sponge. Allow the walls to dry before continuing.

Step 2: Sand the Wallpaper 

Inspect the wallpaper for any tears, holes, or loose edges. Use wallpaper adhesive or a suitable repair product to fix these issues, and follow by using a sanding sponge to gently rough up the wallpaper. This will create a surface for the primer and paint to cohere to. Avoid using too much pressure because pressing too hard can damage the wallpaper.

Step 3: Prime the Wallpaper

Applying a high-quality primer specifically formulated for wallpaper is crucial to create a smooth and uniform surface for the paint. The primer will improve paint adhesion, prevent the wallpaper pattern from bleeding through, and provide a better foundation for the paint. The primer should be applied evenly over your wallpaper, and you can easily do that using a brush or a roller. Don’t forget to follow the manufacturer’s instructions  to ensure a successful job. The primer should dry completely.

Step 4: Test the Paint

Before proceeding with the entire room, it is a good idea to test your chosen paint on a small area of the wallpaper. This will help you evaluate how the paint adheres and looks on the wallpaper. If you are satisfied with the results, proceed with painting the entire room.

Step 5: Paint the Wallpaper

Choose high-quality latex or acrylic paint in the desired color. Begin by cutting in along the edges of the walls with a brush. Apply the paint using a roller and even overlapping strokes. Avoid overloading the roller or brush with paint, which can cause the wallpaper to become unglued or bubble up. 

If your first coat does not fully cover the wallpaper, apply another. Apply the paint in a thin, even layer, allowing the paint coats to dry entirely before you apply the next one. Multiple thin coats will yield better results than a single thick coat. 

Once the paint has dried completely, assess the final result. Look for any areas where the wallpaper pattern or seams may still be visible. Inspect the wallpaper for any gaps or uneven spots. Of course, if you do not like the current look, you can even apply a third coat of paint.

Step 6: Finishing Touches

Once satisfied with the painted wallpaper, you can proceed with additional decorative finishes, such as painting trim or accent walls. But make sure that the painted wallpaper has fully cured before proceeding with any further decoration, addition, or changes.

Can You Paint Over Wallpaper Glue?

Painting over wallpaper glue is certainly possible but not recommended. The presence of wallpaper glue can create adhesion issues and affect the quality of the paint job. So, while it is tempting to skip the boring process of removing wallpaper glue, it is not the best idea to paint over it. Wallpaper glue often leaves behind a textured surface that can interfere with the smooth application of paint. This will lead to the creation of bubbles or peeling of the wallpaper. 

Let’s not forget that any texture or marks left by the wallpaper glue can show through the paint. Additionally, wallpaper glue can retain moisture, potentially causing paint to peel or develop unsightly stains. Moisture trapped beneath the paint can also lead to mold growth.

For the best results, we advise you to remove the wallpaper and glue completely before painting. Use scraping tools or solvents to strip off your wallpaper and clean the surface. If you must paint over wallpaper glue, apply a coat of primer specifically designed for this purpose to help the paints adhere more easily to the surface. And choose high-quality latex-based paints. Avoid using oil-based paints, as they tend to react poorly with wallpaper glue residue.

Painting Over Wallpaper: Final Words

The conclusion is that you can paint over wallpaper, but consider several factors before deciding if it is the right choice. Assess the wallpaper thoroughly and follow the mentioned steps to ensure a high-quality job.

If you are unsure about the best approach or want to ensure professional results, consult with qualified painting professionals. They have the expertise, tools, and experience to assess your situation, provide tailored advice, and execute the painting project with precision and skill.

If you’re seeking professional assistance for your painting project, reach out to a team of experienced painting professionals today. They’ll provide expert advice, quality workmanship, and a hassle-free experience to transform your space into a stunning showcase. 

FAQ

Is painting over wallpaper a good idea?

Painting over wallpaper can be a good idea in certain situations. It can save time and effort compared to removing it, especially if the wallpaper is in good condition. Evaluate the wallpaper’s type, condition, and the desired outcome before deciding to paint over it.

What kind of paint do you use over wallpaper?

Use high-quality, acrylic-latex paint designed to cover wallpaper. It should also be washable and durable. These paints dry relatively quickly, allowing for multiple coats if needed. 

Do I need a primer to paint over wallpaper?

Yes, you need a primer to help the paint adhere properly and prevent damage to the wallpaper surface. A primer designed for use over wallpaper creates a smooth surface and enhances paint adhesion.

How do you hide wallpaper seams after painting?

Use a paintable caulk or spackle to fill in the seams. Allow the caulk or spackle to dry before sanding it smooth. Then, paint over the repaired area with the same color as the rest of the wall. You can also apply a textured finish to disguise wallpaper seams or use creative solutions to hide seams. Hang artwork or decorative items strategically to cover or divert attention from the seams.

Repairing a Metal Roof: The Basics

Metal roofs are repaired to increase their durability and longevity because changing the whole roof presents a next-level project type. Metal roofs, like any other roofing system, can get damaged over time due to weather conditions, improper installation, or general wear and tear.

When faced with a metal roof repair, knowing the basics before starting the intervention is essential to ensure a successful and long-lasting solution. Metal roof repair requires specific knowledge and techniques to address issues effectively.

From identifying the source of leaks and inspecting the extent of damage to selecting suitable materials and executing the repairs, each step plays a crucial role in restoring the roof’s integrity. But don’t stress; this article explores how to repair metal roof, so keep on reading.

Signs It’s Time to Repair a Metal Roof 

Metal roofs are widely known as a very durable roof choice, but they are still not indestructible. Over time, various factors can cause defects and damage, requiring a timely metal roof repair.  

By recognizing the signs that indicate the need to repair metal roof, homeowners and building owners can address issues promptly and prevent further damage. The following section presents some of the signs that might call for metal roof repairs.

Leaks

One of the most obvious signs that a metal roof repair is needed is the presence of leaks or water intrusion. Leaks are a definite sign of roof damage; however, they may not be the core problem but a sign of more extensive, underlying issues.

Some of those issues include warped roof panels, rust-induced holes, or a failing roof’s sealant. If leaks are not repaired, they can provoke damage to the electrical systems and lead to health-treating mold growth. 

If there are water stains on the ceiling, drips, or dampness inside your property, it’s crucial to address the issue promptly to prevent water damage, mold growth, and further roof structure deterioration.

Loose or Damaged Panels

Repairing metal roof is necessary if the panels become loose or damaged. Loose panels allow water to seep underneath, leading to leaks and cracks, mold, electrical troubles, potential structural damage, and more. 

It’s important to inspect the roof regularly for signs of loose or damaged panels, such as visible gaps, bent edges, or panels that have shifted out of place. If you’re not experienced in doing roof inspections by yourself, search for metal roof repair services near me and check with a metal roof repair expert in your area. 

Rust and Corrosion

While metal roofs are specifically made to resist rust and corrosion, they can still be affected over time. Rust and corrosion of the metal roof lead to a series of additional issues. This is especially true if the protective coatings or paint layers become compromised or are initially of lower-quality materials.  

If you notice rust spots, pitting, or corrosion on your metal roof, you should not waste time. These issues need to be addressed, and metal roof repairs must be implemented promptly to prevent further deterioration.

Worn-Off Sealant

Over time, sealant can crack, shrink, or deteriorate due to external exposure to the elements. Cracked or damaged sealant can allow water to penetrate the roof system, leading to leaks and water damage. A metal roof can last 50 to 100+ years, but the sealant lifespan is around 20 years, so this is a completely expected and logical issue.

If you notice any changes and you wonder if you can find metal roof repair near me, you are right to do so. Damaged sealant can lead to more severe damage to the roof and the house itself and cause significant problems that will be more expensive to fix.

Debris

The accumulation of debris, such as leaves, branches, and dirt, can trap moisture and promote the growth of moss or algae on a metal roof, accelerating the deterioration of the metal surface.

The debris needs to be removed regularly as part of the metal roof cleaning and maintenance.

Main Considerations When Repairing Metal Roof

Metal roof repair requires a very serious approach, and many factors need to be weighed in to ensure the safety of workers, the longevity of the repair, and the overall performance of the roof. Whether you are pulling a DIY metal roof repair project or hiring a professional contractor, it is essential to take the following considerations into account.

Safety Precautions

Safety comes first and should always be a top priority when working on a metal roof. The steep slope, slippery surface, and height of the roof pose significant risks. This requires the use of proper safety equipment such as harnesses, fall protection gear, and non-slip footwear.

Also, be sure to check if the work area is clear of debris and other hazards to prevent possible accidents. And if the repair job involves electrical components, turn off the power supply to eliminate the risk of electric shocks.

Metal Expansion and Contraction

Metal roofs are prone to expand and contract as they heat up and cool following temperature fluctuations. This movement can cause stress on fasteners, seams, and other components, leading to potential leaks and damage. When repairing metal roof, it is important to consider the expansion and contraction properties of the material.

Compatibility of Materials

Different metals and coatings may have different expansion rates, corrosion resistance, and weathering properties. Using incompatible materials can lead to accelerated deterioration and premature failure.

Regular Maintenance

Repairing a metal roof is a good occasion to check and determine the condition of the whole roof and note any underlying issues. Promptly addressing minor repairs and conducting routine maintenance, such as cleaning debris or clearing clogged gutters, can extend the lifespan of the metal roof and prevent larger issues from arising.

Metal Roof Repair: Step-by-Step Guide

Repairing a metal roof involves a systematic approach to provide a successful and long-lasting solution. We are sharing a step-by-step guide to help you out in your quest to pull out your metal roof repairs effectively and safely.

Step 1: Safety Precautions

Before starting any metal roof repair work, prioritize safety. You should be equipped with all necessary personal protective equipment, such as gloves, safety glasses and non-slippery footwear. In addition, use proper fall protection equipment if working at heights. Make sure that the working area is hazard free and clear of debris. 

Step 2: Identify the Problem 

Thoroughly inspect the metal roof to identify the specific areas in need of repair. Look for signs of leaks, loose or damaged panels, rust, corrosion, or compromised sealants. Assess the damage extent and make a plan on what would be the best option to move forward with the metal roof repair.

Step 3: Gather Materials and Tools

Based on the identified issues, gather the necessary materials and tools for the repair. If you do not know what material and tools you need, consult a professional metal roof repair service. This may include replacement panels, fasteners, sealant, flashing, and appropriate tools such as screwdrivers, drills, and safety equipment.

Step 4: Remove Damaged Components

Carefully remove damaged components, such as panels, fasteners, or sealants. Take caution to avoid further damage during removal. If removing panels during the metal roof repair, mark their positions to ensure correct reinstallation.

Step 5 – Replace or Repair Components

Replace or repair the damaged components using suitable materials and techniques. Install new panels, ensuring proper alignment and secure fastening. Replace any deteriorated sealants or damaged flashing, following manufacturer guidelines for installation and compatibility.

Step 6 – Test the Roof

Conduct a water test, if necessary, to verify the effectiveness of the repairs, and check for any remaining leaks, loose components, or potential issues. 

Final Words on Metal Roof Repairs

Repairing metal roof is quite a complex undertaking; hence it requires careful consideration and proper execution. If you are going for a metal roof repair DIY, follow a step-by-step approach, prioritize safety, identify specific issues, use compatible materials, and conduct regular maintenance, so you can address the problems effectively.

However, metal roof repairs can be complicated for most individuals and may require professional expertise. If you’re unsure about any aspect of the repair process or if the damage is extensive, it is highly recommended to seek the assistance of experienced metal roof repair contractors near your location.

You can call top roofers in Tucson, AZ, as they can provide specialized knowledge, skillful execution, and access to the necessary tools and materials. Don’t hesitate to take action if you identify any signs of metal roof damage or deterioration!

FAQ

Are metal roofs harder to repair?

Metal roofs can be more challenging to repair compared to other roofing materials due to their unique characteristics and installation methods.

How often do you need to replace screws in a metal roof?

The frequency of screw replacement in a metal roof depends on the quality of the screws, exposure to weather conditions, and proper installation.

Do metal roofs leak more than shingles?

When properly installed and maintained, metal roofs are generally less prone to leaks than shingle roofs. However, like any roofing system, they can develop leaks over time.

What is the average lifespan of a metal roof?

A metal roof’s average lifespan is typically from 40 to 100 years, depending on the type of metal, maintenance, and environmental factors.


Paint Prep: Getting the Walls Ready for Painting

Painting your walls is the perfect way to make your room look vibrant and fresh. But to ensure long-lasting effects and a visually appealing look of your walls and living space, you need to learn how to prep a wall for painting. Proper preparations will help you get flawlessly smooth walls and extend the life of your paint. 

Preparing a wall for painting involves a series of steps to get the surface ready for the paint application. Cleaning the area, removing all the wall hardware, sanding, priming, and letting it dry are necessary steps in the prep process. Also, proper equipment is vital for executing the work efficiently and easily. You can avoid issues like peeling or uneven paint application by closely following the proposed sequence of actions. 

If you want to achieve a perfect finish, keep reading to find out how to prepare a wall for painting!

The Importance of Wall Prep

Properly preparing the walls before painting is essential to avoid a mediocre paint job and achieve a flawless-looking finish. Take your time to prepare wall for painting and enjoy the benefits you’ll gain:

  • Smooth paint application. Prepare the surface by cleaning, sanding, and priming so the wall will be smoother and ready for the paint to adhere successfully. It will also eliminate visible roller marks or brush strokes. 
  • Reduced the risk of peeling. A proper wall prep will help reduce the risk of bubbling, peeling, or flaking. 
  • Enhanced durability. An adequately prepared wall will increase paint durability and create a solid base for the color. 
  • Better paint coverage. Removing all the wall imperfections will ensure consistent color across the entire surface and prolong the lifespan of the paintwork.
  • Easy maintenance. A well-prepared surface is easier to maintain and clean. Proper prep cleaning techniques make it easier to wipe the wall surface without damaging the paint or leaving residue.

Preparing the surface will significantly increase the chances of achieving great results and enhance the overall visual appeal of the painted wall. 

How to Prep a Wall to Paint: The Essentials

The following guide elaborates on the crucial steps for preparing walls for painting. You will have a chance to expand your knowledge about cleaning the area and gathering the necessary equipment for cleaning, sanding, and priming the walls. You’ll also pick up valuable techniques to achieve a professional-looking job and transform the appearance of your household.

Clear the Area and Make Sure You Have the Right Tools and Equipment

Start by moving the furniture and the wall decorations to the center of the room, and make sure to use plastic sheeting to cover them and protect them from paint splatters. Also, collect all the tools and equipment you may need, such as: 

  • Safety goggles and protective gloves 
  • Cleaning materials like mild detergent, warm water, and a clean cloth or sponge
  • Scraper to remove loose paint, flaky patches, or wallpaper 
  • Sandpaper to smoothen rough areas and to prepare the surface for paint adhesion
  • Patching compound and patching knife to fill any holes and cracks
  • Primer  

Remove Hooks, Nails, and Screws 

The second step is removing all the hardware on your wall, like hooks, nails, and screws. Also, unscrew electrical sockets and light switches to clear the entire space for further work. Removing these attachments will eliminate obstacles during the wall prep and provide flexibility when applying the paint. This is a simple but necessary step as it directly influences the success of your painting project. 

Clean the Wall Surface 

Cleaning the wall surface is essential as it prepares the wall for the next steps and determines the success of the final result. You can use a wet cloth or sponge to gently scrub and clean the surface from dust, stains, or dirt. It is crucial to exercise caution when cleaning around switches, outlets, and the baseboard, ensuring that the cloth remains damp rather than overly wet. 

For walls exposed to oil or grime, use grease-cutting cleaning products, follow up with warm water to remove the remaining cleaning agent, and then wipe the wall with a damp cloth. Make sure you let the wall dry before moving on to the next step. 

What if there is mildew?

Mildew can be a serious problem, and treating it efficiently will hugely impact the final look of the painting job. Mildew usually forms in the corners, so you’ll need to check that area carefully. Clean it properly because if you paint over it, it will grow again through the new paint. You can easily clean mildew with a mix of water and bleach. Apply the mixture on the wall, let it sit for a while, and scrub the mildew with a soft brush.

Remove Imperfections on the Wall

Check if there are cracks, holes, or uneven surfaces. Use a scraper to remove loose paint or wallpaper so the paint won’t look messy. Fill the holes and cracks with a patching compound using a filling knife. Always use high-quality filler that creates a strong bond with the surface. 

If the area is severely damaged, you should apply a few layers of the patching compound, and each layer must dry before you add the next one. 

Sand the Surface 

To smoothen the area and achieve an even finish, you need to sand the wall surface with sandpaper or a sanding block. Start by sanding rough spots, previous paint, and the patched areas to even the whole surface. This will not only help you create an even and smooth surface but also create a better base for the paint adhesion. 

Smoothing is necessary, especially if your wall was previously painted with gloss paint. In that case, you can use medium-grit sandpaper; for water-based paint, you can use fine-grit sandpaper. After sanding the wall, vacuum the dust and wipe it with a clean cloth.

Apply Primer 

After you have fixed the uneven areas on the walls, it’s time for a primer. Applying primer is crucial if the wall is porous or if you’re transitioning from darker to lighter tones. A coat of primer disguises imperfections, gives a smooth finish, and further evens the surface so the paint will lock onto it successfully. 

You should do thorough research to find a primer that suits the surface and the paint you are planning to apply. You should use a brush to work on the corners and a roller for the large surface of the walls. 

Don’t apply primer to cover mold, mildew, or water stains. These problems need a different approach, and covering them with primer will just raise more issues in the future. Also, keep in mind that after the first coat of primer, you should let it dry for at least three hours. 

Ready for Painting 

After all of these preparations, we finally come to a point where we can discuss the last and most exciting process – the painting. Now the wall is perfectly smooth, so you can choose and apply your favorite paint color. You will only need a roller or brush for the paint application. Usually, two coats of paint are sufficient, but you can apply more to get the desired color intensity. Remember to let each coat dry before you add the next one. 

Concluding Remarks on Wall Prep

Clearing the area, sanding the surface, priming it with the right products, and using all the necessary supplies are vital steps when preparing the walls for painting. Learning how to prepare walls for painting is crucial to enhance the beauty of the paint and achieve long-lasting results.

Remember, a properly prepared wall for painting is the foundation for a successful project, and if you struggle to achieve great results, you can always use help from professionals.

A team of professional painters equipped with top-notch tools will even out the surface of the walls, use paint sprayers to apply the paint, and clean up after they’ve finished. They will return the furniture in place and hang or attach everything that goes on the walls, leaving you to enjoy your newly painted home. 

FAQ

Do I need to prime before painting?

It’s always better if you prime the wall before painting, especially if there are cracks and wrinkles on the wall. By priming the surface, you will achieve a better texture, and the paint will look drastically better. 

What happens if you don’t wash the walls before painting?

Don’t ever skip washing the walls before painting. This is an important step, and if it’s not done properly, it will negatively impact your final job. 

How long to wait between prime and paint?

Letting the walls dry between the prime and paint should take around 3 hours, depending on the room’s temperature and if there is humidity in the environment. Be patient and wait for the prime to dry.

Can I just paint over dirty walls?

No, that’s simply a terrible idea, and you will spend time on something that won’t look good in the end. The dirt, grime, mold, and mildew must be removed before painting the walls.

Stucco or Plaster: How to Tell Them Apart & Choose One

If you’ve ever partaken in a stucco plaster debate, could you tell what makes the two different from one another? A lot of people can’t really tell the two apart, mainly because they’re very similar building materials. 

However, there’s a stucco vs. plaster debate going on regarding whether both are interchangeable, and in short — they are not. In a plaster stucco showdown, what’s the better option for your property? Let’s find out how to make a distinction between them and what to consider before choosing one.

Stucco: What Is It & Where It’s Used

Stucco, also known as render, is a building material used on walls. Stucco is made of water, aggregates, and binder. When working with stucco, it’s essential to understand that it’s best applied when wet. Stucco gradually hardens until it reaches a point of very dense sturdiness. 

In general, the word stucco originates from the Italian word for plaster. If you’ve never noticed before, a lot of house exteriors in the southwest U.S. are made of stucco, complemented by terracotta shingles. For years now, stucco has been used as an embellishing coating on both ceilings and walls (interior and exterior).

In theory, stucco is a cement-based wall cladding used to add structured finishes. One of the many perks of stucco is that it comes in many colors and textures. It breaks down into two main stucco systems: the 3-coat and 1-coat system. Due to its sturdiness and durability, stucco is a great option for hot and cold environments.

Furthermore, stucco comes in two different forms: synthetic and traditional. Traditional stucco contains sand, water, and lime. Synthetic stucco does not use cement and lime but acrylic resin to boost the resistance to water damage. 

Plaster: What Is it & Where It’s Used

Usually made of lime/gypsum, water, and sand, plaster is a paste-like building material that’s used to coat ceilings, walls, and interior sections. As plaster is applied, it hardens while drying, just like stucco.

As a building technique, plastering is an ancient practice used to build homes, create art, and so on. Plaster is a material used to add a protective or decorative coating to ceilings and walls, as well as casting and molding ornamental features. 

Based on what type of binder is used, and the environment of the application, there are several distinct plastering techniques. 

  • Lime-based plaster: In this technique, lime is the leading binder. It’s the most appropriate option for environments that see a lot of water.
  • Gypsum plaster: This technique is mostly applied in building techniques that are more classic and require embellishments. Gypsum plaster is the technique you’ll see in historic and old buildings.
  • Cement-lime plaster: This particular building technique combines Portland cement and lime and is used when resistance, sturdiness, versatility, and compactness are key.

Stucco vs Plaster: Key Differences

In practice, people often refer to stucco as the coating on the building’s exterior sections, whereas plaster is considered the coating of the interior walls. However, both plaster and stucco can be used internally and externally. 

One major difference between stucco and plaster lies in the visual aspect. As a finish, plaster is smoother, and stucco is more roughly textured. When it comes to the components of both, one can safely say they’re more or less the same: clay/cement, lime, water, and sand (with the possibility of additives).

Compared to many paints, plaster is non-toxic and contains no VOCs (volatile organic compounds) or other hazardous components. Adding color to stucco or plaster is done by mixing all-natural pigments. In addition, using plaster in interior walls won’t generate toxic dust. 

Stucco takes the lead when comparing plaster vs. stucco in terms of durability. Stucco is generally more durable than plaster. On the other hand, plaster offers more customization, whereas stucco is less flexible. For instance, builders put plaster in molds to create custom designs. With stucco, they won’t be able to do that since it’s more rigid and harsher. 

Even though builders can use stucco and plaster interchangeably as indoor and outdoor finishes, they prefer stucco as an exterior building material and plaster as an indoor one. 

Noteworthy Highlights

  • Stucco is deemed more durable than plaster;
  • Due to its rough texture, stucco isn’t the best option when doing custom designs;
  • Put plaster in molds to create customizable designs;
  • Plaster is a preferred choice for indoor projects, whereas stucco performs best as an outdoor finish;
  • From a technical point of view, you can use both stucco and plaster outdoors and indoors;
  • Price-wise, stucco is a bit more expensive than plaster.

Pros and Cons of Stucco

As mentioned, stucco consists of cement, sand, and lime-based components. Sometimes, fiberglass is added to increase its texture and rigidness (some building applications call for this).

Typically, you’ll find stucco on the exterior walls of residential buildings. Still, it isn’t strange for particular interior designs to include stucco in the interior walls of houses, especially those carrying a Mediterranean design staple.

Pros

  • Long-lasting
  • Can increase a property’s value
  • Resistant to mold, rot, and mildew
  • Fire-resistant

Cons

  • It’s porous 
  • Tends to form dark spots
  • Expensive

Pros and Cons of Plaster

The main feature of plaster is that it’s very flexible and can be used in almost every interior or exterior design. Unlike stucco, plaster is smooth and used to cover rough edges and/or uneven surfaces within buildings.

Pros

  • Very tensile
  • Resistant to wear and tear
  • Great insulator and noise-blocker
  • Highly versatile and customizable

Cons

  • Not very resistant to water damage 
  • Can easily mold
  • Can crack with age

Choosing One or the Other: Plaster vs. Stucco

Many homeowners do not pay much attention to the building materials when building their dream home simply because they leave it to the professionals to know what’s best. So, it’s only natural they won’t know the differences between cement plaster vs. stucco.

However, even though you trust the pros to do a stellar job, knowing your options and which building materials to choose for different purposes won’t hurt.

  • Appearance: Looks-wise, plaster is more adaptable and versatile than stucco. If you want to do custom designs, choose plaster since stucco doesn’t perform well for customizations. On the other hand, stucco is a good choice if you prefer a rough texture on your interior walls. 
  • Versatility: By definition, both stucco and plaster are used in exterior and exterior designs. Yet, stucco is better as an exterior option due to its features. Since plaster is more delicate than stucco, using it on your exterior walls might not be a great idea.
  • Durability: In terms of lasting, stucco takes the lead. A well-applied stucco can last way longer than plaster. On average, you can expect stucco to last for up to 50 years, given you’ve taken care of it well. On the other hand, plaster is a bit tricky. It will either last up to 70 years or begin to crumble after 20. 
  • Price: Cost-wise, stucco has a slightly higher price than plaster. On average, stucco costs $8 per square foot. To buy plaster, you’d pay approximately $2 and $10 per square foot. The discrepancy in the cost is due to the quality of each, the color, etc.

The Stucco Plaster Debate: Ultimate Explanation

Homeowners and construction professionals value both plaster and stucco for their sustainability, endurance, and aesthetics. Still, there’s more to these building materials than what meets the eye. For one, both are great paint alternatives that contain no toxins and are fairly easy to work with. Plus, both are eco-friendly building materials composed of components found in nature. 

Stucco and plaster are more or less the same, with a few distinctions. In terms of composition, both include water, sand, and binder in their ingredient list. Looks-wise, plaster offers a smooth finish and can be placed into molds for custom designs. Stucco, however, is not so flexible. 

As opposed to plaster, stucco feels rough to the touch and looks different than plaster. If you want the exterior of your property to be well-shielded against mold, water damage, and fire, choose stucco. If you’d rather have custom designs inside your property, go for plaster. 

If you want to add value to your property, choose stucco — it’s a great curb appeal booster. Potential buyers will appreciate a well-made stucco when you decide to put your property on the market.

FAQs

Which is more expensive, plaster or stucco? 

Stucco is a bit more expensive than plaster.

Does stucco increase home value?

A well-maintained stucco, plain or colored, is a great booster of the property’s curb appeal and really adds to the estate’s overall value. 

What are the two types of stucco?

Stucco comes in two varieties: traditional and synthetic stucco.