
Serving Southern Arizona Since 2003
Call (520) 406-5900

Author: Service Lifter

How to Paint Your Home’s Interior in 17 Steps


  • Step 1: Remove pictures, paintings etc. from the interior walls in preparation of painting.

    A good rule of thumb for all interior painting, regardless of the contractor, is for you to take down anything expensive yourself. Painters don’t know if Great Great Grandma gave you that picture or if it was purchased at the flea market.

  • Interior Painting Step 3

    Step 2: Move furniture away from the wall when practical. i.e. if its not too big to be moved.

    We will move the furniture away from the wall for you and cover it with plastic or canvas as required.

  • Interior Painting Process

    Step 3: Scrape loose and flaking paint.

    We will remove loose and flaking paint with a scraper prior to repainting.

  • Interior Painting Step Move Furniture

    Step 4: Set up scaffolding and ladders as required.

    99% of the time we do our work using ladders, which we ALWAYS lay down at the end of the day. Whether we use ladders or scaffolding as the owner you need to make plans for keeping children – and adults who act like children safe. Being a tort-filled world I have to add we are not responsible for children or adults playing on any ladders or scaffolding at your house. If there is an injury from this, excluding my employees, your homeowners policy is going to be held responsible. Not much fun to talk about but important to know. Shown below is a picture from 2010 and one of the rare occasions where we had to use scaffolding.

  • Interior Painting Step Move Furniture

    Step 5: As required cover windows, doors, fixtures, etc. with plastic.

    Walls and ceiling of empty building are frequently sprayed with paint, which means lots of plastic to protect non-paintable items. Furnished buildings are typically brushed and rolled and don’t need every door and window covered. If you have a preference one way or the other please let us know as we’re easy to work with.

  • Interior Painting Step Move Furniture

    Step 6: Degrease or clean walls as required with a liquid TSP type cleaner.

    If your walls are not greasy or stained with nicotine then skip this step. Surfaces with grease or heavy nicotine stains require TSP type cleaning. TSP and TSP substitute cleaners are basically industrial strength soap. Several times over the years we’ve had to scrub down an entire house prior to painting it. If necessary it’s included as a part of the bid.

  • Interior Painting Step Move Furniture

    Step 7: Neutralize and rinse off TSP.p>

    “Neutralizing TSP” is a fancy way of explaining the application of baking soda water to neutralize the soap. The baking soda water is also rinsed off prior to painting.

  • Interior Painting Step Move Furniture

    Step 8: Remove switch plate covers, outlet covers, etc

    As a standard we remove switch plate and outlet covers so you get a cleaner paint job. The exceptions being covers dealing with electronic data cables such as Cable TV, phone, internet and networks. We don’t remove these so there is no risk of bumping a loose wire and disabling the system.

  • Step 9: Caulk cracks.

    Cracks a few inches long are not problematic. If you have one running the length of your wall or ceiling then there are some more things you need to know. Please see the stucco repair section of this web site.

  • Step 10: Fill nail holes.

    PLEASE tell us if you want to return your pictures and paintings to the same spot so we don’t fill the holes. Many people want to re-organize after painting and we fill the holes unless told otherwise.

  • Step 11: Spot patch stucco texture on sheet rock.

    We paint the body AND the fascia since a job is not complete until they are both painted.

    Small patches on an interior are not usually a problem, as the size grows from a postage stamp to a deck of cards, the rules on what to expect change. See Interior Stucco Repair. Raw wood, new sheet rock patches, caulk lines etc. will be primed and repaired to facilitate a good finished product. Unfortunately, I don’t have any good pictures of interior stucco patching. So shown below is what my wife and I did with our house. Stucco before and after. For reference, the window in the middle left of the before the picture is pass-through at the sink in the “after” picture.

    Before


    After

  • Interior Painting Step Move Furniture

    Step 12: Paint with premium grade interior paint.

    Premium interior paint is the way to go. It covers better and runs less. If you want to see a painter frowning, give them cheap interior paint and ask them to make the finished product look nice. Our two favorite paints are Suprema and VersaFlat. Suprema is hard and wear resistant (scrubable) while Versaflat adheres well and is softer. It’s great for ceilings and low wear areas. If you prefer another paint, we have additional choices from most all main line manufactures.

  • Step 13: Remove scaffolding and ladders.

  • Step 14: Reinstall switch plate covers.

    After the painting is complete, switch plate covers are put back on. Painting without switch plate covers on is one of the single biggest ways to get the professional look.

  • Step 15: Professional Clean up

    We always clean up the job site.

  • Step 16: Quote includes all material and labor for list above.

  • Step 17: Job inspection and walk around with the client.

    We walk the finished project with you. Our interior motto is “It’s easier to paint than to argue.” In the process of walking the job, if you see anything we missed, we will take care of it. Occasionally people see shadows and think it’s a missed spot. Instead of arguing we paint it again, and move on. When we’re finished with the walk around, we collect the final payment.

AA Brite 24/7 Logo

Get a Quote for Roofing or Painting Today!
Call (520) 406-5900

Get a Free Estimate!

More Painting Tips


Continue reading

Roof Adhesion Issues


Roof Adhesion Issues

Greetings,

Robert Anderson, Principal Owner of AA Brite 24/7 here addressing some adhesion issues we’ve run into on elastomeric coated roofs in Tucson AZ. If your not in a desert climate, the principles discussed here are sound, but from what I’ve seen the materials and the way they age are significantly different than in other parts of the country.

We’ve been patching and re-coating elastomeric roofs professionally since 2003. For the most part, large scale adhesion issues are not all that common. The adhesion issues we see with elastomeric coatings the most are the result of a lack of an emulsifier – usually on a patched area.

Until recently almost 100% of the roofs with elastomeric (white or tan rubberized) coatings were applied on top of a tar paper and mopped on tar roof coating. (If your curious about this process then google Hot Mopped Roofing). Elastomeric roof coatings are not compatible with the oils on the surface of new tar or new tar paper.

If a roof was hot mopped with tar and coated without applying a significant amount of emulsifier first, the water based roof coating would fail. Sometimes it failed quickly and other times it would take a few years for the oils to migrate up and break the bond between the rubberized coating and tar.

  • Adhesion Issue Repairs

    Adhesion issues between the cool coating / oily tar underneath it.

  • Adhesion Issue Repairs

    A tar patching compound was used here, and it was not sufficiently emulsified prior to applying elastomeric coating. The Elastomeric roof coating failed to adhere to the tar.

  • Roof Adhesion Issue

    The elastomeric coating has flaked off and washed away as a result of a lack of emulsifier.

Emulsifier is a product that basically dries the oils on the surface of a tar product and allows a water based product to stick or adhere to the tar. Think of emulsifier as a primer that converts oil to something a water based paint wants to stick to.

We run into small emulsifier / adhesion issues pretty frequently – as shown in the above photos. Large scale adhesion issues based on emulsifier problems or misuse are fairly rare. Ironically the desert sun is helpful with this type of adhesion issue. The sun dries oils on a roof the same as it drys out our skin. Over a period of years the oil eventually evaporates off the surface and a once oily roof can be coated without using emulsifier or primer first. As it ages and becomes drier (less oily) the material goes from a rich black to a grey color.

Oil based tar on patched areas comprise 95% of the adhesion issues we see here in Arizona.

On rare occasions we run into other adhesion issues for elastomeric roof coatings.

Roof Coating Adhesion Issues

The roof in this photo was covered with some kind of rubber – similar to that in a bicycle inner tube. It’s my understanding this material is fairly common elsewhere, but in Arizona it pretty rare to see it on a home. It was then coated with an elastomeric – which didn’t stick to it.

This picture was taken in 2011 when I first saw the roof. At the time we were unaware of any primers or elastomeric roof coatings capable of adhering to it. We tried various primers and coatings in test areas and found one product that was marginally successful. It was basically a last resort and it held for about four years with a couple of areas needing touch ups. The alternative was to rip off the rubber and start over – which the client was against doing at the time.

Since then new products have been developed and we have had success using both Tucson Rubberized Primer 295 and Tucson Rubberized Emulsion 210. We do a test area first, let it cure for a week and then do a pull (adherence) test using a high strength tape. If its hard to pull off with high quality tape then the primer or emulsifier is sticking well. Prime or Emulsify and then coat with Elastomeric.

Side note here: If the entire roof is surrounded by a wall, even a short one as shown in the photo above, then the coating doesn’t HAVE to stick as well to the roof. If there is a wall on all four sides, then the wind usually can’t get under the coating and try to inflate it like a balloon. If the roof is not surrounded by walls, then typically the wind can blow into a patio or eve under the roof – and push straight up from below the coating. When this happens the grip strength of the coating is much more important.

Silicone Roof Coating

I only half jokingly tell homeowners I believe 100% silicon roof coatings should not be legal since it’s so difficult to patch them. At least it used to be. We’ve always refused to use 100% silicone coatings since they’ve been known as a one and done system. Coat and then you are done. Unfortunately if a patch was needed or a spot cracked out there were no readily known materials available to patch over them. (How do you patch a big scratch in a teflon pan? Throw it away).

In 2016 we ended up taking a roof patch and recoat job where the homeowner had used Silicon Roof Coating to patch three or four areas on his roof. We couldn’t find anything to stick to it – including more Silicon. Once Silicon cures, not much wants to stick to it. 10% silicon added to a regular elastomeric roof coating seems to be about the maximum before getting into future patching problems. We regularly use products containing up to 10% silicon.

In our limited experience with Silicon coatings since then we’ve found as they age in the Arizona sun the surface of the silicon becomes more receptive to getting other materials to adhere to it. We only have experience with about ten of these at this time, and doing a test patch and pull test is always the safest way to see if its something that can be patched.

In our case we are up front with the client about this, give them the phone numbers to two local roof supply companies and ask them to also do some research. We tell them if they can find someone with more experience who can guarantee their work we are fine not taking the job. We are basically patching them as a favor.

More recently – February of 2019 – we’ve tested a couple of new products from Henry’s that are labeled as being capable of patching silicon. I did a free job for a client who had silicon all around his roof mounted air conditioner. It was leaking. So far it’s held up to several rains. I didn’t charge him labor because I’m not confident the patch materials will hold up for years.

One spray can was $35 and one gallon of patch was $69.

If you are reading this and have solid answers and experience with patches on silicon coated roofs I’d love to talk to you or test your products.

AA Brite 24/7 Logo

Get a Quote for Roofing or Painting Today!
Call (520) 406-5900

Get a Free Estimate!

More Roof Problems You May Have


Continue reading

Roof Blisters


Roof Blisters – What Are They and What to Do About Them

What Are Roof Blisters?

Roof blisters are raised pockets of air or moisture that develop beneath the layers of your roof coating. Generally they are created when water gets under your roof coating and can’t get back out.  The moisture expands and creates a blister, weakening your roof. 

What do roof blisters look like?

Shown below are a multiple photos of flat roof or cool coated roof blisters.

Some are not so bad and others show a roof that needs quite a bit more work.

  • Roof Blister Example

    A single blister on a seam. Water somehow got under the roof coating and couldn’t get back out. It expanded as vapor and made this blister. Left alone it might take several years for the daily heat cycle to dry and crack the material in this location.

  • Large Roof Blister

    A roof with more blisters on it than in the first picture. This still isn’t too big a deal from a patch and re-coat the roof point of view. The blisters shown in this photo might add 2 or three hours to the job.

  • Broke Roof Blister

    When I’m doing quotes I try not to step on the blisters and break them open. Once broken water is more likely to get under the coating or leak into the roof. Generally speaking unless its at a scupper or in a ponding area one broken blister is not an emergency.

  • Too Many Roof Blisters

    This roof has way more blisters on it than normal. If memory serves me correctly this is about a quarter of the roof and the blisters added about 8 hours to the job.

  • Large Thick Roof Blister

    A Large and thick blister. I frequently have to push on these with my fingers to see if they are a blister or if this is just a lump of tar from when the roof was mopped with boiling tar. Its pretty common for there to be lumps on a roof thats hot mopped with tar. The only way to tell a blister with thick skin on it from a tar lump is to push on it and see if its soft or hard.

  • Blistered Roof in Tucson

    We didn’t coat this roof. It was next door to a house we were working on. Getting rid of the blisters, patching and re-coating this wouldn’t be too big a deal.

  • Multipel Roof Blisters on Flat Roof

    The same roof as in the above photo, only zoomed in on the vent pipe. There are even more blisters when you look closer. Lots of them have popped or cracked open.

  • Broken versus Unbroken Roof Blisters

    A closer view of a broken blister, and one that hasn’t broken.

  • Thin Roof Blisters

    These are also thick skinned blisters. Compare them to the second and third photos. These are not very tall and not very round. Generally the taller and rounder ones indicate a thicker roof coating. I.E. If the blister looks like and egg the skin is probably thin. If the blister looks like syrup poured cold, the the skin is thick.

What should I do about my roof blisters?

If you notice roof blisters on your roof feel free to give us a call for a free inspection! If your roof needs to be repaired or replaced we’re happy to give you a free quote!

To prevent roof blisters in the future, it’s important to ensure that your roof is recoated according to manufacturer’s specifications as well as industry best practices.

When you roof is recoated, it’s also very important to keep your roof cleaned and well maintained.

AA Brite 24/7 Logo

Get a Quote for Roofing or Painting Today!
Call (520) 406-5900

Get a Free Estimate!

More Roof Problems You May Have


Continue reading

Flat Roof Wrinkles


What Are Roof Wrinkles?

Roof wrinkles are areas of your roof When you see wrinkles on your roof, it may be a sign of undue stress that could cause premature failures, such as opening of overlaps, abrasion of the raised surface, and ponding of water.

What Causes Wrinkles in My Roof?

Wrinkles are a very common occurrence and don’t always mean you need a roof repair or replacement. When you call AA Brite 24/7 for your free inspection we’ll take a look to see if your wrinkles are concerning or if they could result in a roof failure. 

Common causes of roof wrinkles include:

  • Insulation shrinkage
  • Poor tightening during installation
  • Failed adhesion
  • Wind damage
  • Trapped moisture

What do roof wrinkles look like?

Shown below are a multiple photos of flat roof wrinkles.

  • Roof Wrinkles Example

    The brown stains are where the water ponds up when it rains. The wrinkle is circled in red. This particular wrinkle is not worrying me. If it doesn’t have fiber tape added on top of the wrinkle to support it, then just keep an eye on it.

  • Wrinkles on Flat Roof

    These wrinkles don’t cause me great concern. I did have a roof coating manufacturer’s rep look at this roof and several others. Their opinion is a little more harsh than mine, and it’s easy to say tear it off and start over. There is no liability at all for them to go the most conservative route. If this was my roof I could get another twenty years out of it with preventative maintenance and a new coat every four years or so.

  • Roof Blister Example

    The red circles show what your looking for on the top of wrinkles that are going to the next – bad – step. If you click on the picture and enlarge it you can see where the wrinkles have cracked. These need to be taped and patched now.

Another roof the coating manufacturer said this roof needed to be torn off and re-done. It was improperly installed about 10 years ago and not enough tar was used to hold/glue it down to the plywood. In some spots you can feel the paper floating over the plywood as you step on it. It feels like stepping on cardboard that’s bowed up a little bit. There is a kind of pop sound and you can feel it move down a little in certain spots as you walk across it. The reason I don’t believe this needs to be torn off is of the very small likelihood of the wind getting under it and flipping the tar paper over. On a house with eves its common for a roof in great condition to flip up like a bed-sheet if the wind is blowing strong enough. I’ve NEVER seen this happen on roof with parapets (walls) around the edges. In other words if you can easily afford it and want the absolute minimum risk, then definitely tear it off and get a new one installed. If it were my parents or brothers house I’d tell them to keep an eye on it and with maintenance it will most likely not be a problem.

Tucson Roof Wrinkles Repair

What should I do if I notice wrinkles on my roof?

If you notice any wrinkling on your roof give AA Brite 24/7 a call today! We will come by for a free inspection to let you know if the wrinkles on your roof are a real cause for concern or if they can be repaired and maintained – saving you money in the long run! 

AA Brite 24/7 Logo

Get a Quote for Roofing or Painting Today!
Call (520) 406-5900

Get a Free Estimate!

More Roof Problems You May Have


Continue reading

How to Paint Your Home’s Exterior in 19 Steps


Listed below is our exterior painting process and information business and home owners find helpful for preparing to get exterior painting work.

  • Kitchen Painting Before

    Before

  • Kitchen Painting After

    After

  • Interior Painting Step 1

    Step 1: Pressure Wash.

    Clients are frequently surprised at how aggressive our pressure washing is. This is how it is supposed to be. Loose paint is supposed to come off before the painting starts, not after the job is finished.

  • Exterior Painting Process

    Step 2: Trench.

    Most companies spray down to the dirt and then stop. When it rains, the soil moves and there is a line where the paint stops. We do the extra work and trench below grade to prevent this line. After painting we return the soil and rocks.

  • Exterior Painting Process

    Step 3: Scrape Loose Paint

    Pressure washing causes some building material to soak up water. When the wood dries out a small amount of paint will curl up on the edges. After the surface is dry we carefully scrape loose paint. One more step for high quality.

  • Exterior Painting Patch Cracks

    Step 4: Caulk Cracks or Fill them with paint.

    Stucco buildings will always get cracks over time, especially on the parapets and around the windows. We fill these cracks as well

  • Exterior Painting Patch Stucco

    Step 5: Spot Patch Stucco.

    It’s common for small spots of stucco to flake off. Corners have often been chipped by pets or kids with bicycles. We patch these spots for you.p>

  • Exterior Painting Cover Fans

    Step 6: Cover Ceiling Fans, Lights, Utility Meter Faces etc.

    If it shouldn’t be painted it should be covered. We will cover your items with plastic, paper and tape as required to protect them.

  • Exterior Painting Trim Bushes

    Step 7: Trim Back Bushes and Trees As Required

    We trim bushes and trees as needed to provide a quality paint job. Our preference is to have a landscaper do this prior to painting so you get exactly the cut you desire. If it’s not a concern then we take care of this for you. Some people prefer to leave the plants alone, and to paint around them. We are also agreeable to this if its your desire. Shown below is an example of “leave the plants alone”. In situations like this the ideal thing to do is to trim back the plant a reasonable amount, and then to paint around it.

  • Step 8: Remove Sun Screens

    Screens are removed and reinstalled on older homes with metal frame windows so the window frame can be painted. On newer homes the screens can be left in and covered with plastic since the aluminum window frames don’t get painted. If window sun screens are present and are sticking out, they will be removed prior to painting.

  • Exterior Painting Cover Doors

    Step 9: Put Plastic Sheeting on Windows and Doors.

    Our painters’ mantra: “If it doesn’t get painted it should be covered.”

  • Exterior Painting Spot Prime

    Step 10: Spot Prime as Required.

    We apply primer or premium self priming paint to exposed wood or stucco to give you a superior paint job.

  • Professional Exterior Painting Job

    Step 11: Paint Exterior Body and Fascia same or new color.

    We paint the body AND the fascia since a job is not complete until they are both painted.

  • Premium Exterior Paint Options

    Step 12: Premium Exterior Paint.

    It’s ironic that some contractors use cheap paint, because it is more difficult to use and much more abrasive to the spray equipment painters use. It’s false economy for both the painter and the client to use cheap paint. Premium paint applies faster and it goes on thicker, so there is less touch up. We both win–you get a better job and we are not frustrated with dripping paint and worn out machines.

  • Step 13: Application of 3 coats of Premium paint to exterior walls & eves.

    Walls and eves are typically painted end to end 3 times before we move to paint another wall. The first coat is sprayed onto the stucco & eves. The second coat is sprayed on stucco and eves, with the stucco area being back rolled as its sprayed.

  • Exterior Painting Backroll

    Step 14: Backroll.

    Backrolling is when paint is sprayed on with a sprayer and is rolled with a roller. During the process of backrolling, paint is pushed deeper into the stucco with the roller than it would be with a sprayer alone. It’s the equivalent of using your fingers to work shampoo deeply into thick hair. Typically the second coat is backrolled, but on really dry stucco, as in not painted in a long time, backrolling can’t be done until the third coat.

  • Step 15:Exterior fascia is painted two coats by hand.

    This helps us to work the paint into the small cracks in the wood (like back rolling) and lowers the chance of getting paint overspray on the roof.

  • Step 16: Fill & Paint any cracks which are still visible.

    Some stucco walls will have thousands of cracks on them. It’s common on jobs like these for some cracks to “appear” after a few coats of paint have been applied. The cracks were always there, we just could not see all of them. Technically there is no problem with filling them after paint has been applied, and then painting them again.

    Several times a year I get calls from homeowners who are concerned there are cracks showing after paint has been applied to their home, but before we are finished with the job. There will almost always be cracks which could not be seen prior to applying paint. These cracks can be caulked or filled after paint has been applied, and then painted over. This is a natural and expected part of the process. Paint and caulk are highly compatible and it does not matter if paint is put on before or after caulk is applied so long as the caulk is painted over before the job is completely finished.

    Stucco patching is the same as caulking in that some of the patch work will be done after paint is applied. It might be hard to imagine but it’s A LOT easier to see areas needing to be patched after they have been spray painted. The best example I can give is this: Think of an old car with dingy faded paint. This car has a few small dents on it. Now think of a shiny new car with two small dents. Would you notice the dents more on the old dingy car or the new shiny one? Answer – The shiny new car will show the dents more in the same way freshly painted stucco makes it easier for us to find the rest of the cracks and areas needing additional patch work.

  • Step 17: Professional Cleanup.

    We always clean up the job site.

  • Step 18: Leave touch up paint with the client.

    In the future, if a corner is nicked by a wheelbarrow or bicycle we want you to have some touch-up paint. On Caulking Cracks & Spot Patching Stucco.

  • All material and labor is included in our bids unless noted otherwise in writing.

  • We Provide Various Options.

    Jobs are bid “cafeteria-style” so clients can pick and choose what they want done and what they can skip to save money. For example, a standard Rita Ranch home with a swimming pool will be quoted with a base price for painting the stucco walls and trim of the house and then on separate line items will be the cost for the pool fence and the side gate. If you want the pool fence or side gate painted you know the price before we start. You get only what you want and are not required to pay for extras. Plus items can be added after we start, without renegotiating the price.

AA Brite 24/7 Logo

Get a Quote for Roofing or Painting Today!
Call (520) 406-5900

Get a Free Estimate!

More Painting Tips


Continue reading

Roof Ponding


Roof Ponding and What it Looks Like

What is Roof Ponding?

Roof ponding is when water gathers in an area of your roof and remains there longer than 48 hours. Roof ponding usually occurs when your rooftop doesn’t drain properly, allowing the water too pool and damage your roof coating.

How do I know if I have roof ponding?

Shown below are a multiple photos of ponding on roofs all over Tucson and southern Arizona.

  • Roof Ponding Example

    The building is beautiful to look at, but the roof is shaped like a soup bowl and holds alot of water. When it takes over a month for the pond to evaporate off of the roof after each rain, the coating might last as long as two years. If there was a steep pitch and no pond, this coating could last six years.

  • Roof Ponding Damage

    A close up of the damage to the roof on the Frank Lloyd Wright building caused by ponding water.

  • Large Roof Ponding

    A larger than usual pond on a local Tucson home. Two basic choices. Do a small amount of preventative maintenance on it once a year AND broom it off after big rains, or have it re-coated every couple of years. The right way to fix this is to lower the scuppers but that’s a pretty large project.

  • Roof Ponding in Middle of Roof

    Ponding in the middle of the roof.

  • Roof Stains from Ponding

    Its dry now, but the size of the stain indicates there is a pretty good sized pond on this roof when it rains.

  • Garage Roof Ponding

    The roof over a garage of a friend of mine. He has stairs going up to his roof and sweeps it off each time it rains. It’s held up this way for years because he does preventative maintenance on it.

  • Corner Roof Ponding

    Another larger than average pond.

  • Roof Ponding by Scupper

    And another pond.

  • Roof Ponding Example

    As you can probably guess from the photos, ponding is fairly common.

  • Scattered Ponding

    This one is more unusual. Lots and lots of small ponds. This is common on foam roofs and on a homes with shallow pitch and thin plywood on the roof. This coating will age faster than normal but not bad enough that I’d recommend a tear off and new roof.

  • Ponding Around Solar Panels

    More ponding. Luckily for the home owner this pond doesn’t end up under the solar heaters. If it did the shade would keep it wet longer and destroy the coating even faster.

  • Ponding Near Scuppers

    A little bigger than I’d like to see, but this size is remarkably common.

  • Roof Ponding Example

    Another pond. I’m running out of things to say.

  • Roof Ponding Example

    Finally one back in the acceptable range. By acceptable I mean I wouldn’t want it on my house but this wouldn’t stop me from telling my parents to buy a house like this

  • Roof Ponding Damage

    I probably have 200 pictures of ponds since I take pictures of a roof and then show the client. Here is the last one for now.

What should I do about my roof ponding?

If you notice roof ponding on your roof feel free to give us a call for a free inspection! If your roof needs to be repaired or replaced we’re happy to give you a free quote!

AA Brite 24/7 Logo

Get a Quote for Roofing or Painting Today!
Call (520) 406-5900

Get a Free Estimate!

More Roof Problems You May Have


Continue reading

The 6 Most Common Stucco Problems


Below is a guide outlining the five most common stucco problems you may see in your home! 

The most common stucco problems include: 

  1. Air Voids
  2. Caulk Scars
  3. Scaffold Lines
  4. Window and Corner Cracking
  5. Filled in Texture
  6. Stem Wall Was Stucco’d

Knowing about stucco defects will give you the ability to detect the flaws or “character marks,” similar to a jeweler when looking at a diamond.

The difference is that a magnifying glass is not needed to see the stucco flaws each time you come into or out of your home or office. For some, defects and variations are a source of irritation. We want prospective customers to be informed that all stucco looks different from various angles and the difficulty making a perfectly blended patch. This guide will show pictures and descriptions of the various types of exterior stucco and how the patches appear.

  • Stucco Problem Air Voids

    Stucco Air Voids

    Most common for air voids is sprayed on synthetic stucco. The key is to back-roll on a heavy coat of paint.

  • Stucco Calk Scars

    Stucco Caulk Scars

    We see this frequently. A homeowner or “painter”
    runs a bead of caulk on top of the stucco texture.
    We typically have to cut these out with a diamond
    saw.

  • Stucco Scaffold Lines

    Stucco Scaffold Lines

    Once you start looking for scaffold lines, they are more common than you would expect. No amount of paint is going to get this to go away. If this result is unacceptable, then the other option would be to re-stucco the side of the house.

  • Stucco Problems Cracked Corners

    Window & Corner Cracking

    Almost all homes have this. Cracks love to start in sharp corners. Fortunately, most of them can be repaired without too much trouble.

  • Stucco Filled in Texture

    Filled In Texture

    We don’t see this too often. There is so much paint
    on this stucco that the texture is starting to
    disappear.

  • Stem Wall Was Stucco’d

    It is where the stucco is applied down the wall, over the foundation, and all the way to the dirt. In my opinion, the foundation of the house should not have a stucco texture put on it since the walls and foundation expand and contract at different rates. Stucco doesn’t stretch; it cracks. Different parts of a building moving at different speeds will cause the stucco to crack where the two surfaces meet. Of the few homes I’ve seen with the stucco on the foundation, all were cracked. We can repair it, but it’s coming back. It’s just a question of how long.

AA Brite 24/7 Logo

Get a Quote for Roofing or Painting Today!
Call (520) 406-5900

Get a Free Estimate!

More Information on Stucco


Continue reading

The Ultimate Guide to Elastomeric Roof Coatings


What is elastomeric roof coating?

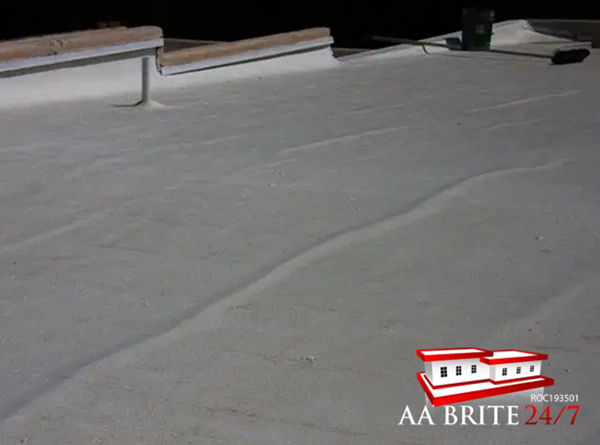
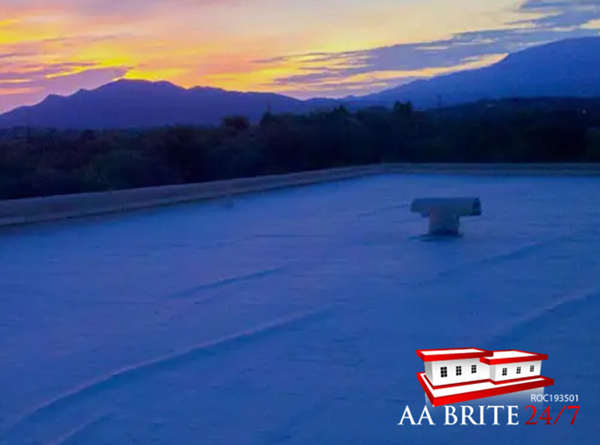
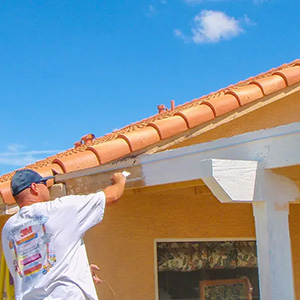
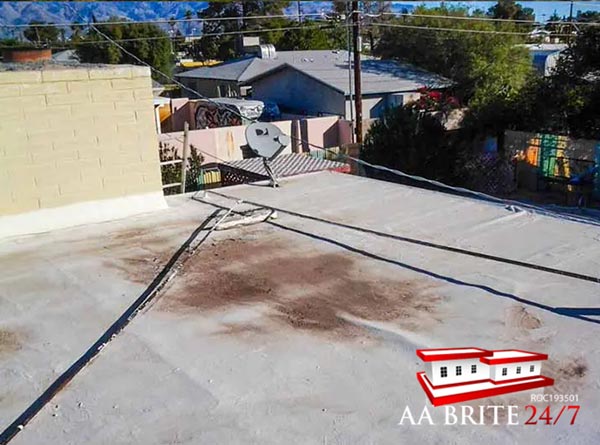
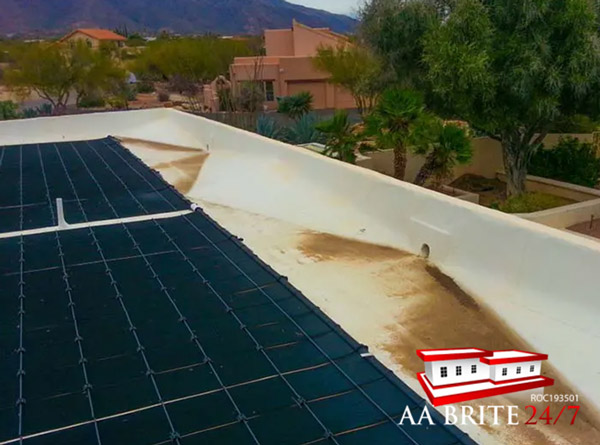
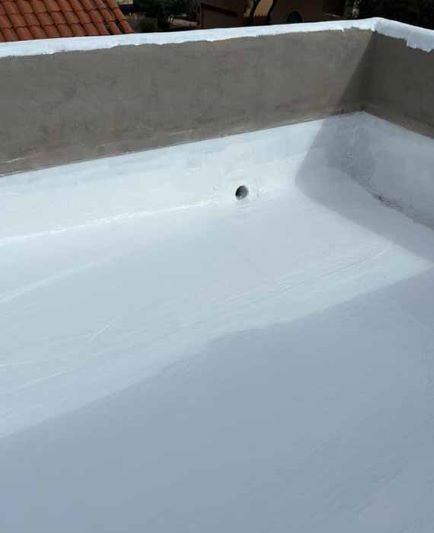
Elastomeric roof coating is a synthetic rubber product that can be applied to residential or commercial roofs for the purpose of waterproofing and extending their service life. Elastomeric roof coatings are usually a white or a light beige color and are applied in liquid form with a roller, brush or sprayer. When dry, the coating acts as a solid membrane which reflects most sunlight and allows rainwater to flow off the roof. It’s likely the third most common roofing system behind tile and shingle.

What else is elastomeric roof coating called?

“Cool Coating” is a generic or slang term for elastomeric roof coating.

Is elastomeric roof coating the same as rubberized roof coating?

Cool Coating is a generic or slang term for elastomeric roof coating. There are other roofing systems using various forms of rubber (such as EPDM sheeting) which are vastly different from elastomeric rubber roofing systems.

What are the benefits of using an elastomeric roofing system?

The three primary benefits to a cool coated / elastomeric roof coating roof system are:

  1. Much lower summer surface temperatures than other kinds of roofs = lower air conditioner bills.
  2. Compared to tile and shingle, a coated system is quite a bit easier to work on, and it can be safely walked on when its hot or cold outside.
  3. Its less expensive to apply than most other roofing systems.

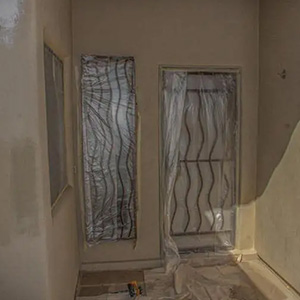
How does elastomeric roof coating / cool coating work?

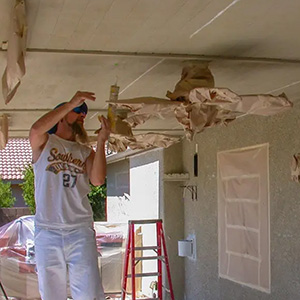
Most roofs are finalized using some sort of system. Shingle, tile and elastomeric roofs all have several layers to them. An elastomeric roof coating system usually consists of a base layer. The most common base layers are tar or tar paper, rolled asphalt sheeting, or polyester fabric. On top of the base layers several coats of a liquid rubber coating (elastomeric / cool coat) is applied. The entire elastomeric / cool coat system is designed to keep water out while withstanding the sun, rain, wind and some snow. The coating is designed to flex enough to allow for a normal amount of movement of the wood within the ceiling.

Do elastomeric roofs work as advertised?

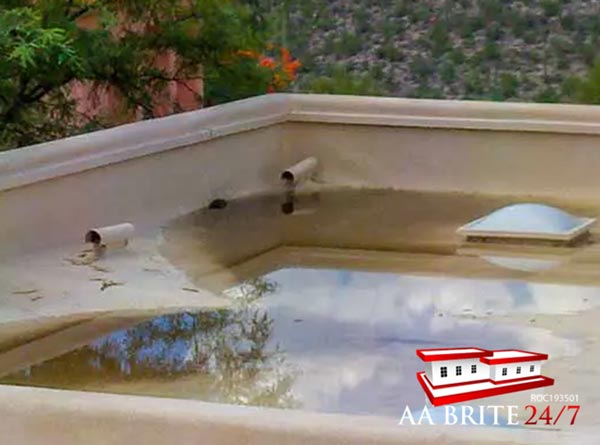
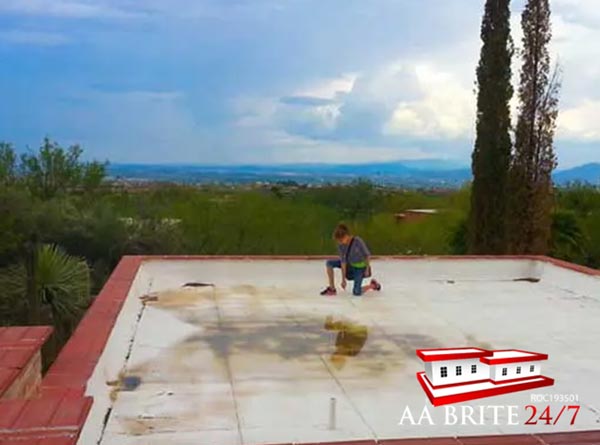
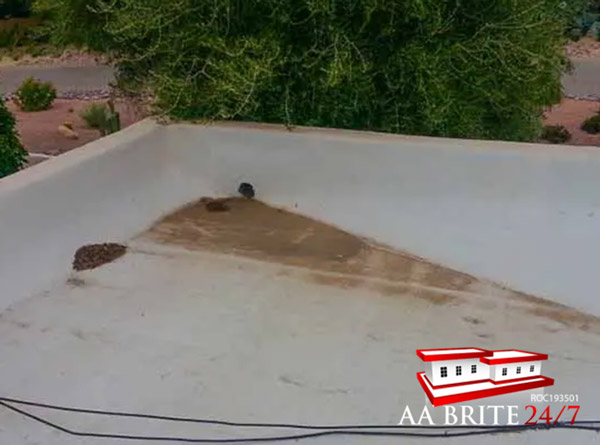
Yes and no. Advantages to cool coated roofs are ease of maintenance and lower initial installation costs than tile or shingle, and they reflect A LOT of sunlight. The disadvantages include more frequent maintenance, susceptibility to damage if there is ponding water, and a danger on some roofs of the drains becoming plugged from tree debris.

Do local elastomeric roof coating manufacturers have advantages over national box store coatings?

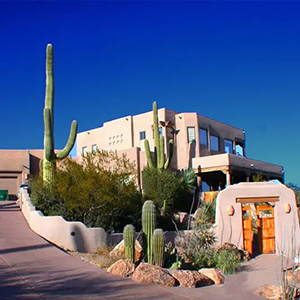
Definitely yes! Local or regional manufacturers can produce coatings that are formulated for the weather in the area. A good coating for a roof in the damp and overcast northwest US is going to be completely different than one for hot, mostly dry, and very sunny Tucson, Oro Valley, or Green Valley Arizona.

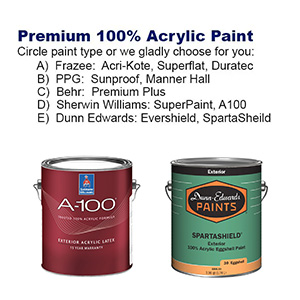
What is the best elastomeric roof coating?

One regionally produced, or produced specifically for the climate where you are living. For example a good coating in phoenix would also be good in Las Vegas since they are similar climates. In Tucson our favorite for the past 4 years or so has been Tucson Rubberized 7000. In prior years we used another well known brand produced in the south west, but then the company was sold and the quality went down. Assuming Tucson Rubberized does not change the formula, drastically alter the price, or sell the company, then we will probably be using them for the foreseeable future.

How long will an elastomeric coated roof last?

In most cases usually three to six years for the coating itself and indefinitely on the base layers. There are a tremendous number of variables from roof design, drainage, tree and plant debris, quality of roof coating, if coating was watered down when applied, and how well was any patching done.

Do elastomeric coatings last as long as advertised?

No, the manufacturers of elastomeric roof coatings use ASTM standards and testing methods which produce artificially high, but comparable, years-of-service numbers. Think MPG numbers on car ads. The different models were tested in the same manner, and the good news is the advertised lifetime of the coating can be used to compare it to others to get an idea of relative quality.

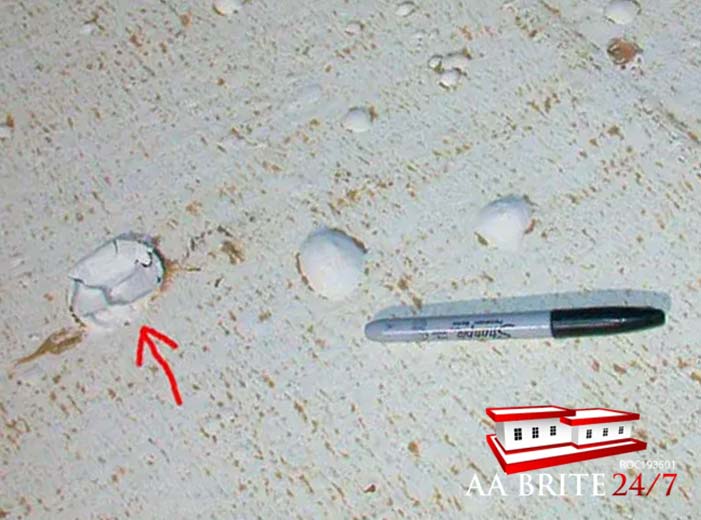
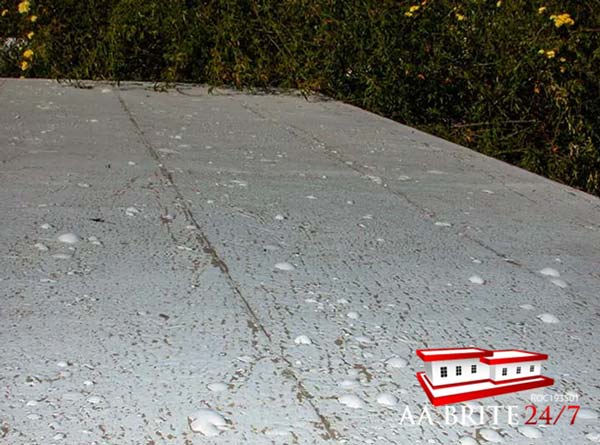
Why is an elastomeric roof coating sometimes referred to as a “throw away” coating?

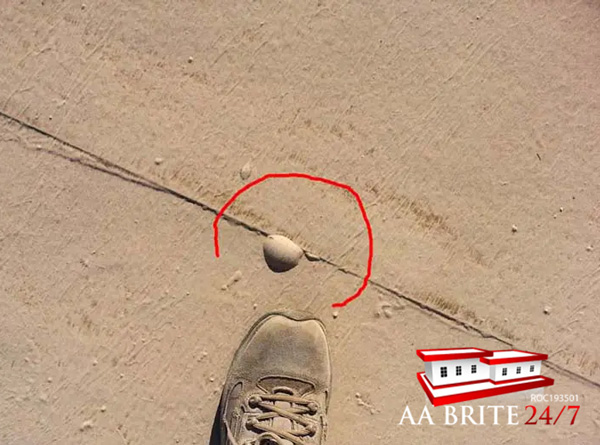
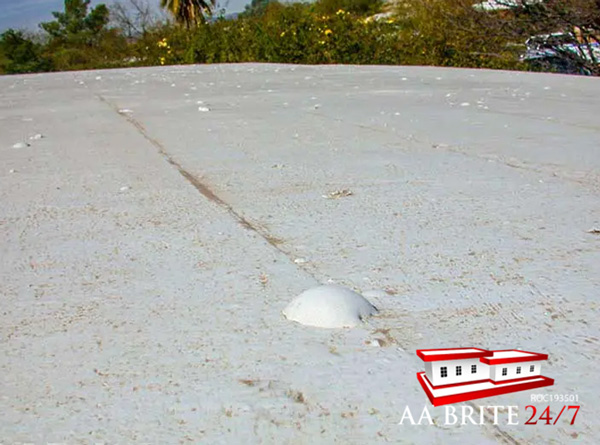
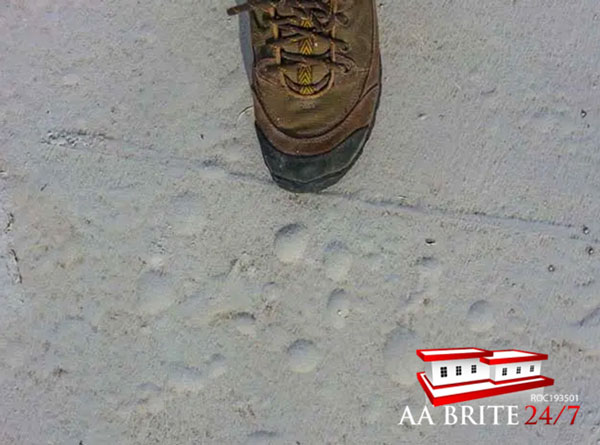
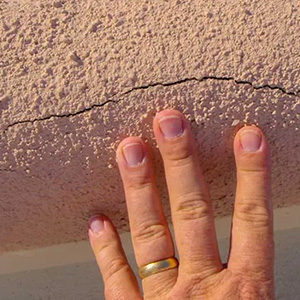
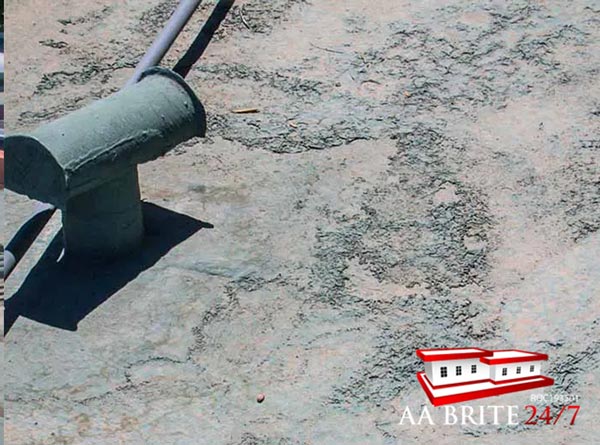
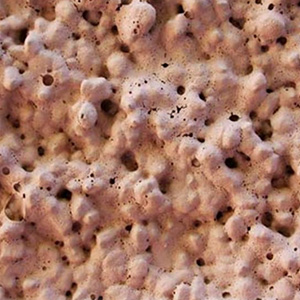
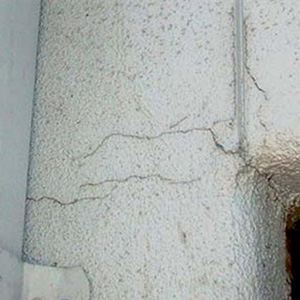
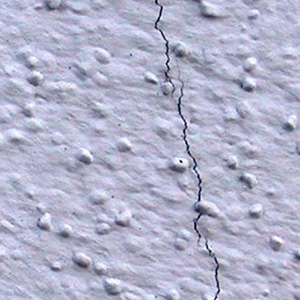
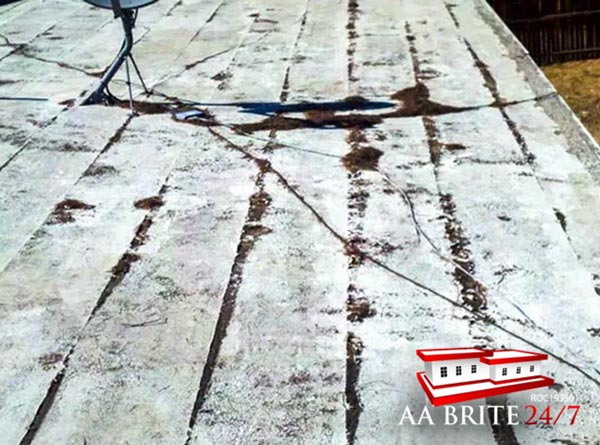
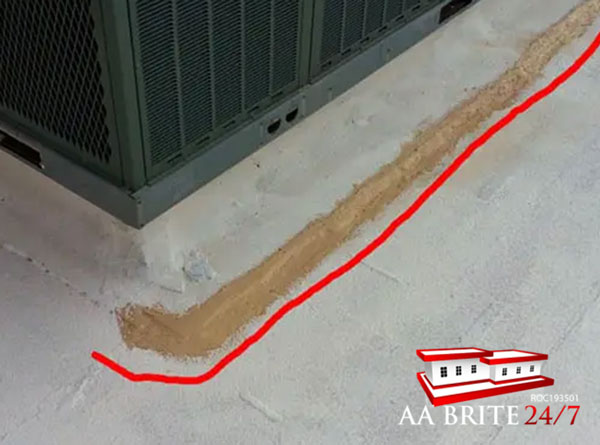
Elastomeric coatings go on thick, and then the sun and air starts to oxidize the surface. (Coating oxidation is similar to rusting, but it’s white instead of orange / brown seen on metal). A microscopically thin layer of oxidized coating then washes off when it rains. This is the white baby powdery material occasionally seen on concrete around a home with a cool coated roof. The oxidation process starts when the coating is applied and continues until all the coating is oxidized and washed off years later. Usually it takes about six years for a significant portion of a premium coating to oxidize away. When new coatings are applied, the process starts all over again.

Does the aging process on Elastomeric Coatings accelerate in the last year of the coatings life?

Yes. Over the years we’ve noticed fairly consistently roofs we believed had a year or so of life left in the coating actually lasted closer to six months. For some unidentified reason near the end of the lifecycle of the coating things seem to go downhill faster.

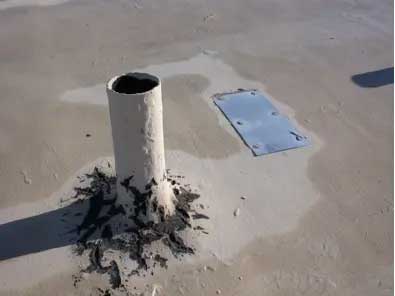
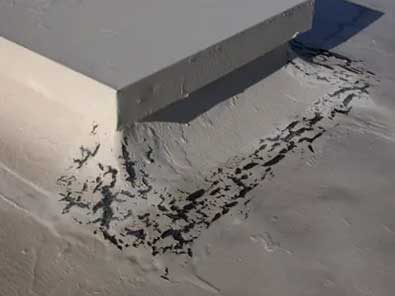
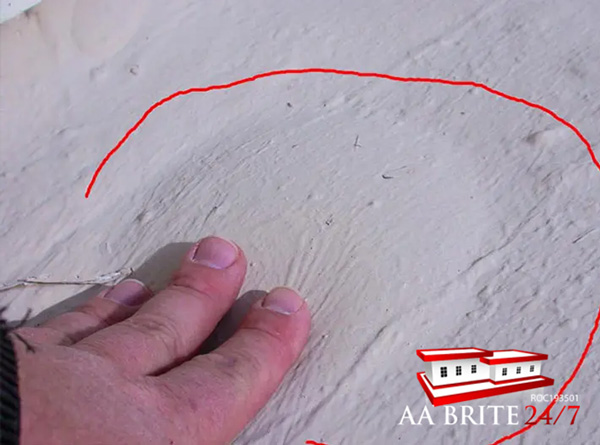
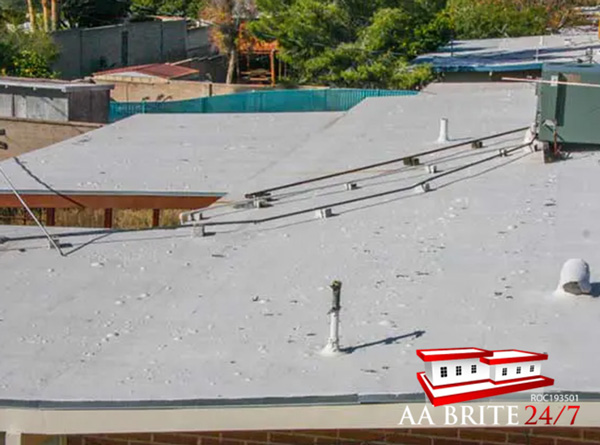
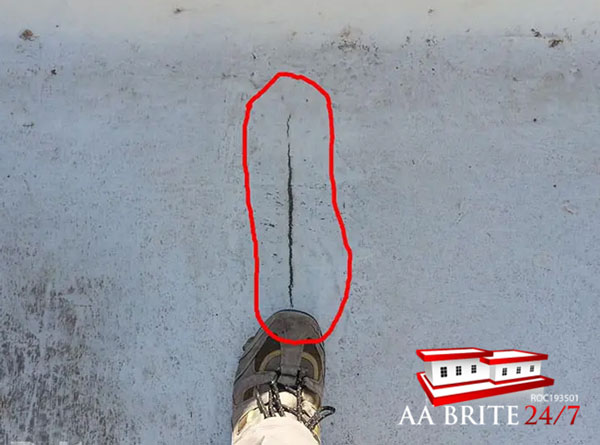
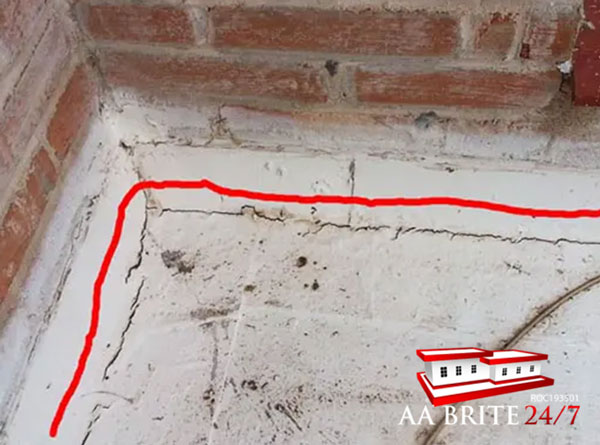
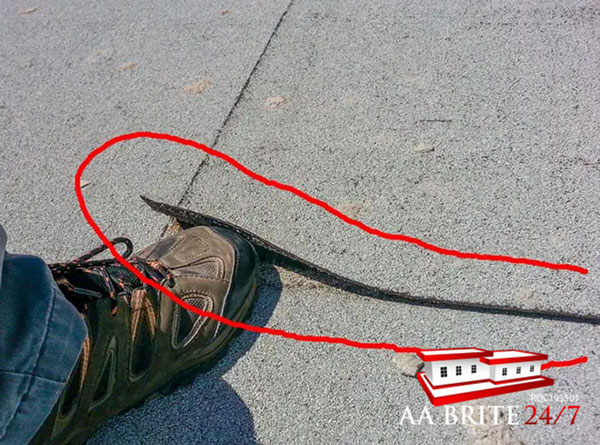
Does the entire elastomeric coated roof go bad at the same time, or over time does it die in spots?

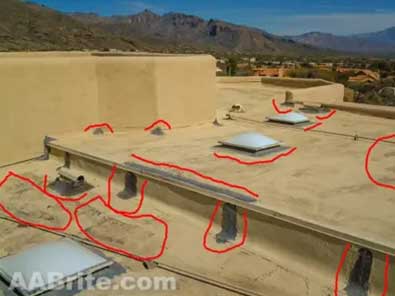
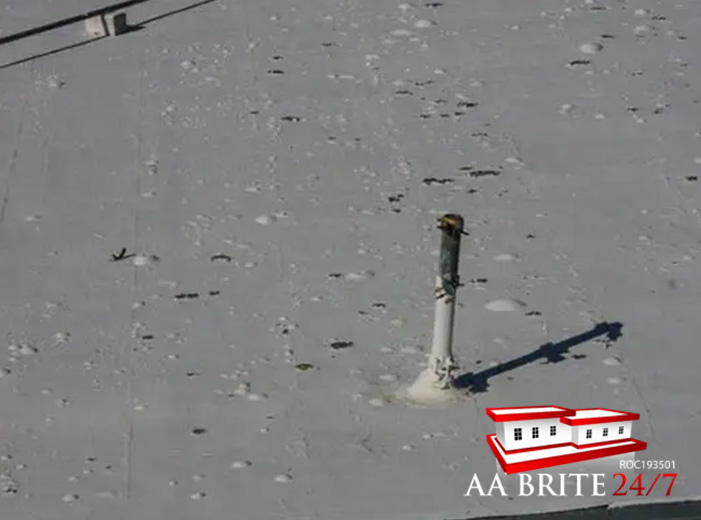
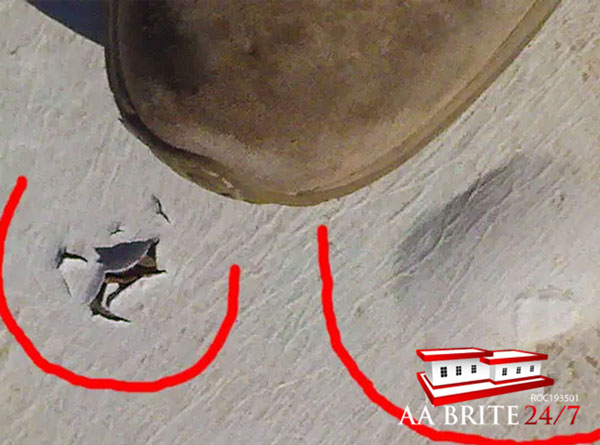
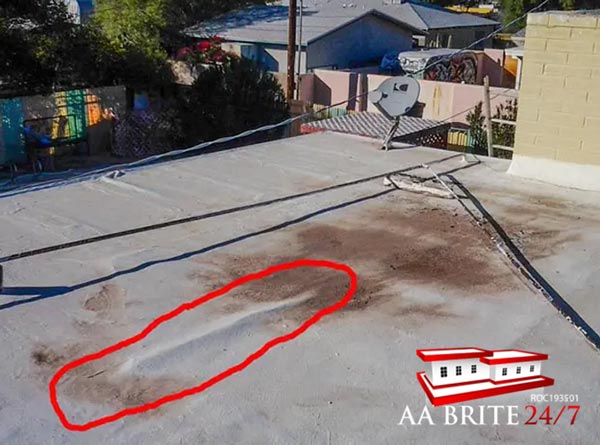
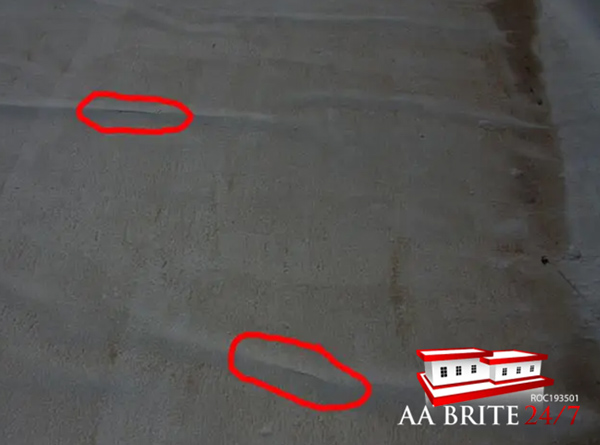
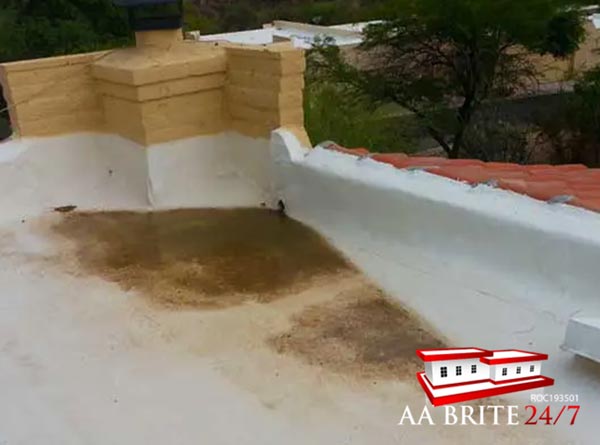
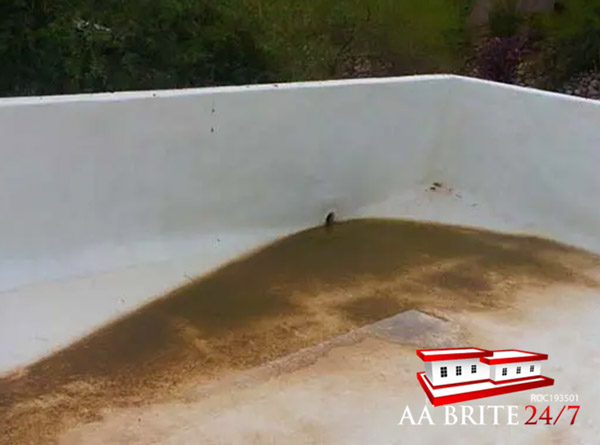
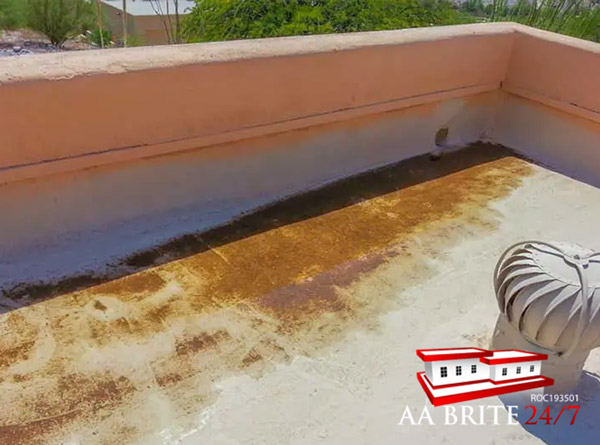
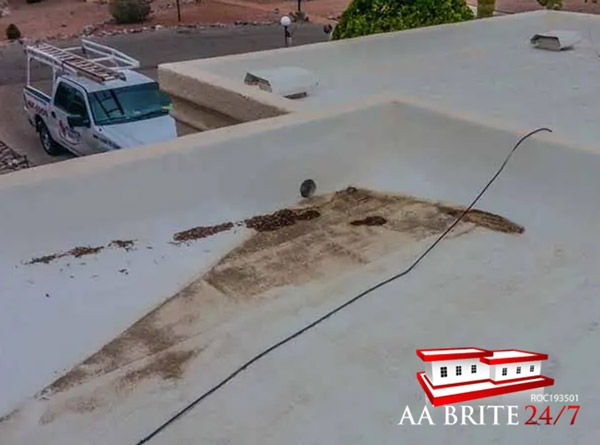
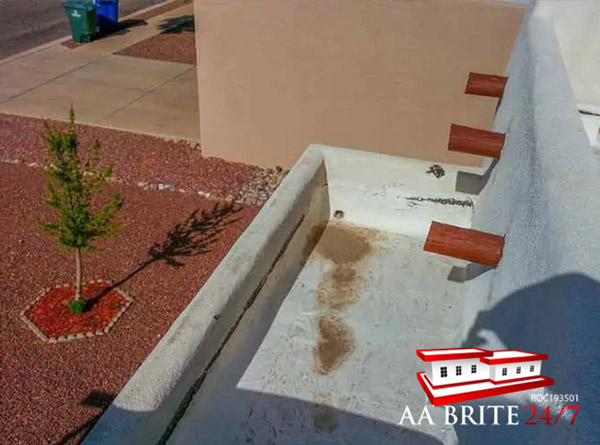
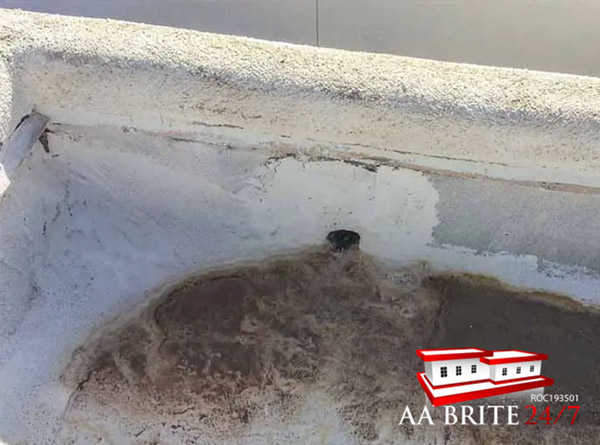
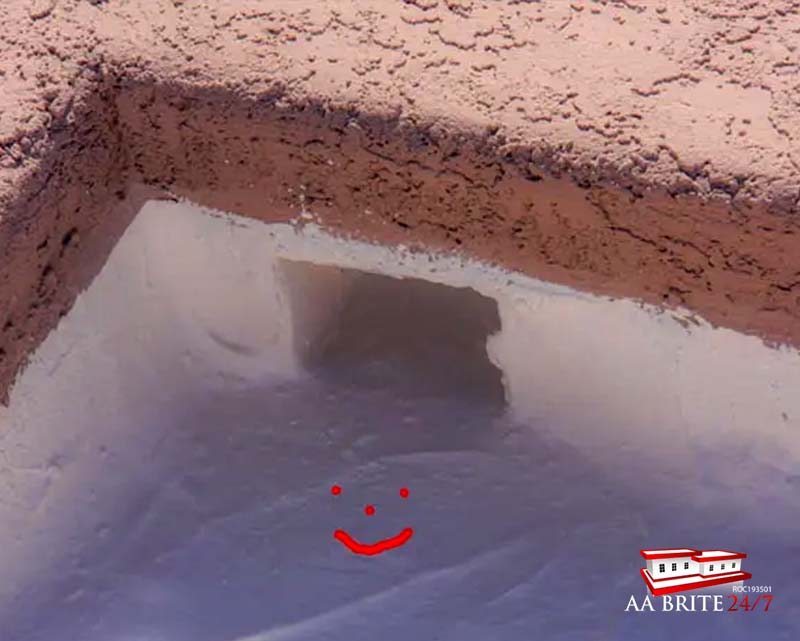
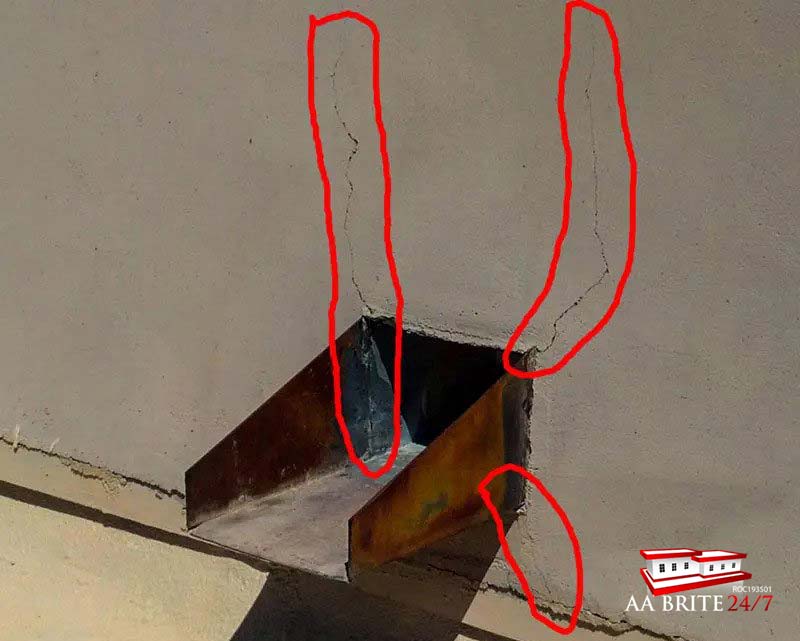
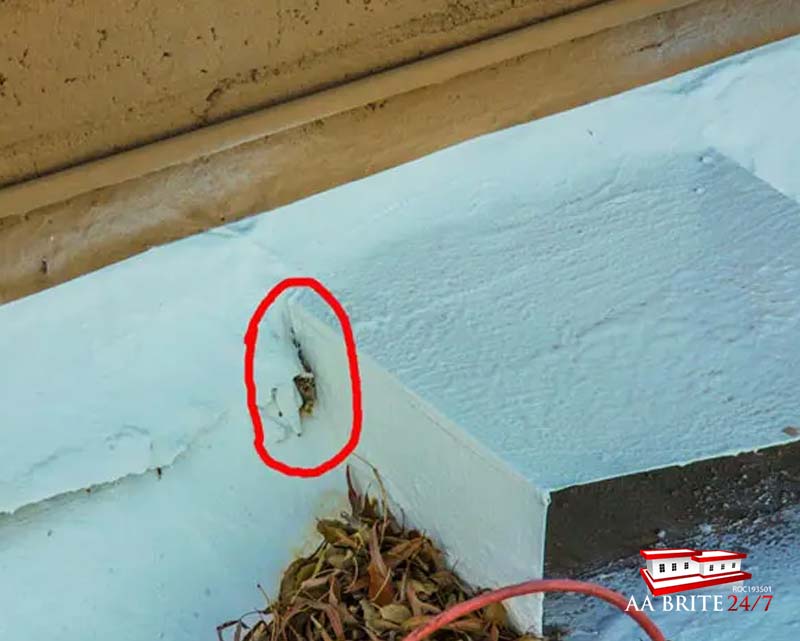
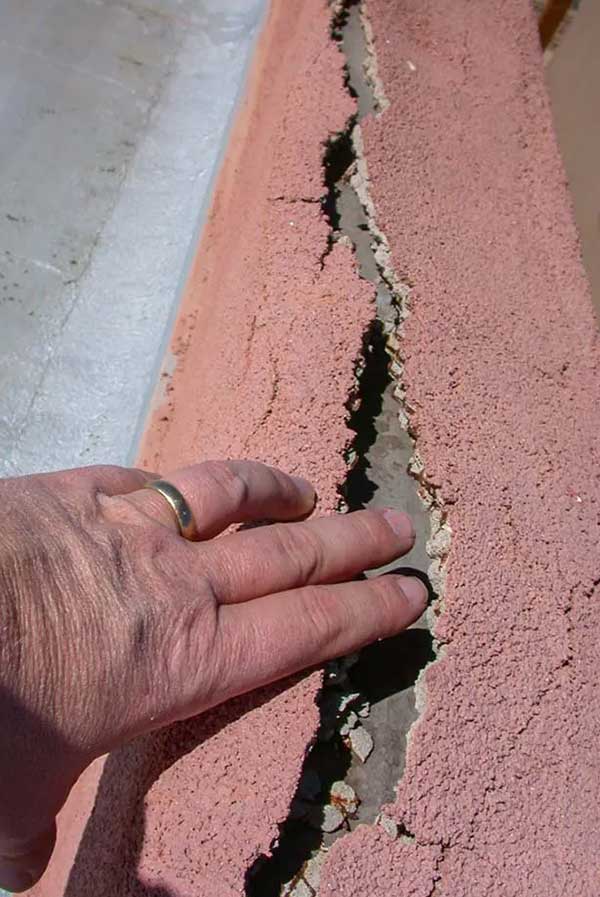
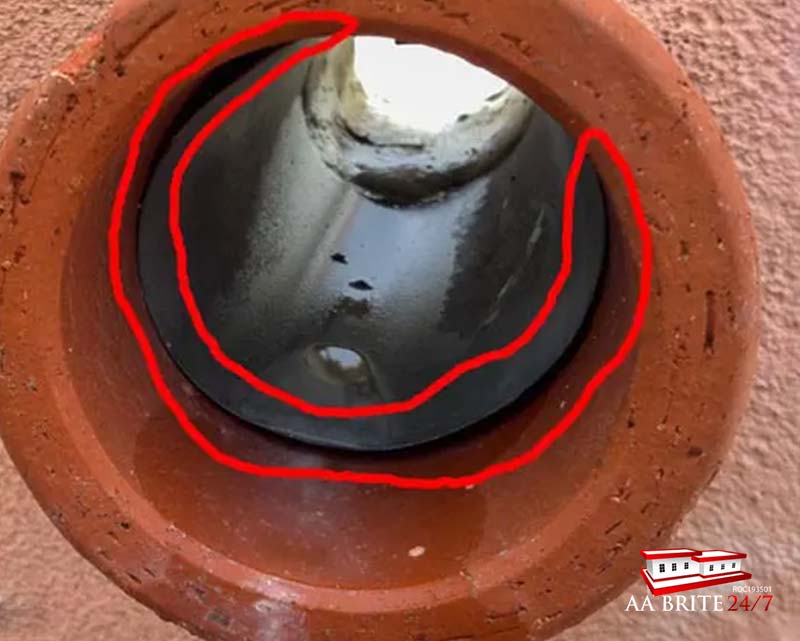
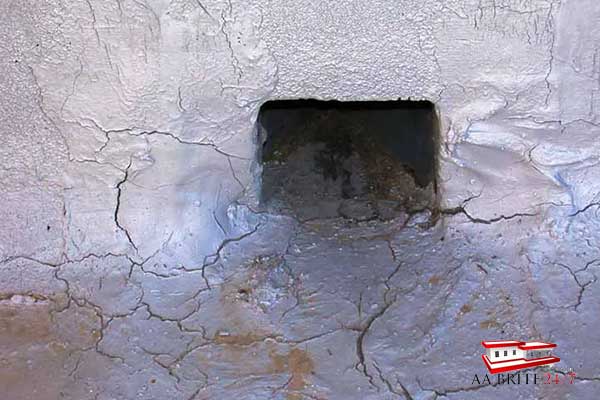
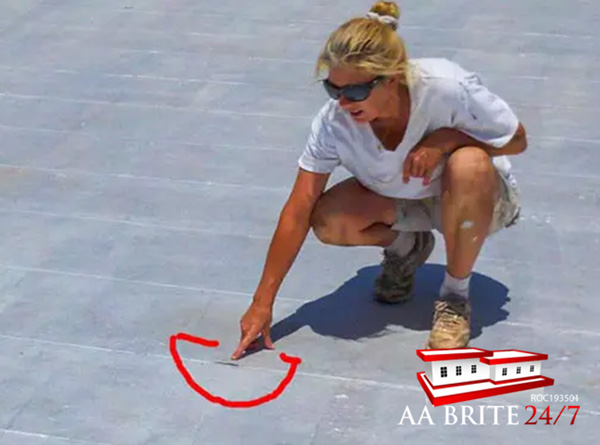
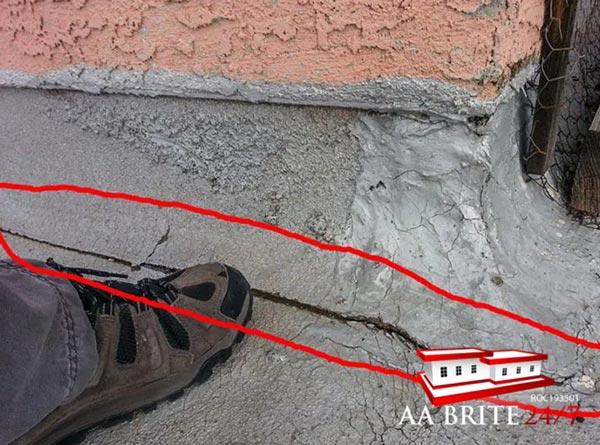
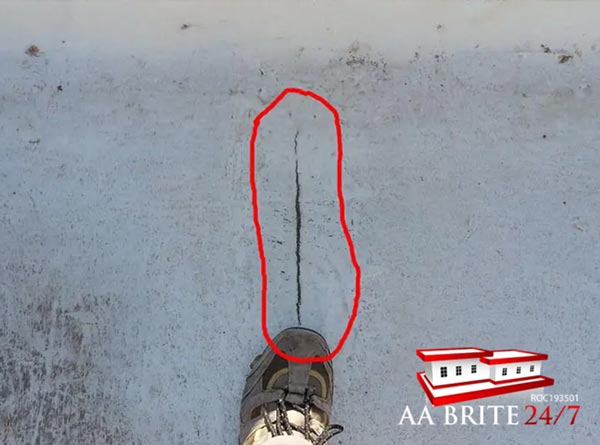
The vast majority of the time the coating will start to go bad in specific areas first. Seams in the base layers (which move when heated by the sun), ponding areas, and edges of drains (usually called Scuppers) most likely need touch up work years before an entire roof needs to be re-coated.

What happens if the coating wears out, and nothing is done to the roof?

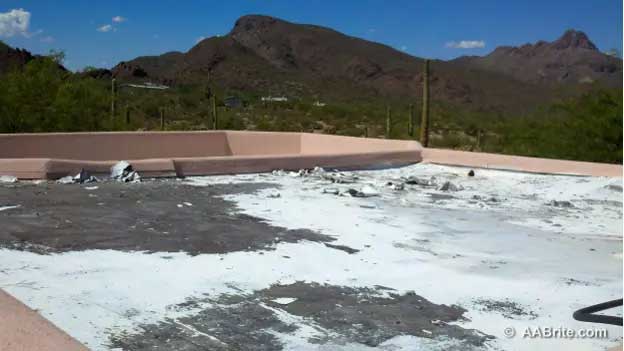
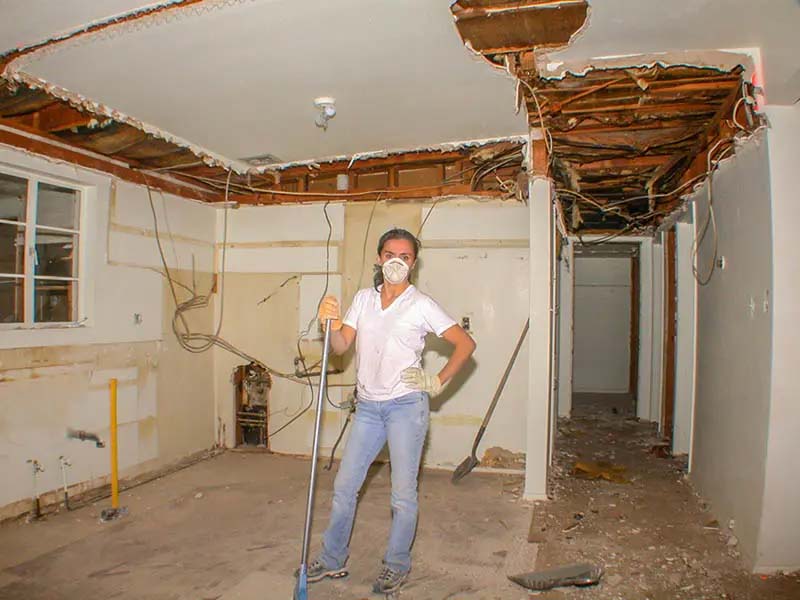
Its fairly common for homeowners to let the roof age out, and then start to leak prior to calling to get a quote. When the coating has died, the next step in the aging process is for the base layer to start failing also. Back to the skin cancer analogy. First the skin has a problem, then if left untreated it goes to the bones. Allowing the base layer to fail causes the costs to go way up.

How much longer will an elastomeric coated roof last with preventative maintenance?

The average is around three to six years. It’s like fighting skin cancer. Treat it when its little and not expensive, or wait till it’s grown into a big deal and is expensive. For most elastomeric coated roofs we suggest preventative maintenance at the two year mark.

What’s the longest you’ve seen a cool-coated roof last?

Twelve years or so. Classic 1950’s style ranch house with half of roof pitched towards the street and half of the roof pitched towards the back yard. No gutters, no trees around and not much stuff on the roof.

What’s the shortest time frame you’ve seen a cool coated roof go bad?

Six months. Sam Hughes area of Tucson, lots of pine trees dropping large quantities of pine needles into the roof area of a Santa Fe style house. Needles plugged up the drains, kept the roof underwater for months and made the water really acidic. Looked like a two inch deep koi pond, and it didn’t last long.

How much does an elastomeric coated roof cost?

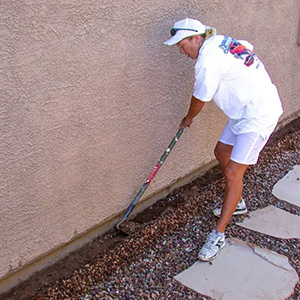
Homeowners doing the work themselves with 2022 costs: Purchasing a reasonably high quality roof coating, for two coats, will cost a homeowner about $400 per thousand square feet, or $0.40 per square foot total coating cost. Price is for purchasing the coating only. Pressure washing, cleaning, patching materials and crack and joint sealer could push homeowner prices up to $0.60 per square foot.

Hiring a licensed contractor who has workers compensation for roofing work (expensive), general liability insurance (expensive) and employees will put a standard patch and two coat re-coat on a roof around $1.00 to $1.15 per square foot. This usually includes a two year warranty against leaks from the contractor, as well as the longer warranty from the material manufacturer.

How many square feet does a gallon of typical Elastomeric Roof Coating cover?

Most roof coatings are intended by the manufacturer to be applied at a rate of one hundred square feet per gallon, per coat. With a roller or a brush its pretty difficult to get it on any thicker than this per coat.

How much does preventative maintenance cost for elastomeric roofs?

For the past 10 years we’ve charged $150 for touch up work at an existing client’s home. Usually this is an hour’s worth of work and about $20 worth of material.

How much is preventative maintenance if I’m not a pre-existing client?

For the past ten years our standard minimum cost has been $599, and it is usually two employees working for a few hours. This is the same price we charge for emergency patching. Prior to submitting a quote for $599, we typically also provide a quote for cleaning and recoating the entire roof. The smaller the roof the more likely recoating it entirely will be the best option financially.

What determines the quality of an elastomeric roof coating?

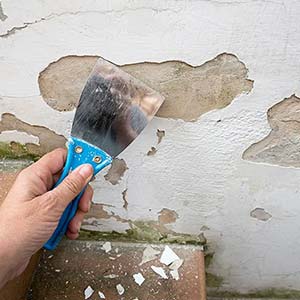
The quantity and quality of the various plastics and rubbers, thickening agents and suspension materials used to produce an elastomeric are a large portion, but not all, of what determines the quality of an applied roof coating. Two other large factors are how the surface was prepped and the environmental conditions when it was applied.

To reasonably access job quality over a period of time, Homeowners should also consider other factors such as response time to problems, the contractors likelihood of still being in business and available to respond at some future point, how well prep work was done, the contractors experience level for dealing with odd situations on the roof, and obviously value for the money paid.

Is Henry’s Roof Elastomeric Roof Coating good quality?

If you live in extreme environments like Tucson, Phoenix or Las Vegas then No. If you are using the product in moderate environments then maybe. We are based in Tucson and from experience I can only speak about roof coatings aging in hot, low humidity, high temperature environments. In this environment the best coatings have been manufactured specifically for these conditions, instead of being the most average so they work in the desert and also in places (cold and wet) like seattle washington.

Do Elastomeric Roof Coatings come with a Warranty?

Most warranties on elastomeric roof coatings are not worth the paper they are written on. Almost no homeowners will do the documented maintenance and touch up work required to keep the warranty current. This is one reason the coatings are advertised as 8-15 years coatings, and yet the most widely known roofing contractors usually offer two year warranties, with touch ups needed thereafter.

Why does one of my elastomeric roof coating quotes offer a 4 year warranty, while the others are all two years?

In the over twenty years I’ve been in business and had the same phone number, I’ve yet to see a roofing company that was around for long offering warranties past two years. The primary reason is a large percentage of the elastomeric roofs need some touchup work two or three years after being recoated. In my opinion it’s unethical to sell a service without informing the client it will need touchup work.

Can you install elastomeric roof coating yourself, or do you need a contractor to apply it for you?

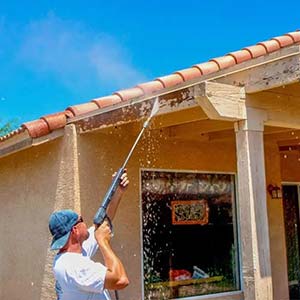
As a roof coating contractor, we gladly talk people through the process when they ask us. If you can clean the roof and get the five gallon buckets, weighing around seventy five pounds apiece, safely up onto a roof then you could probably apply it. Its hard and dirty work, but not terribly complicated. The coating will not wash out of clothes, and usually a sacrificial pair of jeans and shirt are also needed.

Warmer weather warning: When its nice outside, the reflection from the coating will easily make it feel twenty degrees hotter than it actually is. So when its actually hot outside, its likely warm enough on the roof to get sick from the heat. And a bit of trivia to go along with this. So much sunlight reflects upwards on an elastomeric coated roof its common for roof coating employees to get a tan through their shirts over time.

Is there a maximum recommended age for someone to apply roof coating?

Yes. 60 years old and in great health, or younger if not in great health. In the over twenty years we’ve been in business I’ve talked to about twelve homeowners who have fallen off of a ladder while doing roofing work. Common denominator: Sixty years old or older for at least 10 of the 12. My belief is as we get older and our hearing starts to decline, our balance also gets worse. Don’t work and save money most of your life only to blow it by falling off a ladder when you retire or are near retiring. It’s a bad business decision to take the risk if you can afford to pay a professional to take it for you.

AA Brite 24/7 Logo

Get a Quote for Roofing or Painting Today!
Call (520) 406-5900

Get a Free Estimate!

More Roof Problems You May Have


Continue reading

Scupper Leaks


Scupper Repair & Replacement

A Scupper is a drain off of a roof through a wall which rainwater water flows through as it exits a roof.

Scupper problems are a primary reason why as a contractor I can afford a nice house. In other words they are fairly common, and in some cases can be fairly expensive to repair.

There are multiple reasons why scuppers seem to be a magnet for roofing problems. Fast low quality construction, an architect’s failure to understand installation liability, and the sheer number of materials concentrated in one area which all expand and contract in the heat at different rates. Differential expansion. Basically a perfect storm of problems in some situations.

You’re going to need a coffee or a beer before reading on, as there is quite a bit here.

Low quality construction. The lowest bid contractors are used to construct most track homes. One hundred dollars saved per home on one thousand homes turns into big money. So the roofing installation crews are banging out work as fast as they can. If a few less nails or screws are used than was necessary, then the entire drain (metal scupper assembly) is moving around some. It might only be 1/16 of an inch, but it matters, and it can become a headache for years to come.

In the over twenty years we’ve been patching scuppers in Tucson and Southern Arizona, the same design mistakes have popped up over and over. I joke with my employees that one day a crazy man (me) is going to kick down the door at the UofA Architecture school and be dragged off by campus police as he is screaming about lowering the scuppers. It will make the news and he will sound crazy, but he isn’t.

When drawing plans its easy to write on them that the scuppers are to be a half an inch lower than the level of the roof. That doesn’t mean when the framers and roof crews are flying through the new builds that a little detail on the plans will be followed. In my opinion the scupper and drain area should be INCHES lower than the rest of the roof. This would cost more as the framing contractor would actually have to build the area around each scupper differently than the remainder of the wall, and the roof crew would then install the scupper in the lower area. There is a long term cost benefit, but not a short term one.

The third reason is CYA, or cover your rear, from the installation roofing contractors point of view. When the scuppers are installed on a new build, the roofing contractor knows the scuppers are prone to leaking and will usually have the roofing crews put a little extra material (tar or sealer) around the scuppers as they are installed. This extra material is a cheap guarantee against scupper movement cracks, but it also raises the bottom of the drain upwards. Think about drawing a circle inside of a circle. Each new circle you draw is smaller than the previous one, but the bottom of each circle is also higher than the one before it. Adding more material to the scupper in effect raises the ground level of the bottom of the scupper, and creates a dam in front of it. If a little material was used to seal the scupper, no water would get stuck sitting in front of it. When a lot of material is used, it creates a dam. Years down the road, the dam is still there holding water, and now the scupper and the material under it is old and has moved a lot from heat cycling. It’s a recipe for leaks.

  • Scupper in Good Shape

    Scupper in Good Shape

    This is pretty rare.

  • Smooth Stucco Scupper Repair

    Smooth Stucco Cracks Around Scuppers

    Smooth stucco is prone to cracking.  Corners on windows, doors and scuppers are prone to cracking.  Combine the two of them and it’s almost a guarantee there will be cracking in the corners of smooth stucco scuppers.  The problem with these is if its an area where people can see it, the repair will scar and be ugly.  The only way to lower the visibality of the patches and caulk is to paint the wall.  The Stucco Patching section of this web site has quite a bit of information on this topic.

  • Leaking Around Scupper

    Leaking Around Scupper

    A building maintenance man did some roof coating and in general did a pretty good job. He apparently didn’t know to seal up the outside of the scupper too. When I get a call about a leak only occasionally happening during a rain this usually means the hole is up a few centimeters off of the flat portion of the roof.

  • Holes Inside Scupper

    Fairly common problem. All of the different materials; plywood, tin, tar paper, tar, cool coating and fiber tape are each expanding and contracting at different speeds with the daily heat cycle. Eventually gasses in the tar work their way out and now there’s a leak.

  • Smooth Stucco Scupper Repair

    Gutter Boxes

    Another one with an above average difficulty level. The caulk has probably failed under neath the scupper and the water is running into the wall. If this is the case the only way to get to them is to take off the gutter box. The adobe frequently falls apart when this happens and makes for more work. Another way of saying this is we have to charge more to repair these since they take longer than most other repairs.

  • Affordable Parapet Repair

    Wall Leak

    This is not a roof leak or a scupper leak, the crack is near the srupper and water is coming in through the wall.

  • Leak at Base of Scupper

    Common problem. In this case gas bubbles came out of tar and now water can get it.

  • Canon Scupper Repair

    Cannon Scuppers

    10 out of 10 on the difficulty scale. “Cannon Scupper” is our term for them. It means a long scupper and you can’t get your hand into it. In this case the leak is at the end which is good. The area marked in red needs to be caulked. The water is running back up the clay pipe after exiting the metal insert.

  • Smooth Stucco Scupper Repair

    Cracks around Scupper

    Common problem. Caused by heat cycles and age.

  • Small Elevated Hole at Scupper

    This will leak with big rains but not small ones since the water level only gets up to the leak during big rains.

  • Roof Adhesion Issue

    Mesh Lifting

    The patching mesh was not sufficiently coated with roof coating and water can get in under it.

  • Roof Ponding by Scupper

    Debris At Scupper

    The debris hasn’t turned into a problem yet. Sometimes debris clogging the scupper causes huge problems. More frequently it causes accelerated aging at the scupper since the leaves and dirt hold water. The roof coating needs to dry out between rains or it gets soft and quits working – like skin that’s been in the bath tub too long.

  • Stuff Inside Scupper

    Grr. Most all building trades have something other trades do that’s wrong and irritating. Here’s an example. Scuppers were not meant to be doors ways for cables and pipes. Now that its done, the correct way to do roof work around this pipe is to cut it off, do the roof work, and then have the AC guys reinstall it after the roof work is complete and cured out. Most homeowners just want us to work around it. We can, but since the pipe is sitting in our material it knocks the longevity of the new coating down some.

  • Large Roof Ponding

    Pond At Scupper

    This pond is actually “great” by Tucson standards. If they are small – say a square foot or so, they can dry out between rains. If they get bigger then they hold the water too long and make problems.

  • Smooth Stucco Scupper Repair

    Scupper WAY To Small.

    Not much can be done with these. Depending on the build of the house, the wall / roof can be cut open and a larger scupper installed. This is outside our scope of work.

AA Brite 24/7 Logo

Get a Quote for Roofing or Painting Today!
Call (520) 406-5900

Get a Free Estimate!

More Roof Problems You May Have


Continue reading

Split Roof Seams


What Causes Roof Seams to Come Apart?

The main causes for roof seams coming apart usually include:

  • Old age
  • Damage from the sun breaking down the adhesive
  • Water freezing and expanding beneath your seams
  • Incorrect Installation

What do split roof seams look like?

Shown below are multiple photos of split roof seams.

  • Roof Seam Example

    The seams failed first because there was more movement there and it broke down the coating faster.

  • Split Roof Seam

    Roof is in great shape, but here is a split.

  • Split Seam Close Up

    Close up of the above image.

  • Corner Roof Split Seam

    Notice the cracks are in straight lines. This means the material under it caused the cracks along the edge of the sheets.

  • Roof Split Seam Around AC Unit

    A roof a client asked me to look at. They did a fine job of patching this themselves.

  • Lifting Roof Split Seam

    A rolled roof, which has not been cool coated year. Here is a seam that’s lifting.

  • Split Seam on Roof

    Another straight line crack through the silver coating. As a side note the silver is more like oil based paint and not really a rubberized coating. It holds up fairly well but cracks easier than cool coating because it goes on thinner and stretches less. Its also typically over 150 degrees in the summer sun.

  • Roof Split Seam in Cool Coating

    Another straight line crack. The seam kept moving and finally split the cool coating.

Can you ignore split seams on your roof?

If you ignore split seams on your roof you will more than likely end up with a much bigger issue that will require costly repairs. When you have split seams they should be repaired as soon as possible to prevent water from leaking into the split seams. If this happens the damage can quickly spread and end up resulting in a full roof replacement. 

What should I do if I notice split seams?

If you notice split seams in your roof give us a call right away! Although some homeowners can repair split seams themselves, we’re happy to provide you with a free professional consultation and a quote to repair the seams and recoat your roof. 

AA Brite 24/7 Logo

Get a Quote for Roofing or Painting Today!
Call (520) 406-5900

Get a Free Estimate!

More Roof Problems You May Have


Continue reading

  • 1
  • 2